Kodi is open source media software that allows you to store and share content across devices in your home. This free media player can run on wide range of operating systems and stream content from local storage, internet, and home network.
Since it is open source, you can install a wide range of entertainment add-ons without worrying about licensing issues. Exodus is one of the best KODI add-ons which brings vivid content (movies, videos, music) from the Internet and allows users to view content on any Kodi-compatible device, like you computer or TV.
There are different ways to install the Exodus add-on in Kodi. The following are some of the ways you can include Exodus on your Kodi player.
Before Installation of Exodus on your Kodi player
You will need to tweak the settings in the Kodi player in order to enable it to download third-party add-ons. Here are the steps you need to follow to do this:

- Launch Kodi on your device
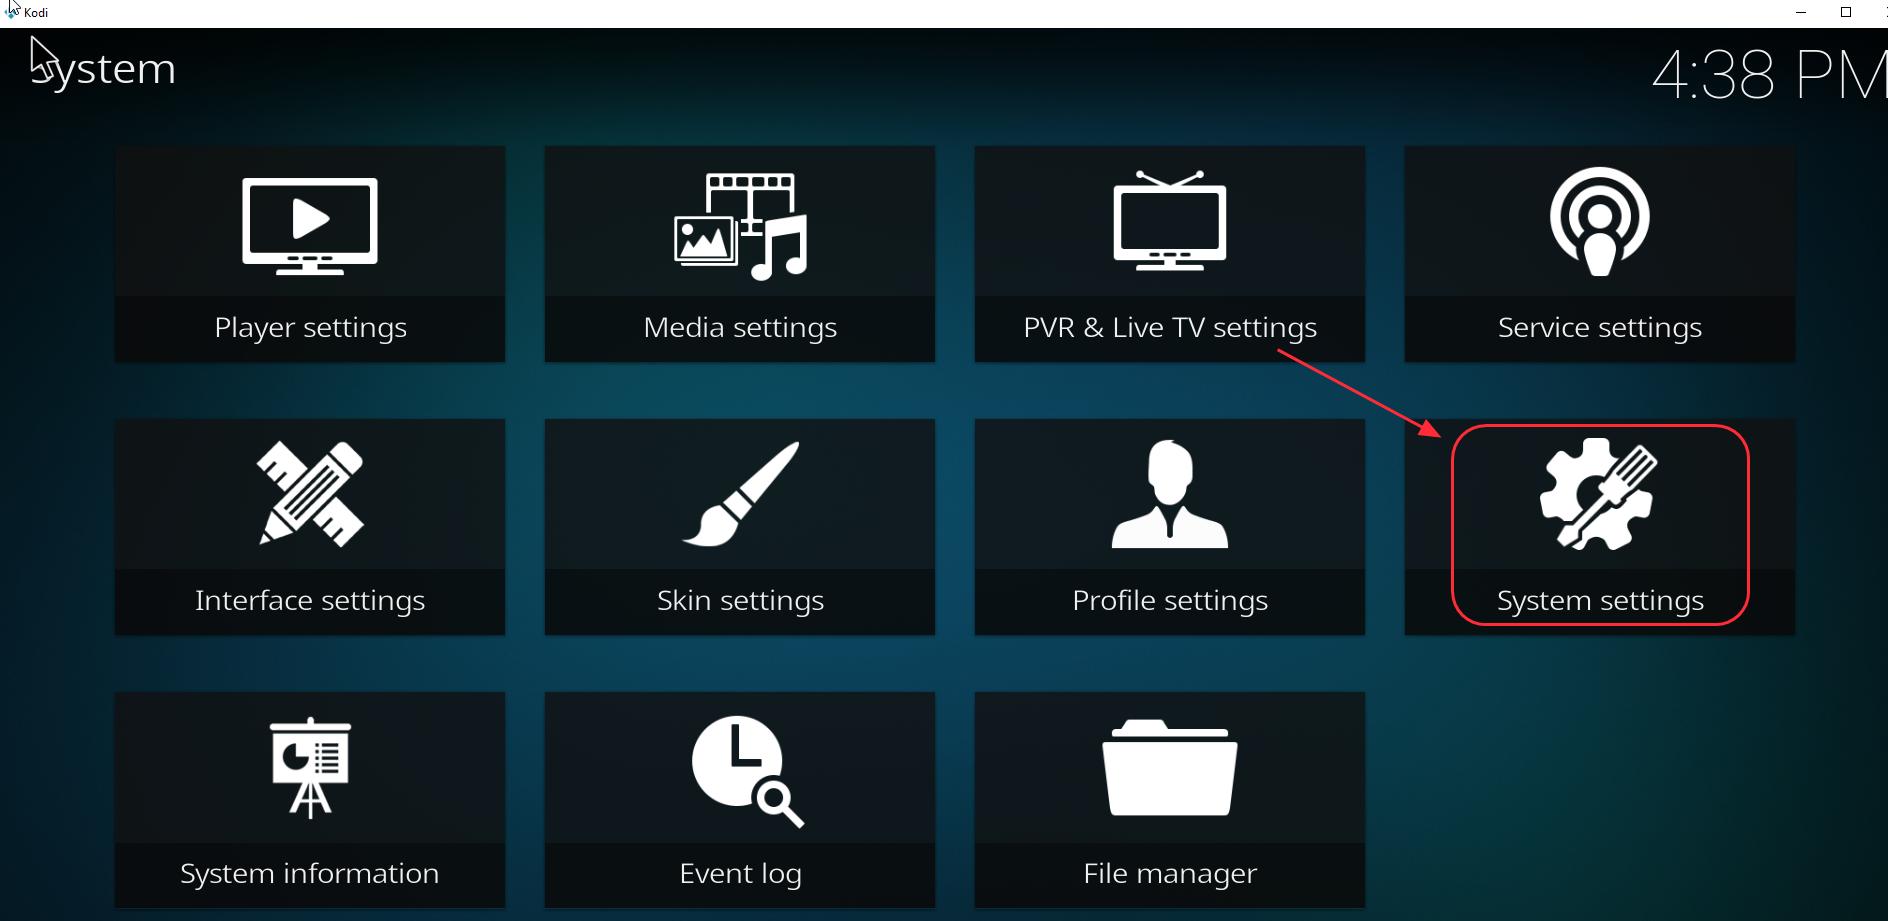
- Click Settings followed by System settings

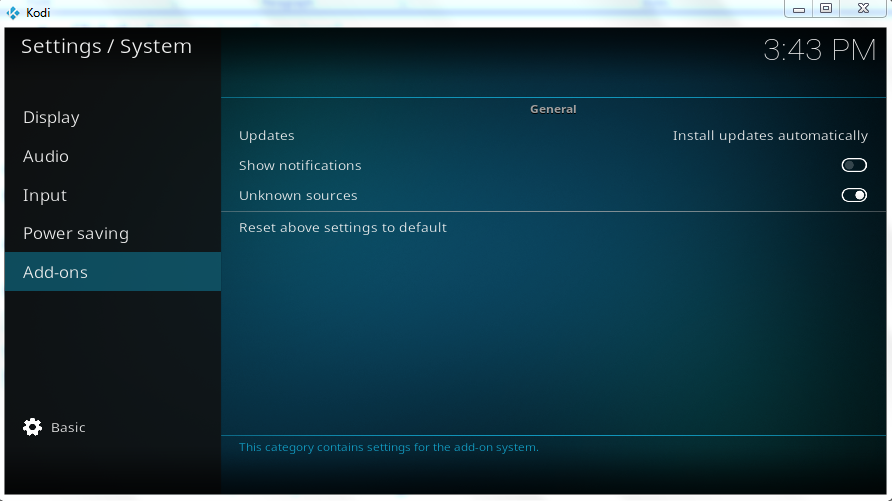
- Click Add-ons. Look for the option Unknown sources and click the button beside it

- Click Yes when prompted to confirm your action
- Now Kodi will allow you to install the Exodus add-on
There are no direct options available in Kodi to install the Exodus add-on and different methods discussed here use different repositories to install Exodus on Kodi.
Software repositories are storage locations on the internet from which you can download software packages and core modules for software and install them on your device or computer.
Method 1- Installing Exodus on Kodi using the Kodil repository
The Kodil repository has several add-ons including Exodus. Below we will look at the installation steps:
- Open Kodi on your device
- Click the gear symbol (Settings) that appears on the top left corner of the home screen
- Click File Manager
- Look for Add source option that appears at bottom and double-click on it
- Click the option <None> and then type the address for Kodil repository. The web address for Kodil repository is – http://kdil.co/repo/
- At the bottom, you will be required to name the installation. By default, the installation name is Kdil, leave it unchanged and click OK to proceed with the installation
Note – The Kodi app will now try to access the Kodil repository on the Internet and download the software package for the Exodus add-on. Make sure the Internet connection is active and the firewall or anti-virus is not blocking the download.
- Navigate back to Kodi Home Screen
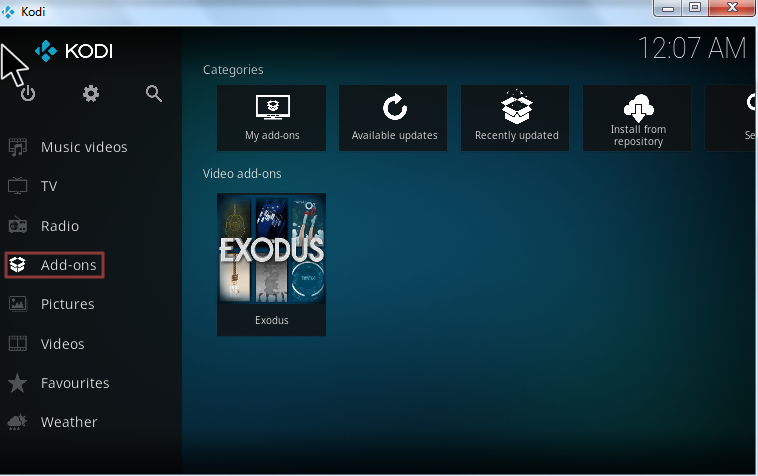
- Select Add-ons
- Choose the option “Install from a Zip file”
- Select the file name “kodil” that appears in the list
- In the next screen, choose zip
- Wait for the installation notification to appear on the screen
- When the notification appears, click Install from the repository
- Wait until the process completes. You will see an entry Kodil repository in the list, click on it
- In the next screen, select the Video add-ons option that appears at the bottom
- In the next screen, click Exodus followed by the Install option that appears on the bottom left
Method 2 – Installing Exodus on Kodi using the XvBMC repository
The installation steps for Exodus on Kodi using XvBMC repository are somewhat similar to the first method. The primary difference is the web address of the repository and the steps that come after it. Here are the steps you need to follow.
- Launch the Kodi app on your device
- Go to Home Screen and click Settings(the gear icon) followed by File Manager
- Click Add Source option that appears left on the screen
- Select <None> in Add File Source screen
- Type the following address in the field – http://archive.org/download/repository.xvbmc/ and click OK
- In the text box labeled – Enter a name for this media source, type xvbmc and click OK
- Navigate back to Kodi Home Page
- Select Add-ons and then click on package icon that appears in the left corner of the screen
- In the next screen, select Install from zip file
- Select xvbmc in the list which is the name of the file you saved earlier
- Wait until the Add-on enabled notification appears on the screen
- In the next screen, select install from repository
- Choose (Add-ons) REPOsitory option
- In the next installation screen, select Add-on repository and then select tknorris Release Repository
- Click Install to start the installation. Wait until you see install notification in the right-hand corner of the screen
- In the next screen, choose Video-Add-ons and then Exodus
- Select Install that appears at the bottom right corner of the screen
- Wait for the installation to complete which takes few seconds. Now you should see notification of Exodus add-on enabled in Kodi
- To use Exodus in Kodi, go to Main Menu in Kodi and then click Add-ons
- Click Video add-ons and then click Exodus
You can now start enjoying streaming videos using Exodus on Kodi. However, Exodus needs to be updated frequently for better viewing experience and content. Below are the steps to update Exodus on Kodi:
- Open the Kodi app on your device
- Go to Add-ons and then My add-ons
- Select Video add-ons
- In the next screen, select Exodus
- Click on Update option and follow the instruction to update Exodus.
View our post How to solve Exodus not working issue?
View post Kodi not working issue

Leave a Reply