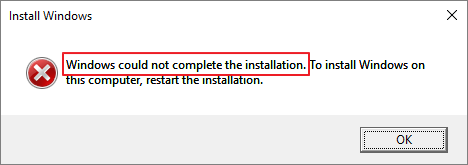
Are your getting an error “Windows could not complete the installation” while installing Windows 10?
This is a common error. Many windows have reported getting it or a similar error while installing Windows.
This post offers four easy solutions to fix the problem and complete Windows installation.
You don’t need to try all the solutions given in this post. Start with the first one and move to the next one and so on, till the issue is resolved.
Solution One – Continue installation with the Automatic Repair option
Like previous Windows versions, Windows 10 also features Windows Recovery Environment that can help you resolve issues with unbootable Windows operating system.
Windows RE is pre-loaded with all Windows 10 editions. Users can start the recovery environment manually from the Windows RE CD/DVD.
Here are the steps to invoke Automatic Repair option in Windows 10.
- Switch on your PC and when Windows enters booting phase, switch it off. Repeat this 2-3 times and you will see Automatic Repair option initiated. You will see a screen like the one below that shows preparing automatic repair
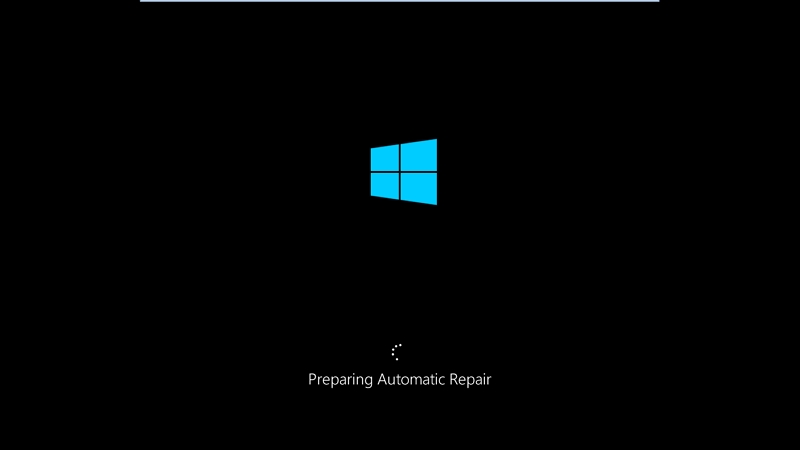
- In the Automatic Repair screen, click Advanced Options
- In the next screen, select Troubleshoot
- In the Troubleshoot screen, click Reset this PC
- In the next screen, select Keep my Files
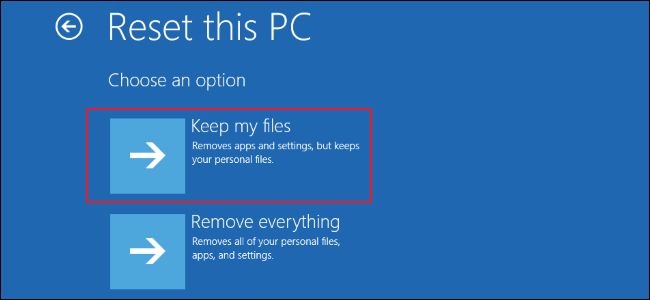
- In the Reset this PC screen, click Cancel
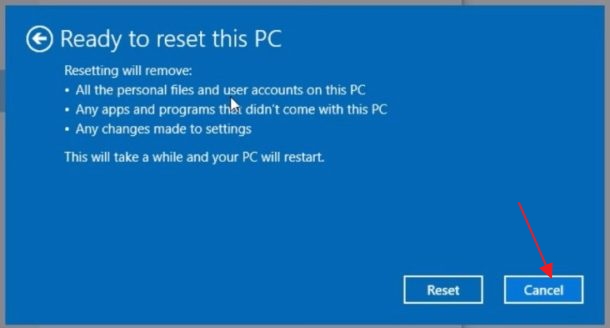
- In the next screen, click Continue
If these troubleshooting methods succeed, you can see Windows installation progressing normally without any errors. After Windows 10 installation is complete, don’t forget to update all drivers by the following method given below.
Next Step – Update Drivers
Automatic driver update tools offer many benefits, the most important ones being:
- You can update device drivers automatically
- The software scans and updates all outdated or missing drivers at one go
- The tool picks the right drivers for your device and operating system, so you won’t have to worry about installing an incorrect driver by mistake
- Automatic driver updates are 100% safe
Driver Updater is one of the best driver update tools out there. Outbyte Driver Updater will give you access to a database of over 1 million drivers. It will regularly scan your PC, suggesting new driver versions to install. Driver Updater contains drivers for a variety of Windows devices. With just one click, you can update drivers in your system.
Step 1
Click here to Install and launch the app
Step 2
Scan all devices
Step 3
Install or update drivers automatically
Solution Two – Use Windows Account Creation Wizard
Windows 10 installation also fails to complete because the setup is not able to create a user account normally. In such a scenario, using Windows account creation wizard is one of the options available to you.
Once the user account is created, the Windows installation would progress normally. Here are the steps to follow.
- With error still on the screen, hold down Shift and F10 key at the same time to bring up command
- In the command prompt window, type cd C:\windows\system32\oobe\ and hit Enter on your keyboard.
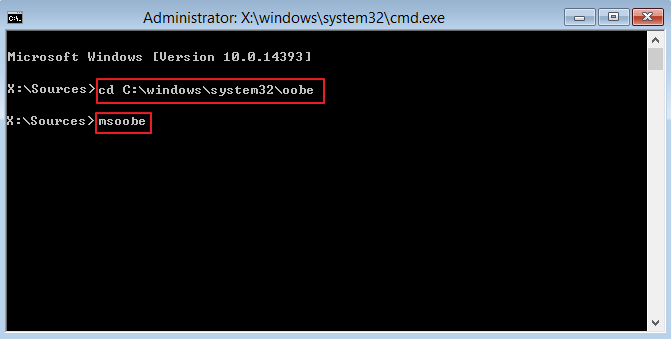
- Next, type msoobe and hit Enter on your keyboard
- When the user account creation wizard appears, create a generic username and password
Restart your computer and see if the Windows 10 installation progresses without error. if you are still getting the Windows could not complete the installation error, move to the next solution.
Solution Three – Don’t activate Windows while installing
Many users make the mistake of trying to activate Windows 10 while installing. It is possible that Windows activation process could take an unusually long time to complete and in turn cause the Windows could not complete the installation error.
To avoid such issues, activate Windows after the installation is complete.
When the Windows 10 is successfully installed, you can activate Windows 10 by entering the product key. Here are the steps to follow
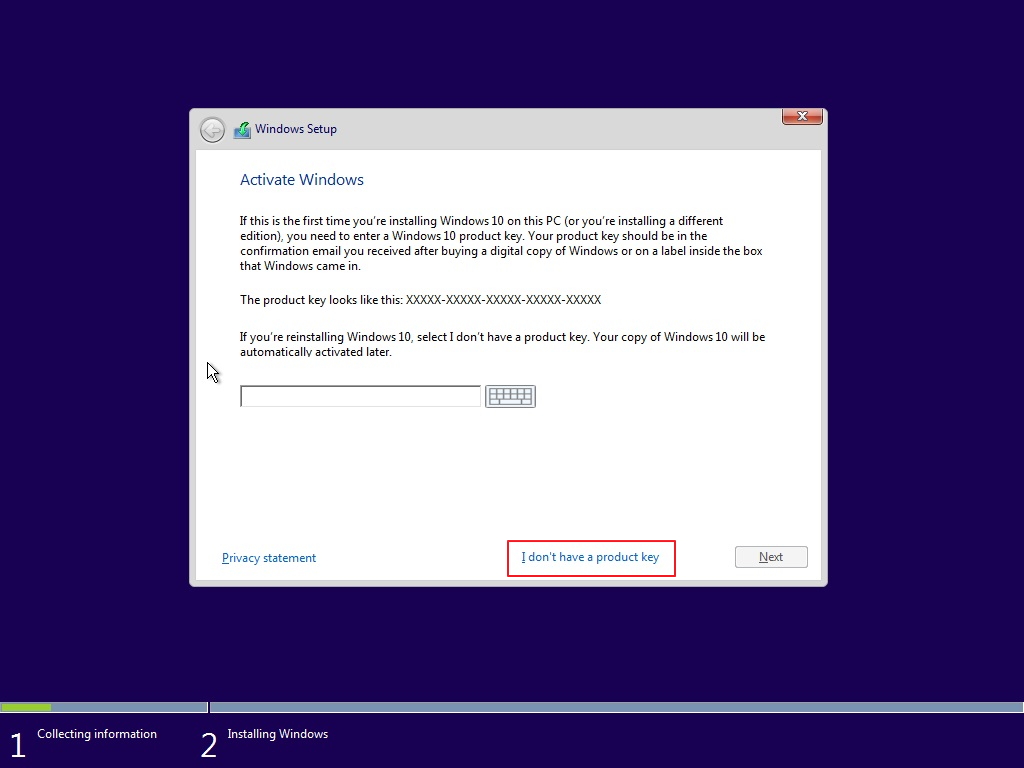
When you get the following screen, click I don’t have a product key. The Windows installation would progress normally even after you make this choice.
Once Windows 10 is installed, follow the steps given below
- Click Start and then click Settings
- In the Settings window, click Update & Security
- In the Update & Security window, click Activation in the left pane
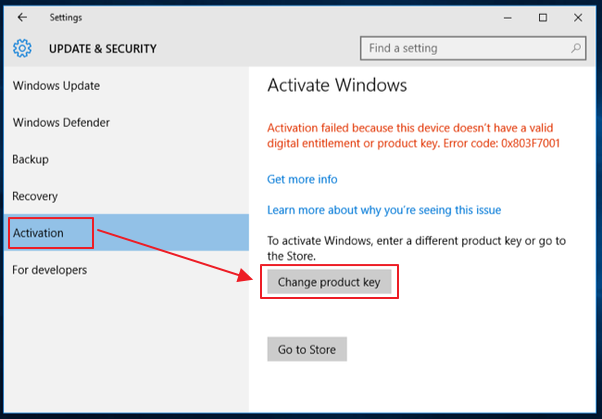
- In the right pane, click Change Product key and type your product key
- Click Close
Solution Four – Try another installation media
One of the reasons behind Windows could not complete the installation error is corrupt installation media. A simple solution to this problem is using another installation media. You can download any Windows 10 version from the Internet and create an installation disc or USB installation media for Windows 10.
You will need a working computer to download Windows 10 and create installation media. Here are the steps to follow
- Go to Microsoft Windows 10 download site
- click Download tool now
- Click Save
- click on MediaCreationtool.exe file that you just downloaded
- In the user account control window, click Yes
- When you see the license terms window, click Accept
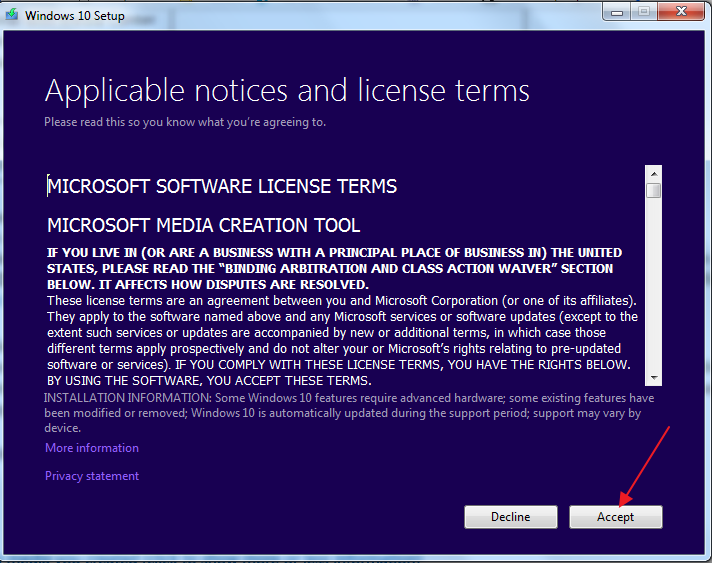
- In the next window, click create installation media(USB flash drive, DVD, or ISO file) for another PC and click Next
- In the next window, select desired language, edition, and architecture and click Next
(Note- You need to select Windows edition and architecture for which you have the product key)
- Select desired option( USB Flash Drive or ISO) and click Next
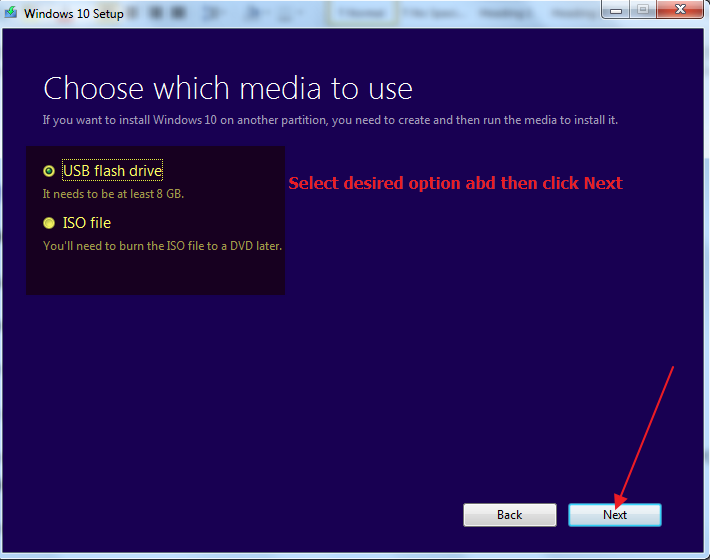
- If you have selected USB Flash Drive option, plug-in USB and follow on-screen instructions to continue
- If you selected ISO option, select the drive where you want to save the file and type in some name for the ISO file. Follow on-screen instructions to continue.

Leave a Reply