Almost every Windows user needs internet for doing one thing or another. That’s why appearance of”Windows 10 can’t connect to this network” error message when you try to use the net can be extremely frustrating.
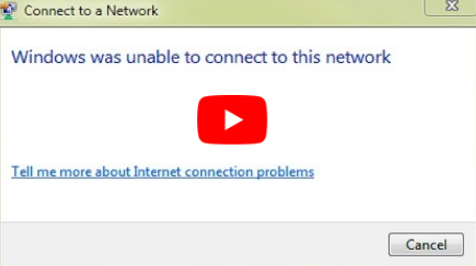
Of course, this is no small issue, but thankfully there are more than one fixes available for it.
In this post, we’ve listed several solutions that have worked well in the past for other Windows users. We’re sure at least one of them will work for you, too.
1st Solution – Uninstall the network adapter
This issue can arise when there’s a problem with the wireless adapter. You can resolve it by uninstalling the network adapter drivers and installing them again.
Here are the steps to follow.
- Type ‘device manager’ in the start search box, select Device Manager in the result list
- Now browse to the network adapter and then right-click it
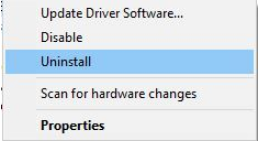
- Click Uninstall
- In case the system asks, select the option “Delete the driver software for this device”. Click the OK button
- Now Windows will uninstall the wireless adapter drivers
- Once that’s done, restart Windows. Upon restarting, Windows will install the new device driver on its own
Now check if you’re able to connect to the Internet. If not, you may need to update the driver for your network adapter (discussed ahead).
2nd Solution – Update the wireless adapter drivers
If the wireless adapter driver is out-of-date, then too you can encounter “Windows 10 can’t connect to this network” issue. To solve the problem, you will need to update the drivers.
You’ll require a computer with internet connection to manually download the latest driver from the manufacturer’s website. Once you’ve downloaded the driver file, you can transfer it to your computer using a pen drive. Save the driver file on your desktop and then follow these steps.
- Open Device Manager
- Browse to the network adapter, right-click it, and then click Update driver
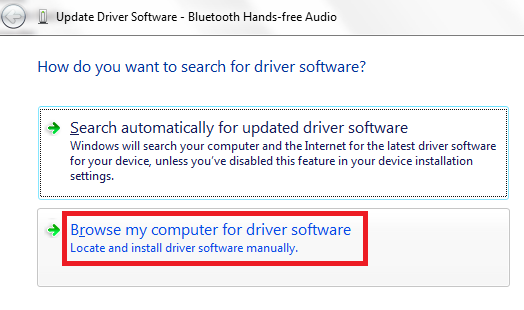
- Click Browse my computer for driver software
- Now browse to the location where you’ve saved the driver file (which is the desktop in this case) and then click the Next button
- Select the desired driver in the list and follow onscreen instructions
- Restart Windows so that the changes can take effect
As it is evident, the process of searching the manufacturer’s site for the latest driver for your network card is a bit cumbersome. However, more than that, this process is not fool-proof.
It is always possible that you may download and install an incompatible driver, which in turn may cause serious issues.
Precisely for this reason, we recommend you use a professional driver update tool.
At a click of the button, this tool can update your network adapter driver and other device drivers.
Automatic driver update tools offer many benefits, the most important ones being:
- You can update device drivers automatically
- The software scans and updates all outdated or missing drivers at one go
- The tool picks the right drivers for your device and operating system, so you won’t have to worry about installing an incorrect driver by mistake
- Automatic driver updates are 100% safe
Driver Updater is one of the best driver update tools out there. Outbyte Driver Updater will give you access to a database of over 1 million drivers. It will regularly scan your PC, suggesting new driver versions to install. Driver Updater contains drivers for a variety of Windows devices. With just one click, you can update drivers in your system.
Step 1
Click here to Install and launch the app
Step 2
Scan all devices
Step 3
Install or update drivers automatically
3rd Solution – Alter Channel Width for the Network Adapter
You can also receive this error if the channel width of the network adapter is set improperly. Here are the steps you can perform to change channel width.
- Press Win Key + S. Type network.
- In the result list, click Network and Sharing Centre
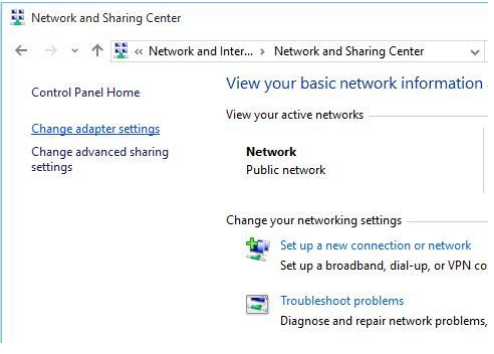
- In the Network and Sharing Centre window, click Change adapter settings
- Browse to the network adapter. Right-click it and select Properties
- Click the Advanced tab
- Choose 11 channel width. Also alter the value. Several users have said that they were able to fix the issue by setting the value as 20 MHz. You may use this or any other value
- Click the OK button so that the changes can be saved
5th Solution – Disable IPv6 on Windows 10
- Press Win Key + S. Type network.
- In the result list, click Network and Sharing Centre
- Click the current connection, and now click Properties (towards the bottom of the window)
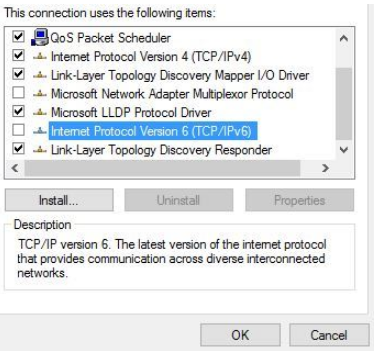
- Browse through the list until you come across Internet Protocol Version 6 (TCP/IPv6). Uncheck the box before it
- Click the OK button
- Reboot Windows so that the changes can take effect
4th Solution – Ensure security type used by adapter and router is the same type
Wireless connections use various security types, like WPA-PSK or WPA2-PSK, to ensure data protection. Your network connection will work only when the security type used by the computer and router is the same.
Use the instruction manual that came with the router to set its security type. Once that is done, check whether your computer is using that security type as well.
Perform these steps to do just that.
- Press Win Key + S. Type network.
- In the result list, click Network and Sharing Centre
- Locate the wireless network you’re using. Then right-click it and click Properties
- Click the Security In the Security type sub-section, choose the same security type as is being used by the router
- Click the OK button
6th Solution – Manually add connection
Here are the steps to follow.
- Press Win Key + S. Type network.
- In the result list, click Network and Sharing Centre
- Select Set up a new connection or network
- Click Manually connect to a wireless network
- Click the Next button
- Feed in the necessary information like network name, security type and security key
- Click the Next button
7th Solution – Change wireless network mode
Your network will work only when the network adapter and router use either identical or similar network mode. It is possible for you to alter network mode for the adapter and router.
To change the network mode for the router, you should refer the instruction manual that came with it. That said, in majority of cases, there’s no need to alter network mode for the router.
To alter network mode for the computer, perform these steps.
- Press Win Key + S. Type network.
- In the result list, click Network and Sharing Centre
- Here click at Change adapter settings. Then find the network adapter and right-click on it and select Properties
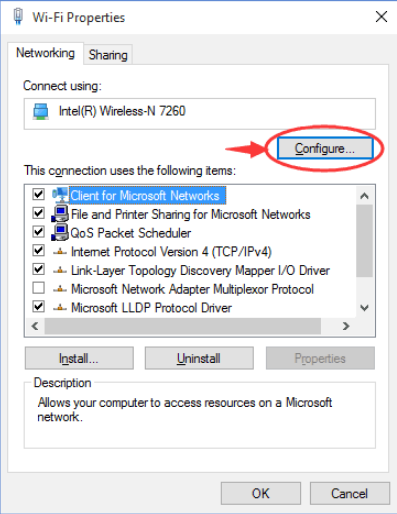
- Click Configure
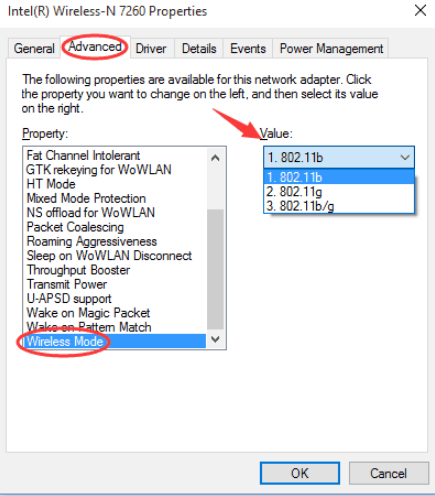
- Click the Advanced tab. Choose Wireless mode in the Properties section
- In the Value section, set the Wireless mode value as 802.11b. If this doesn’t work, try other values one by one
8th Solution – Forget wireless connection
Several Windows 10 users have reported that this solution worked like a breeze for them. You, too, should give it a go if the problem still persists.
Here are the steps to follow.
- Press Win Key + I. This will open Settings
- Click Network & Internet
- In the Wi-Fi section, select Manage Wi-Fi settings
- Browse down to Manage known networks and select Forget
- Now you need to connect to this very network again
9th Solution – Disable and then enable the wireless connection
Some users were able to fix the “Windows 10 can’t connect to this network” issue by disabling the connection and then right away enabling it.
Perform these steps.
- Press Win Key + S. Type network.
- In the result list, click Network and Sharing Centre
- Locate the wireless connection and then right-click it and select Disable
- Having done this, right-click this wireless connection once again and select Enable
10th Solution – Try ipconfig/release command
In case the problem is still troubling you, run ipconfig/release command to solve the listed problem.
Here are the steps to follow.
- Press Win Key + X and then click Command Prompt (Admin)
- In the command prompt, run these commands one by one by typing them and pressing Enter key each time
- ipconfig /release
- ipconfig /renew
- Exit command prompt and now try connecting to your network
If none of these solutions have worked for you, you should consider changing the network adapter.


Leave a Reply