Windows has a habit of throwing up very frustrating errors such as this black screen issue. When it happens, you see only a black screen with cursor. Typically this issue appears after you’ve performed an upgrade. Many users have also encountered this problem when Windows automatically installs updates.
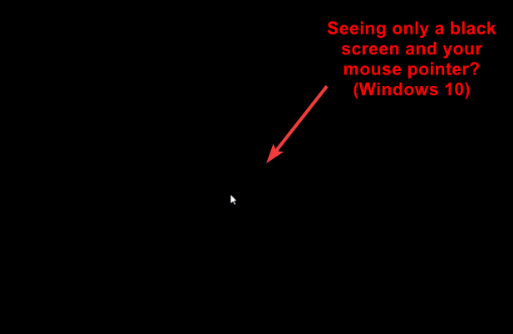
Even though this error looks serious, it is actually quite benign and something that you can fix yourself.
In this post, we’ve listed some common solutions for Windows 10 black screen with cursor error. All of these solutions have worked for Windows users, and we’re sure you will be able to resolve this problem using these workarounds.
Solution 1 – Fix it blindly
Here are the steps you need to follow.
- When you get the black screen, wait until the white mouse cursor shows up on your screen
- After the appearance of the mouse cursor, simultaneously press the ctrl key and space bar on the keyboard
- Now enter your login pin code or password blindly. This will allow you to log into Windows
In case the desktop doesn’t appear when you login and all you get is the irritating black screen, you should press Window + P + Down Arrow Key (Two times) and then type the login details once again.
Solution 2 – Power Cycle
In case you use a laptop with a removable battery, perform the following steps:
- Take the laptop battery out
- Now unplug power adapter
- Then Press and hold laptop’s power button for at least 10 secs
- Now release power button
- Connect back the charger, insert the battery back and then power on the laptop
In case the problem persists or you are a desktop user, you should try the next solution.
Solution 3 – Update the Graphics Drivers
The black screen error that you’re receiving can also occur if video driver is outdated, incorrect, or corrupt. Because it doesn’t take much to update a device driver, we recommend you try this solution before moving further.
You can use a driver update tool to simplify the task of updating video driver or you can use the Device Manager utility.
We will be discussing both of them. Let’s start with manual method of updating the video driver.
Update Video Driver Using Device Manager
You can allow Windows to update the driver present on your computer or you can download the latest driver from the video card’s manufacturer’s site.
Method 1 – Let Windows Install the Generic Driver
Here are the steps to follow.
- Press Win + R keys on your keyboard to launch the Run dialog box
- Type devmgmt.msc and press Enter to open the Device Manager window
- Right-click the video card and then click Update driver
- Click Search automatically for the updated driver software
- Follow onscreen instructions
Method 2 – Download the Latest Driver from the Manufacturer’s Website
It is possible that Windows doesn’t have the latest driver for the device. In such a case, you should go to the manufacturer’s website, and manually download the latest driver.
Save the driver file on your desktop or another convenient location and then use the Device Manager to update the driver.
Here are the steps to follow.
- Press Win + R keys on your keyboard to launch the Run dialog box
- Type devmgmt.msc and press Enter to open the Device Manager window
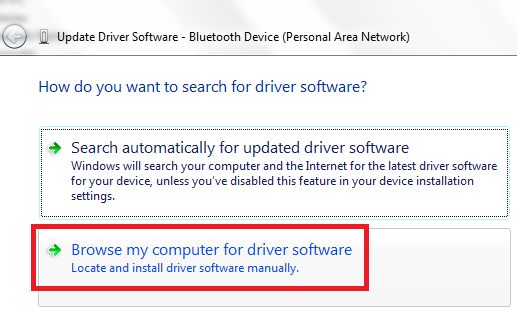
- Right click the video card and then click Update driver
- Click Browse my computer for driver software (the second option in the list)
- Now browse to the location where you’ve saved the driver file and then click the Next button to install the driver
Update Driver Automatically
Automatic driver update tools offer many benefits, the most important ones being:
- You can update device drivers automatically
- The software scans and updates all outdated or missing drivers at one go
- The tool picks the right drivers for your device and operating system, so you won’t have to worry about installing an incorrect driver by mistake
- Automatic driver updates are 100% safe
Driver Updater is one of the best driver update tools out there. Outbyte Driver Updater will give you access to a database of over 1 million drivers. It will regularly scan your PC, suggesting new driver versions to install. Driver Updater contains drivers for a variety of Windows devices. With just one click, you can update drivers in your system.
Step 1
Click here to Install and launch the app
Step 2
Scan all devices
Step 3
Install or update drivers automatically
Solution 4 – Disable Fast Startup
If the above-listed solution failed to fix the problem, you can try disabling Fast Startup. This step has worked for many users and may very well work for you, too.
Restart Windows in the Safe Mode
First you’ll need to Restart Windows 10 in the Safe Mode. To do this, perform these steps:
- Click Windows-button → On/Off
- Holding down Shift key, click Restart
- Now click Troubleshoot. Then click Advanced Options
- In the Advanced Options section, click Start-up Settings
- In the Start-up Settings section, click Restart
- You will see many boot options on your screen. The options relevant for starting windows in the Safe Mode are options 4, 5, and 6. You can use the Function keys or number keys to select the appropriate option. For instance if you want to select the 5th option in the list, press F5 or 5 on the number keypad.
Once Windows 10 boots in the Safe Mode, perform the steps listed ahead to disable Fast Startup.
- Type Control Panel in the start search box and then click Control Panel in the results
- Select Small icons in the View by drop-down menu
- Click Power options
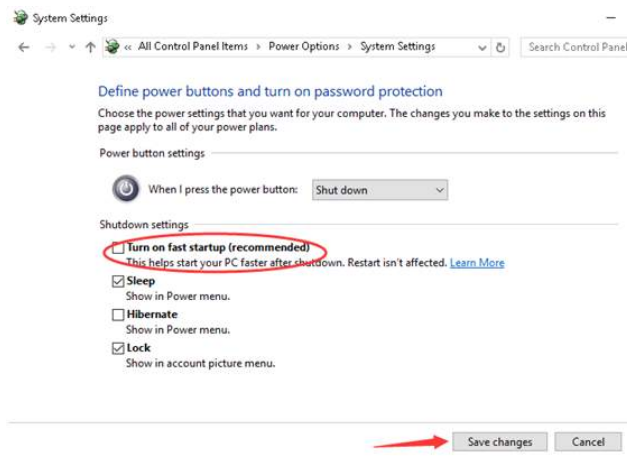
- In the left-pane, click at Choose what the power button does

- In the System Settings window, now you need to click at Change settings that are currently unavailable

- Now go to Shutdown Settings and here unselect the box before Turn on fast startup (recommended). Then click the Save changes button.
Solution 5 – Disable integrated graphics card
In case you are using a separate graphics card, it is possible that Windows is assuming that you use a dual monitor. This in turn can lead to the Windows 10 black screen with cursor error.
In such a scenario, you may be able to resolve the issue by disabling integrated graphics card.
- First, restart Windows in the Safe Mode (Refer to the steps listed in the Solution 4)
- Press Win + R keys simultaneously on your keyboard to launch the run box
- Now type devmgmt.msc in Run box and click the OK button
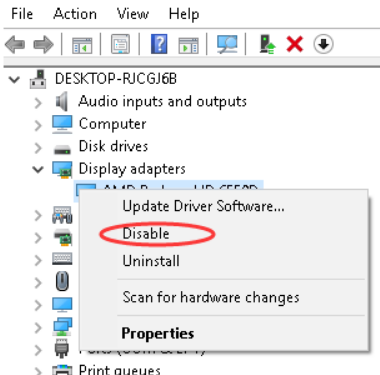
- Expand Display adapters. Here you’re likely to find multiple graphics card. Right-click integrated graphics card (generally this is an AMD or Intel graphics card). Next, click Disable
- Now reboot Windows
In case you don’t know for sure which graphics card is the integrated one, we suggest you disable the first graphic card in the list and check if that resolves the issue. If not, disable the second one and so on.
Solution 6 – Use a different user account to login
A corrupt Windows user profile is another reason why the Windows 10 black screen with cursor problem occurs. In case you are able to login to your computer using another user account and use the pc as before, chances are the cause of the problem is a corrupt user profile.
In this case, simply replace the non-working user profile’s folder with the working profile’s folder.
Here are the steps you need to follow.
- Restart Windows in the Safe Mode (Refer to the steps listed in the Solution 4)
- Login into your PC with the user profile that’s working
- Now browse to C:\Users\{working-user-profile-name}\AppData\Local\Microsoft\Windows\Caches
- Next, copy “Caches” folder
- Login into your PC with the user profile that’s corrupt
- Now browse to C:\Users\{broken-user-profile-name}\AppData\Local\Microsoft\Windows\Caches
- Now replace this folder with working user profile’s folder
In case you have no existing working user account, use the following instructions to create one.
- Make sure your user account has administrative rights. That is, it is an administrator account. If the user account doesn’t have administrative rights, we recommend you to activate the in-built Windows administrator. To do this, follow these steps
- In the Start Search box, type command prompt, then right click Command Prompt in the search results and click Run as administrator
- Now in the Elevated Command Prompt, you should type net user administrator /active:yes and then press Enter
- Restart Windows
- Now you can log in with administrator account
- Now follow the instructions listed ahead to create a new user account
- In the Start Search box, type “settings” and then click Settings
- Now click Accounts
- In left pane, click Other people. Now click Add someone else to this PC
- Just follow onscreen instructions to create another user account
- Now login into Windows with this new account. Check if the problem is fixed
Solution 7 – Reset the PC
This is the last solution. If the problem has not been resolved till now, we recommend you reset the PC. This action will completely reinstall Windows.
In case you don’t think this is something you can do yourself, you should consider contacting the PC manufacturer for assistance.
- Restart Windows in the Safe Mode (Refer to the steps listed in the Solution 4)
- In the Start Search box, type “settings” and then click the Settings button
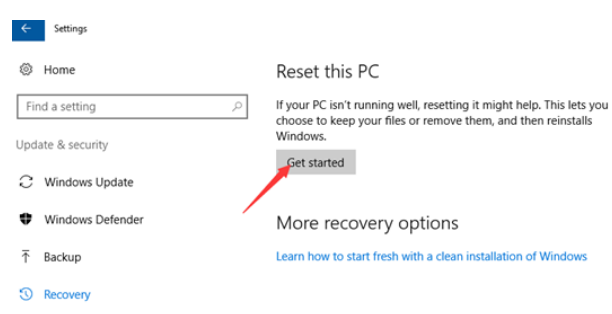
- Click Update & Security
- Now Click Recovery
- Now go to the “Reset this PC” section and here click the Get Started button. Now you can reset the PC by following onscreen instructions
We hope one of these solutions do work for you. In case you have any questions, leave us a comment.

Leave a Reply