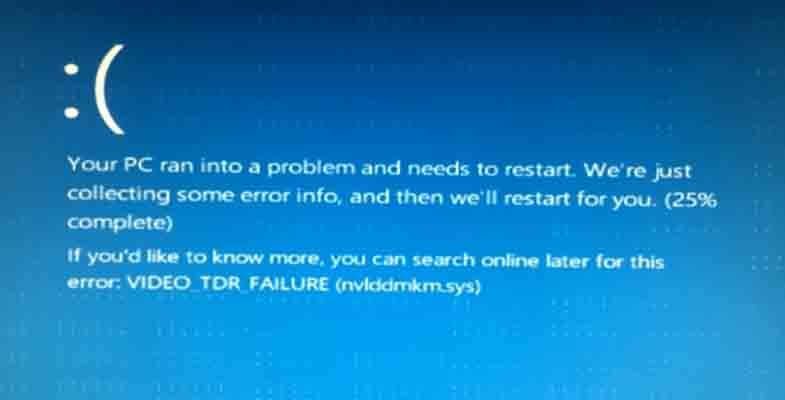
Are you getting a Blue Screen of Death error at startup that reads VIDEO_TDR_FAILURE (nvlddmkm.sys) like the one shown below?
If yes, there is nothing to worry about as we have listed some easy solutions that would help you fix the issue.
The Video_TDR_failure mentioning the file name nvlddmks.sys is related to NVIDIA graphics card and many users who have reported this error were able to resolve the error by following the solutions given below.
What does Video_TDR_failure error mean?
The TDR in the error message stands for Timeout, Detection and Recovery. It is a feature in Windows that detects response problems in the graphics card and resets the graphics card to recover functional desktop.
By default, the operating system waits for 2 seconds for a response from the graphics card and then resets the card.
TDR is a useful feature that prevents system freeze ups, in which rebooting the system is the only option. Luckily, there are solutions that can fix the issue with NVIDIA graphics card. Now, let’s get started.
Solution One – Clean re-install NVIDIA graphics card
Corrupt NVIDIA graphics card drivers could be one of the reasons behind the Video_TDR_failure error. A clean re-install of the NVIDIA graphics card means removing the NVIDIA graphics driver completely and then installing latest NVIDIA graphics card drivers. Here are the steps to follow.
- Download and install Display Driver Uninstaller(DDU)
- After DDU is installed, run the application
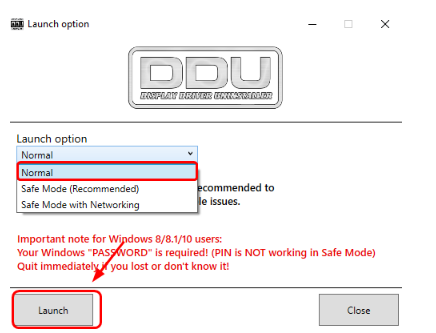
- You can run the application in different modes- Safe Mode, Safe Mode with Networking and Normal mode. Here, we have chosen to run DDU in Normal mode
- After you have selected the desired Launch mode, click Launch
- Click Clean and Restart (Highly recommended)
- DDU will remove NVIDIA graphics card drivers and related packages from the system. It will also remove all leftovers like registry entries, drive store, and folders and files related to NVIDIA graphic card drivers
- After the NVIDIA graphics card drivers are completely removed from the system, Windows will reboot
- After the system reboots, press Windows key and X simultaneously on the keyboard
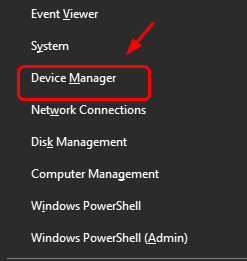
- Click Device Manager from the menu
- In the Device Manager window, click Action and then click Scan for hardware changes
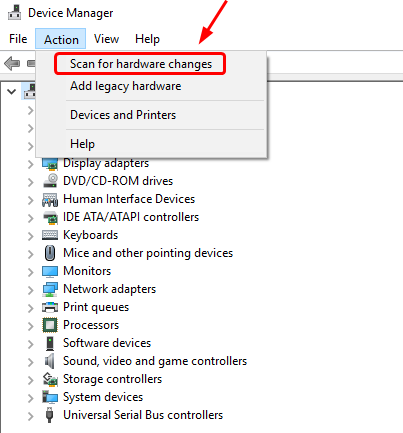
- Windows will detect the missing drivers for NVIDIA graphics card and install the latest driver update available. Please be patient while Windows finds the right graphics card drivers and installs them.
Solution Two – Update NVIDIA graphics card drivers
You can also receive this error if you NVIDIA graphics card drivers are outdated. Though it is possible to update drivers manually, the whole process is often tedious. If you don’t have much time to spare, we recommend you use a Driver Update Tool.
Automatic driver update tools offer many benefits, the most important ones being:
- You can update device drivers automatically
- The software scans and updates all outdated or missing drivers at one go
- The tool picks the right drivers for your device and operating system, so you won’t have to worry about installing an incorrect driver by mistake
- Automatic driver updates are 100% safe
Driver Updater is one of the best driver update tools out there. Outbyte Driver Updater will give you access to a database of over 1 million drivers. It will regularly scan your PC, suggesting new driver versions to install. Driver Updater contains drivers for a variety of Windows devices. With just one click, you can update drivers in your system.
Step 1
Click here to Install and launch the app
Step 2
Scan all devices
Step 3
Install or update drivers automatically
Solution Three – Check for drivers and programs conflict
There is a possibility that you have recently installed some programs and drivers that are causing conflicts. You can resolve this issue by following steps given below.
Try to recall the programs and drivers you have installed. Look for their updated version and install them
According to some experts, there is a driver conflict between the integrated webcam and Logitech webcam. So you need to uninstall Logitech webcam and its drivers and see if it fixes the issue. Here are the steps to follow.
- Click Start and then Settings
- In the Settings window, click Apps
- Now click Logitech webcam in the list of apps and then select Uninstall
- Follow on-screen instructions to uninstall Logitech webcam and its drivers
Solution Four-Run check disk and check memory for errors
One of the reasons behind BSODs can be corrupt hard drive and faulty RAM. You need to rule out this possibility by running check disk utility and Windows Memory Diagnostic tool that checks memory for errors.
Here are the steps to follow.
Run Check Disk
The Check Disk (CHKDSK) utility in Windows checks the hard drive for errors and rectifies any problem with the file system.
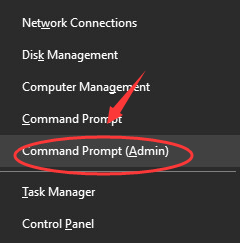
- Press Windows logo key and X at the same time on the keyboard
- From the menu, click Command prompt(admin)

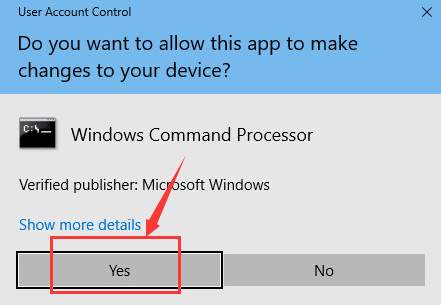
- When the user account control prompts for permission, click Yes

- In the command prompt windows, type chkdsk /f c: (where c: is the drive where Windows is installed.

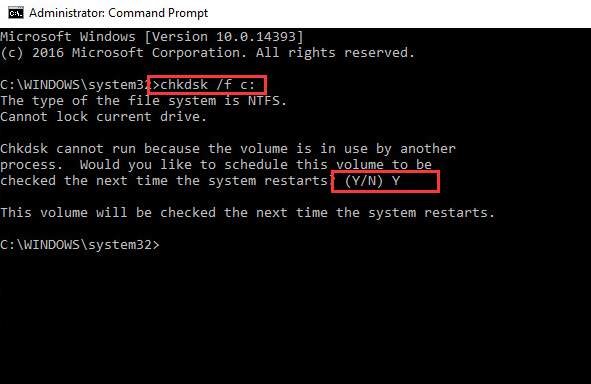
- Press Enter on keyboard after typing the above command
- When the Windows asks whether you want to schedule CHKDSK during next system reboot, type Y for an answer.
- Windows will restart and you will see CHKDSK running and scanning hard drive for errors. Wait for the program to complete the process.
Your computer will reboot after the process is completed. Now check if the issue persists. If you are still getting BSOD, run Memtest.
Run Windows Memory Diagnostic tool
The Windows Memory diagnostic tool checks the physical RAM module for any faults. Here are the steps to follow
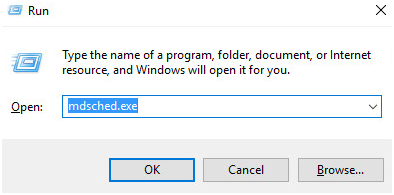
- Press Windows logo key and R simultaneously to bring up the Run command console
- In the run command box, type mdsched.exe
- In the next window, you get two options- 1) Restart now and check for problems (recommended) and 2) Check for problems the next time I start my computer
- Select 1st option if you want to run Windows Memory diagnostic tool immediately. Your computer will reboot and start the Memory test
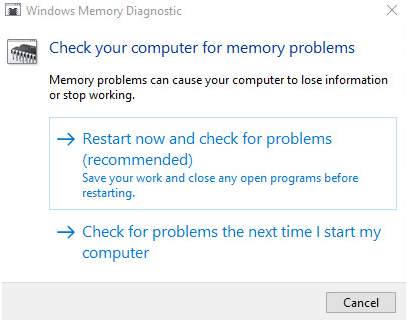
- Select 2nd option if you want to run Windows Memory diagnostic tool later.
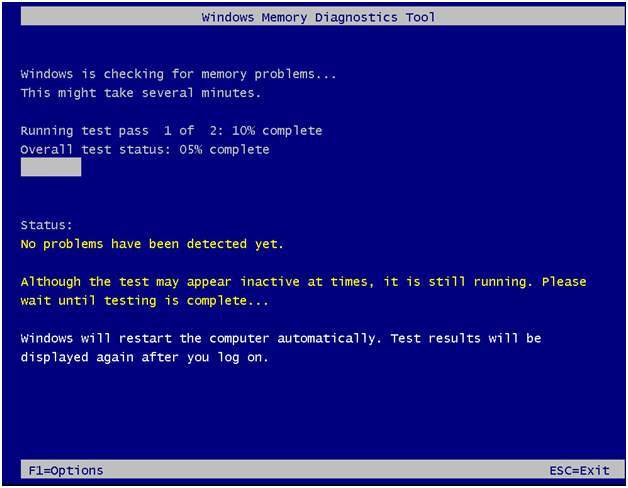
- When the computer reboots, you will see the Windows Memory diagnostic tool in action. After the memtest process is completed. The computer reboots and you can see the errors(if any) in the log file.
Leave a Reply