Are you getting a Blue Screen of Death error that says “video scheduler internal” error?
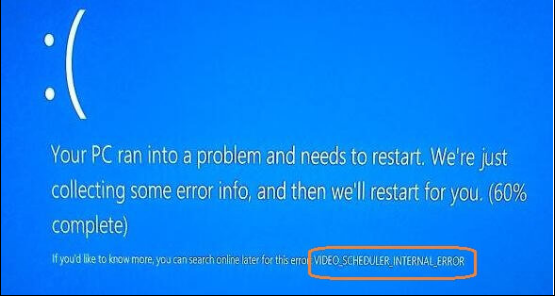
This error is a common issue, but thankfully it doesn’t take much to solve it. Usually it occurs because of one problem or another with your graphics card. At times, other issues can also trigger this error.
In this post, we have listed four solutions for the “video scheduler internal” error. You need not try all solutions given on in this post. Start with the first solution and work your way downwards, until the error is fixed.
You need to be logged in your Windows computer to perform the troubleshooting steps. If you are unable to do so, power on and off your PC three times to force a hard reboot, so that you can launch windows in Safe Mode and try the solutions given below.
Solution One- Check hard drive and system files for errors
Faulty hard drive or corrupt system files could cause the “video scheduler internal” error. To rule out this possibility, you need to run check disk utility that can detect and fix hard drive errors.
Here are the steps to run Check Disk.
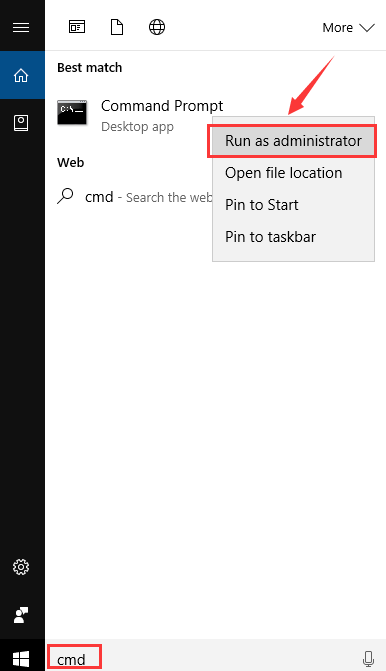
- Click Start and type cmd in Cortana search
- Right-click Command Prompt from the list of search results and click Run as administrator
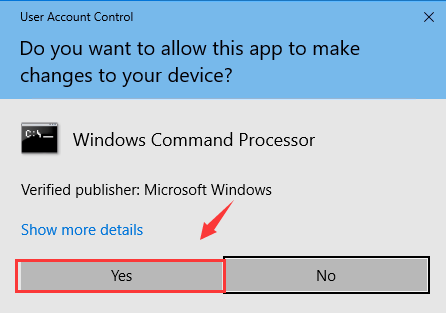
- When the User account control prompts for confirmation, click Yes
- In the command prompt window, type chkdsk /f /r and press Enter on your keyboard.
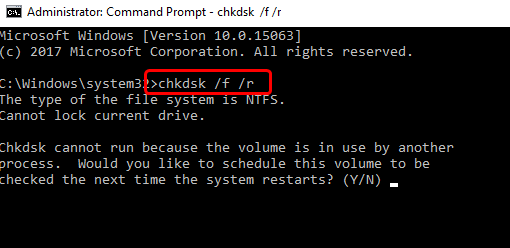
- When the computer asks you about scheduling check disk at next system restart, type Y for an answer
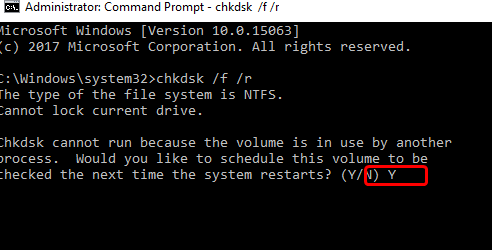
- Restart your computer so that Windows can run the Check Disk program
- After the system reboots, you will see Check Disk running and see the progress and findings on screen. Wait for the program to finish. Once the Check Disk completes checking the hard drive, it will boot the system in normal mode.
To check system files for integrity, Windows provides an inbuilt-program known as System File Checker. The System File Checker will scan all protected system files and replace any corrupted files with the cached versions.
Here are the steps to run System File Checker.
- Click Start and type cmd in Cortana search
- Right-click Command Prompt and click Run as administrator
- In the command prompt window, type sfc /scannow and hit Enter key on your keyboard.
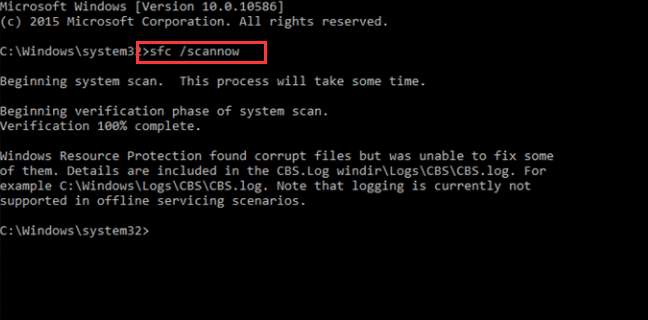
- Have patience and wait till the System File Checker checks all system files and replaces the corrupt ones with cached versions
- After the process is completed, restart the computer
Now see if you still get the “video scheduler internal” error. If the error is not resolved, try next solution.
Solution Two- Install pending Windows updates
There is a possibility the “video scheduler internal” error might be caused by an internal bug in the operating system. Microsoft provides regular updates to fix bugs in Windows operating system.
To resolve the issue, you need to install all pending Windows updates. Here are the steps to follow.
- Press Windows logo key and I simultaneously on the keyboard to open Settings
- In the Settings window, click Update & Security
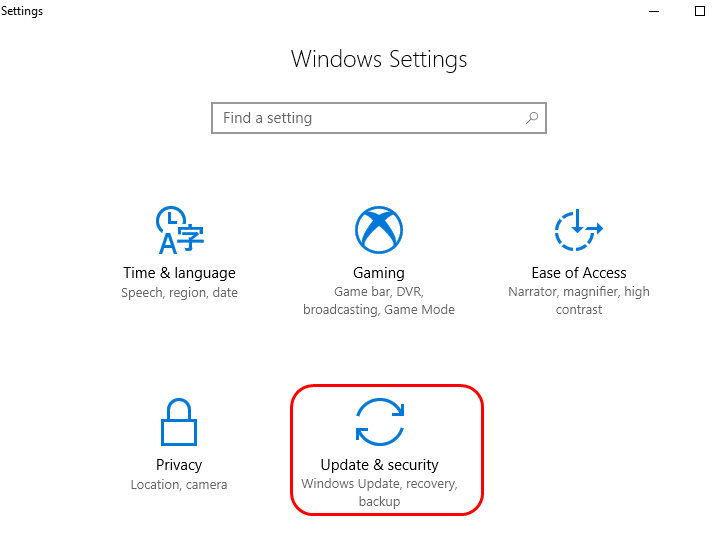
- In the next window, click Windows update in the left pane and then click Check for updates in the right pane
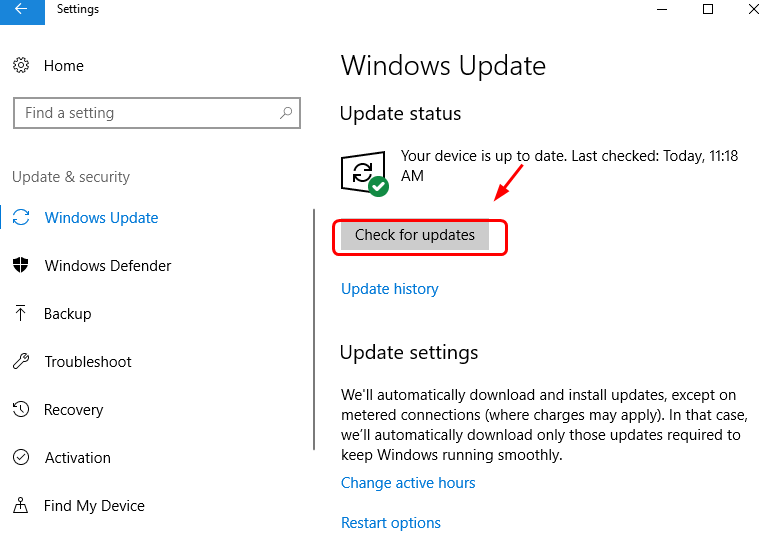
- Windows will provide you list of available updates. Click on updates to install them
- After Windows is up-to-date, restart PC and see if the “video scheduler internal” error is generated. If the issue persists you need to update drivers following the steps given
Solution Three – Update Drivers
The most uncomplicated way of updating device drivers is by using a trustworthy and fast driver update tool.
Automatic driver update tools offer many benefits, the most important ones being:
- You can update device drivers automatically
- The software scans and updates all outdated or missing drivers at one go
- The tool picks the right drivers for your device and operating system, so you won’t have to worry about installing an incorrect driver by mistake
- Automatic driver updates are 100% safe
Driver Updater is one of the best driver update tools out there. Outbyte Driver Updater will give you access to a database of over 1 million drivers. It will regularly scan your PC, suggesting new driver versions to install. Driver Updater contains drivers for a variety of Windows devices. With just one click, you can update drivers in your system.
Step 1
Click here to Install and launch the app
Step 2
Scan all devices
Step 3
Install or update drivers automatically
Solution Four – Reinstall Drivers for Problematic Devices
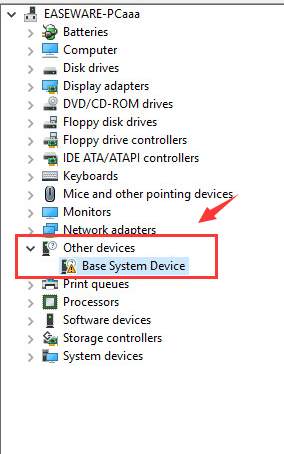
Faulty or incompatible drivers could be one of the reasons behind the “video scheduler internal” error. You can know about problematic devices in Device Manager; they will have a yellow exclamation mark which indicates right drivers are not installed.
To fix the issue, you need to uninstall problematic devices and install latest drivers. Here are the steps to follow.
- Press Windows logo key and X simultaneously on the keyboard to bring up Start Menu
- Click Device Manager from the list
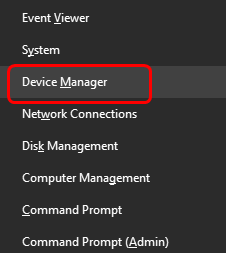
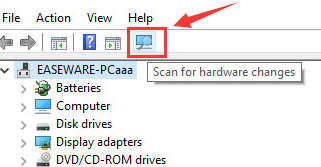
- In the Device Manager window, click Scan for hardware changes icon at the top
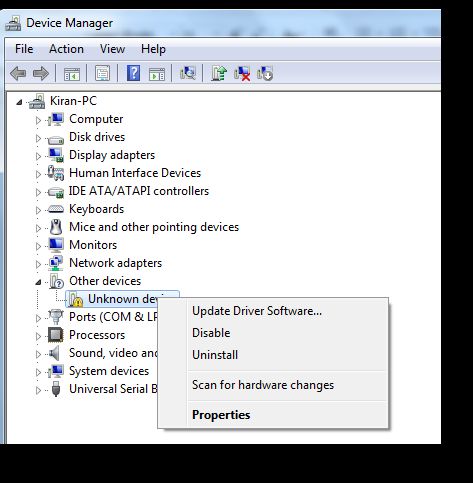
- Double-click on Other devices category to expand it. Here you would find devices with faulty drivers with a yellow exclamation mark or question mark. You need to also look in other categories and find problematic devices if any.
- Right-click on problematic device and click Uninstall
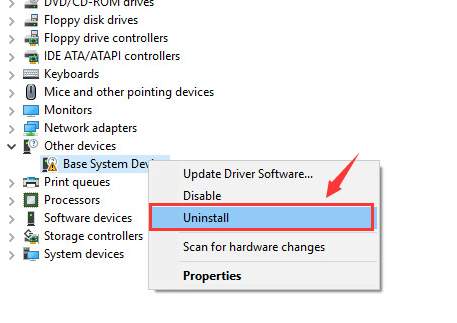
- When Windows prompts for confirmation, click OK
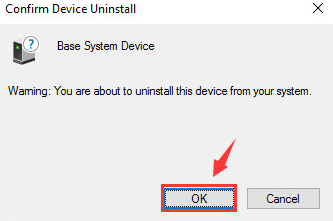
You need to go to hardware manufacturer website to download latest drivers for the device. Download drivers that are compatible with your Windows version. Drivers are available in various formats that include ZIP and EXE format.
If the driver is available EXE file, double-click on it and follow on-screen instructions to install drivers. If the driver file is in ZIP format, you need to unzip the contents to a designated folder and then follow the steps given below to install the latest driver for the device.
- Perform the first four steps from above-given solution
- Right-click on the problematic device and click Update driver software
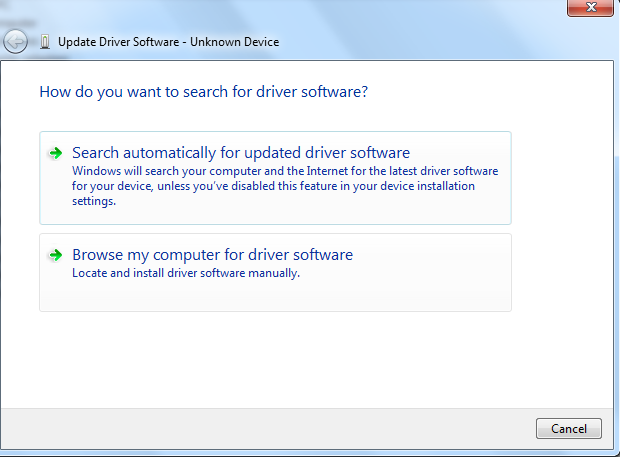
- In the next window, click Browse my computer for driver software
- Click Browse and navigate to the location where you have unzipped the contents of driver file
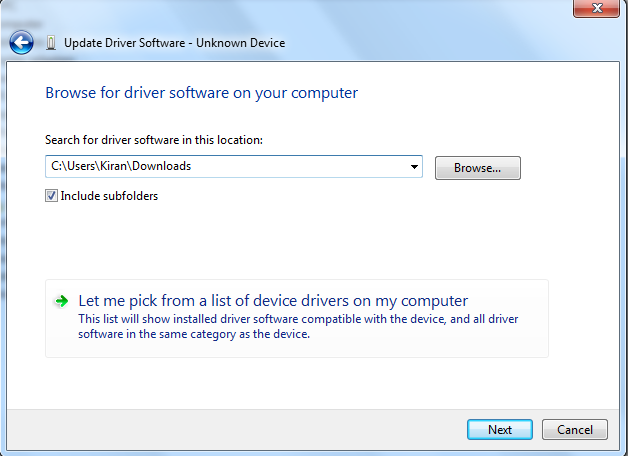
- Click Next
- Windows will recognize the driver file from the folder and install it
Restart your computer and see if the “video scheduler internal” error is generated. In most cases, the issue should be resolved now.

Leave a Reply