The last thing a Windows user wants is see a Blue Screen of Death error on his screen. In case you are looking for answers to system service exception BSOD error, this post is just for you.
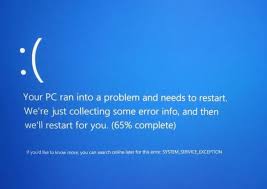
The system service exception BSOD error is quite common and we have presented here five solutions to fix the issue. The System Service Exception error is generated due to corrupt drivers or software incompatibility. The solutions given below target both causes and helps resolve the issue.
Since, you are not aware of the reason behind system service exception BSOD error, you can start with the first solution given here and then work your way downwards trying other solutions until the issue is fixed. Let’s get started.
Solution One – Update Drivers
When you get the system service exception BSOD error, the first thing you should do is ensure that all your device drivers are updated. To update device drives, we recommend you use a Driver Update Tool.
Automatic driver update tools offer many benefits, the most important ones being:
- You can update device drivers automatically
- The software scans and updates all outdated or missing drivers at one go
- The tool picks the right drivers for your device and operating system, so you won’t have to worry about installing an incorrect driver by mistake
- Automatic driver updates are 100% safe
Driver Updater is one of the best driver update tools out there. Outbyte Driver Updater will give you access to a database of over 1 million drivers. It will regularly scan your PC, suggesting new driver versions to install. Driver Updater contains drivers for a variety of Windows devices. With just one click, you can update drivers in your system.
Step 1
Click here to Install and launch the app
Step 2
Scan all devices
Step 3
Install or update drivers automatically
Solution Two – Run System File Checker
Corrupt system files could be one of the reasons behind the system service exception BSOD error in Windows 10. You need to run system file checker to resolve any issues with system files. The System File Checker is command line tool that is executed from an elevated command prompt.
The System File Checker utility checks the integrity of all protected system files. If it finds any corruptions, it replaces the corrupt file with the most recent cached version to fix the issue. Here are the steps to follow.
- On your keyboard, press the Windows logo key and X same time to bring up Start Menu
- Click Command Prompt(admin) from the list
- In the command prompt window, type sfc /scannow and press the Enter key on your keyboard.
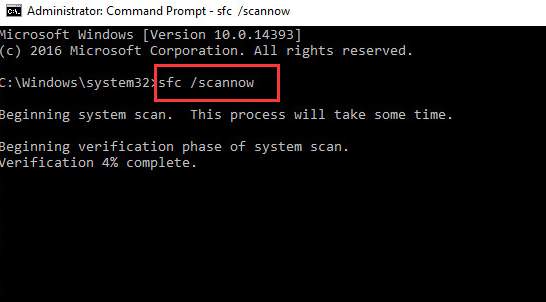
- You will see the System File Checker tool running in the command prompt window and scanning system file for corruptions and restore corrupted files. Wait for the program to finish.
- Close the command prompt window
Check if the issue has been resolved. If you still get the system service exception BSOD error, try the next solution.
Solution Three- Run Check Disk
The Windows 10 system might also throw up system service exception error on the screen if there are bad sectors on the hard drive or if the NTFS volume is corrupt. The CHKDSK utility marks bad sectors and isolates them and also fixes errors in NTFS volume.
To resolve any problems in hard drive, you need to run Check Disk by following steps given below. Here are the steps to run chkdsk.
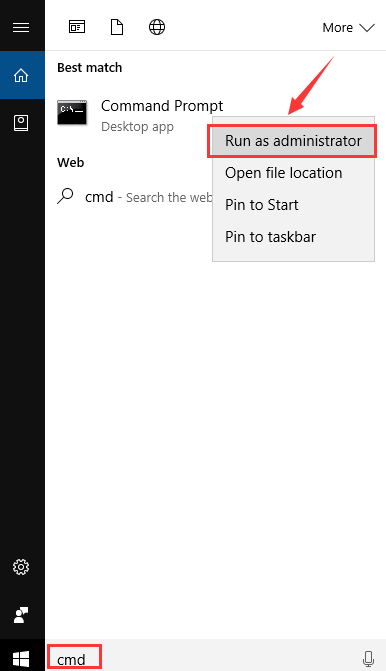
- Press Windows key + S simultaneously on the keyboard to bring up Cortana search
- In the search box, type cmd and click OK
- Right-click Command Prompt from the list of results and select Run as administrator
- In the command prompt window, type chkdsk /f /r, and press Enter on your keyboard.
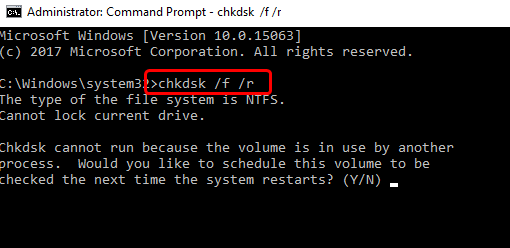
- When the system asks “Would you like to schedule this volume to be checked next time the system restarts?”, press Y on the keyboard
- Close the command prompt window and restart your computer.
- When the computer reboots, Windows will run the check disk program to fix any issues with hard drive.
- Use your computer for some time and see if the error is generated. If the issue persists, try next solution.
Solution Four -Run Windows memory diagnostic test
When your Windows 10 system throws up system service exception BSOD error, you cannot rule out the possibility of some problem with physical RAM installed in your computer. Windows memory diagnostic tool is an in-built program that checks physical RAM for any faults. Here are the steps to run memory test.
- Press Windows key + R simultaneously on the keyboard to bring up the Run command console
- In the Run command window, type mdsched.exe and click OK
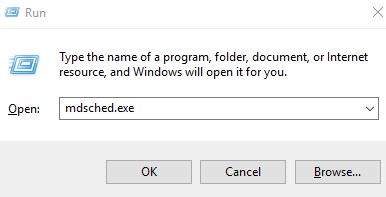
- Windows will provide two options – Restart now and check for problems (recommended)or Check for problems the next time I start my computer
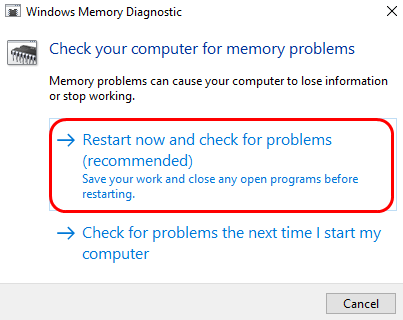
- If you want to run Windows memory diagnostic tool immediately, select Restart now and check for problems (recommended)
OR
- If you want to schedule memory test later, select Check for problems the next time I start my computer
- When the Windows OS runs Windows memory diagnostic tool, you will see the progress and also the errors that Windows memory diagnostic tool may find.
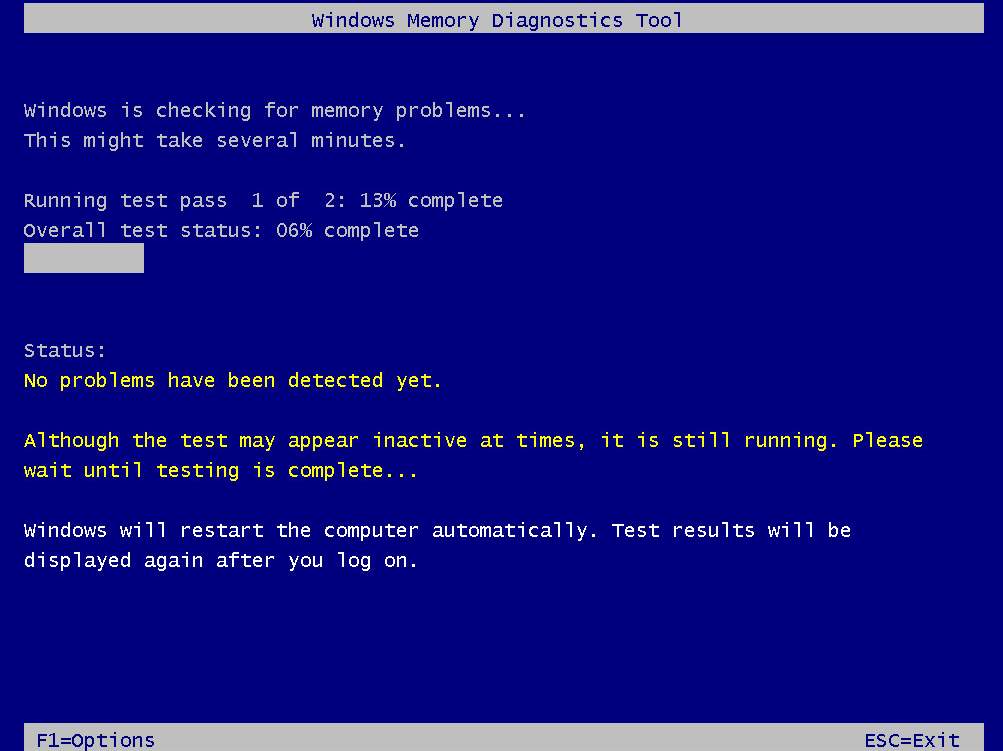
- Wait for the program to finish. After the memory test is completed, the computer will reboot and you can see the test results when you log on
If the Windows memory diagnostic test results show no errors, you can draw a conclusion that RAM is not the cause behind system service exception BSOD error. In that case, you need to move to next solution to resolve the issue.
Solution Five- Uninstall 3rd party anti-virus programs
Many users have found out that 3rd party anti-virus programs could be the reason behind system service exception BSOD error. To rule out this possibility, you need to uninstall any 3rd party anti-virus program that you have installed in Windows 10 system.
Windows 10 has in-built Windows Defender anti-virus program that can protect your computer from Internet threats, viruses and malware. All you need to do is uninstall the 3rd party anti-virus completely and activate the Windows Defender protection by following steps given below.
- Press Windows logo key and I simultaneously on the keyboard to bring up the Settings window
- In the Settings window, click Update & Security
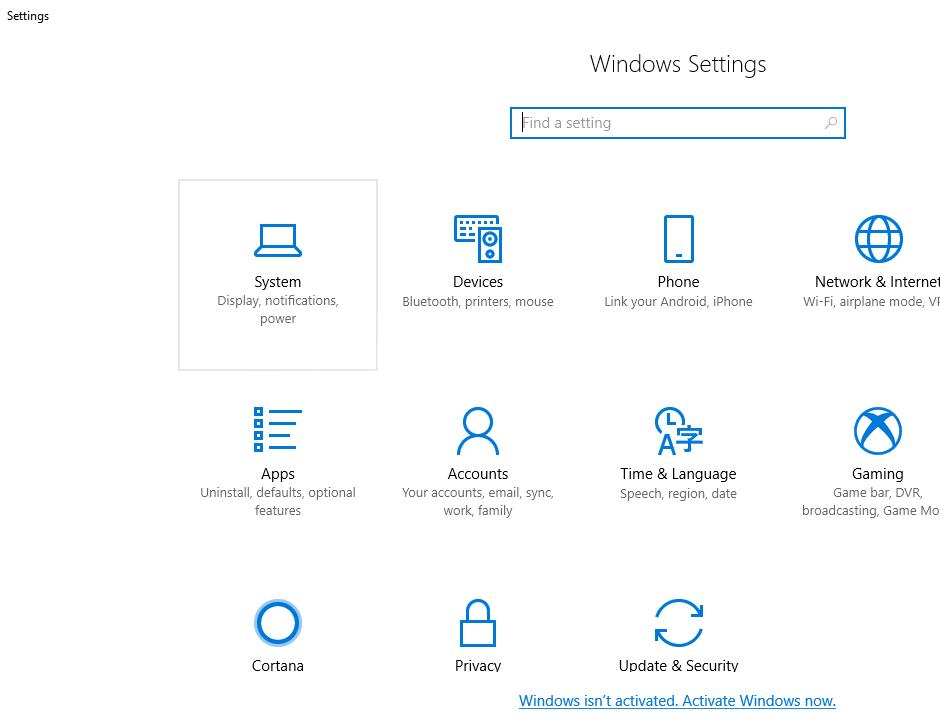
- Click Windows Defender in the left pane
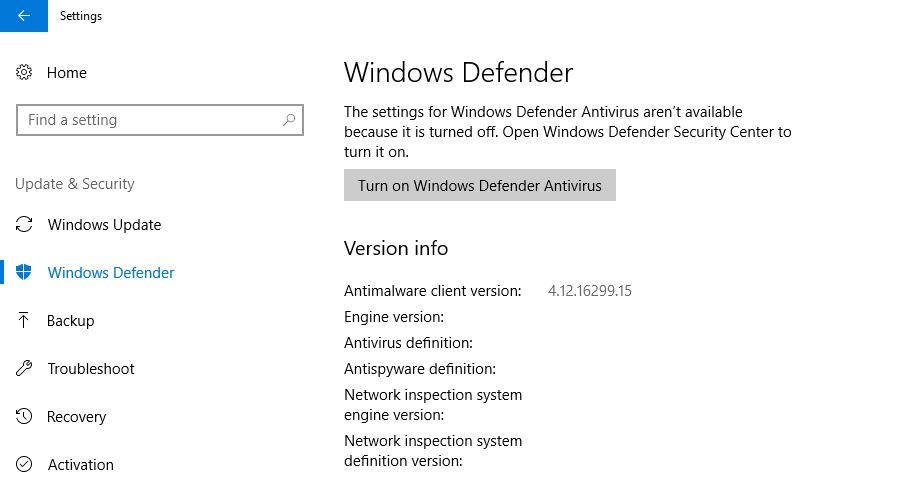
- Click Turn on Windows Defender antivirus

Leave a Reply