You have just changed the toner of your Brother printer yet the machine issues a pop-up warning that you are low on the toner or that it needs replacement.
This issue can be irritating to say the least because you have already done all that was needed to fix the problem. All the same, this is a common problem and relatively easy to fix.
In this post, we will look at how to reset a Brother HL-L2320d printer after you have changed the toner. So, let’s dig in.
Why does a Brother HL-L2320d act up after you have changed the toner?
Hardware devices, don’t always behave as hoped or expected.
This warning message in and of itself is not really a concern. But the problem is that because the printer thinks (erroneously, of course) that it is low on toner, it will likely refuse to print anything. And there is where the real problem lies. You can’t print anything until you make your printer aware that the toner has been replaced.
How can you do that? How can you turn off that irritating light?
Thankfully, there are a few ways to fix this problem, and in the next section, we will discuss each one of them in depth.
How to Reset Your Brother HL-L2320d Printer After You Have Changed Toner
Shared below are the different ways to solve this problem. We recommend you try these solutions in the order they appear below.
Check the Printer’s Connection
First thing you must do is ensure the printer is properly connected to your computer. If it is, disconnect it and reconnect it. This is similar to restarting your computer and often does the trick.
Open the Windows Settings app and then click Devices. In this section, you will see relevant information regarding your printer as well as its properties.

In the left part of the window, different categories will be listed. Click Printers and Scanners.
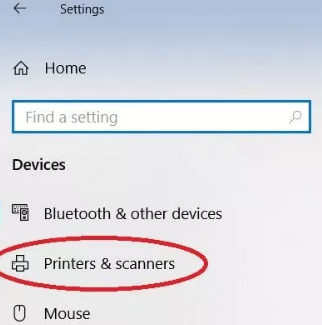
Now, click the Brother HL-L2320d printer. Two options will appear on your screen — Open queue and Manage. Opening the printer queue can prove helpful in many situations, but this is not one of them. Right now you should pick the other option, so click the Manage button.

You will see Run the troubleshooter option on your screen. Click it since the in-built troubleshooting tool can detect the underlying problem that causing the titled issue and fix it.
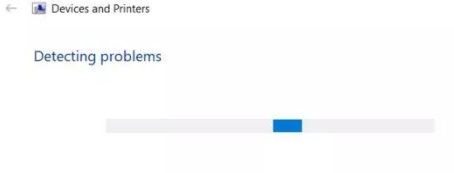
In case there is no connection between your computer and printer, try resetting the printer. Turn the printer off and then turn it on. At times, a printer may not be able to establish a proper connection with a computer and resetting may prove helpful.
In case this doesn’t work, don’t worry. Consider restarting Windows. This will refresh the computer and also take care of pending updates, if there are any.
Keep in mind that you should use the restart button for this purpose. A hard reset (pressing down the power button and holding it until the Windows screen turns black) is not recommended unless it is the only option. Whenever possible, go with the safer option of using the restart button to reboot Windows.
Restart the Printer Settings
It is possible that restarting Windows and attempting to set up a connection may not work. If that is the case, you should reset the printer settings.
Restoring a printer to its default factory settings is easy. Even though you are likely to lose some of the customization that you have done, you can set them again without any problem.
- Power off the printer
- Once the printer is shut down, press the Go button till the printer powers on
- Wait until all panel lights pop up
- You will have to repeatedly push down the Go button (roughly 8-10 times)
- Once you have done that, the printer should be restored to its default settings
This action is recommended only if you are unable to get rid of the “toner low” light through any other way. Chances are once the printer has been reset and starts operating with default settings it will be able to recognize that its toner has been refilled.
However, if the problem still doesn’t go away, you will have to dig deeper.
Check the Drivers
Drivers are essential pieces of software that ensure your computer and attached devices work seamlessly. Since they run in the background, if anything is wrong with them or if an essential driver is missing, you will not know about it until some error occurs.
Windows computers come with an in-built utility called the Device Manager that lets you manage the installed drivers.
- In the Start Search box, type run
- In the run dialog box, type devmgmt.msc and press Enter to open the device manager window
- Click and expand Print queues and then click your printer
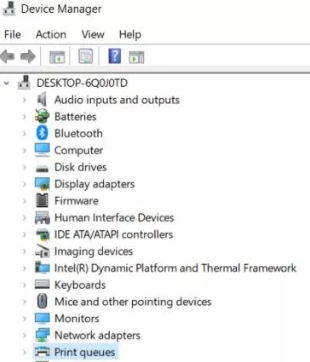
- You will see a window like the one shown below. Here you will see relevant information regarding your Brother printer
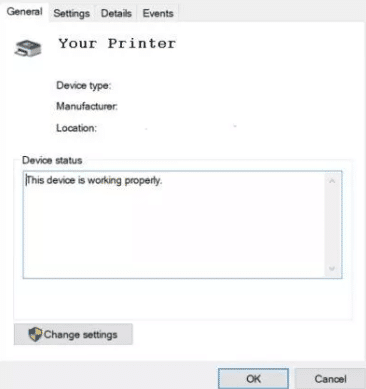
- Click the Details tab to see if the driver needs an update
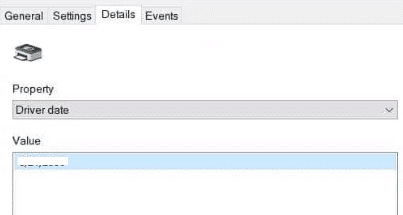
If your driver needs an update, you can manually download the relevant updated from the Brother’s website. While this is a time-consuming process, the effort is worth it. Installing the latest driver can fix the problem you are facing and also help the printer run smoothly.
Once you have downloaded the latest driver for your Brother printer, double-click it to install the driver.
Benefits of using an automatic driver update tool
Automatic driver update tools offer many benefits, the most important ones being:
- You can update device drivers automatically
- The software scans and updates all outdated or missing drivers at one go
- The tool picks the right drivers for your device and operating system, so you won’t have to worry about installing an incorrect driver by mistake
- Automatic driver updates are 100% safe
Driver Updater is one of the best driver update tools out there. Outbyte Driver Updater will give you access to a database of over 1 million drivers. It will regularly scan your PC, suggesting new driver versions to install. Driver Updater contains drivers for a variety of Windows devices. With just one click, you can update drivers in your system.
Step 1
Click here to Install and launch the app
Step 2
Scan all devices
Step 3
Install or update drivers automatically

Leave a Reply