Are you getting a msvcr120.dll is missing error while running an application? If yes, this post is for you.
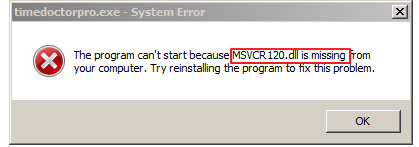
Many Windows users don’t understand what to do when they get such an error and they often panic. However, the fact of the matter is that error is not so difficult to resolve. You don’t need a lot of technical knowledge to troubleshoot it.
You can fix this error yourself—and we’ll show you how. In this post, we have listed five solutions that could fix the “msvcr120.dll is missing” error.
What is msvcr120.dll and why programs need it?
Msvcr120.dll is DLL (Dynamic Linked Library) file known as Microsoft C Runtime Library. It is part of Microsoft Visual Studio 2013 program developed by Microsoft Corporation. It is an essential file in Windows operating system that is used to extract valuable resources at runtime by 3rd party applications.
You are more likely to see this error if the msvcr120.dll is missing from your computer and the application you are trying to run needs it. You won’t be able to run any programs written in C++ programming languages until your computer has msvcr120.dll file.
Though we have provided five different solutions to fix the issue, you are not required to try all of them. You can start by performing troubleshooting steps in Solution One. If that does not fix the issue, move to the next one and so on.
Let’s get started.
Solution One – Reinstall the Visual C++ Redistributable Packages
As mentioned earlier the msvcr120.dll is part of Visual C++ Redistributable Packages of Microsoft Visual Studio 2013 program. If the file has gone missing on your computer, it means there is something wrong with the Visual C++ Redistributable Packages on your computer.
The easiest solution to get back the msvcr120.dll file is downloading the Microsoft Visual C++ Redistributable Package and install it on your computer. Here are the steps to follow.
Note- You need to download the Visual C++ Redistributable Packages from the official site and install them. Don’t download DLL files from unknown sources as you might end up downloading a virus camouflaged as an msvcr120.dll file.
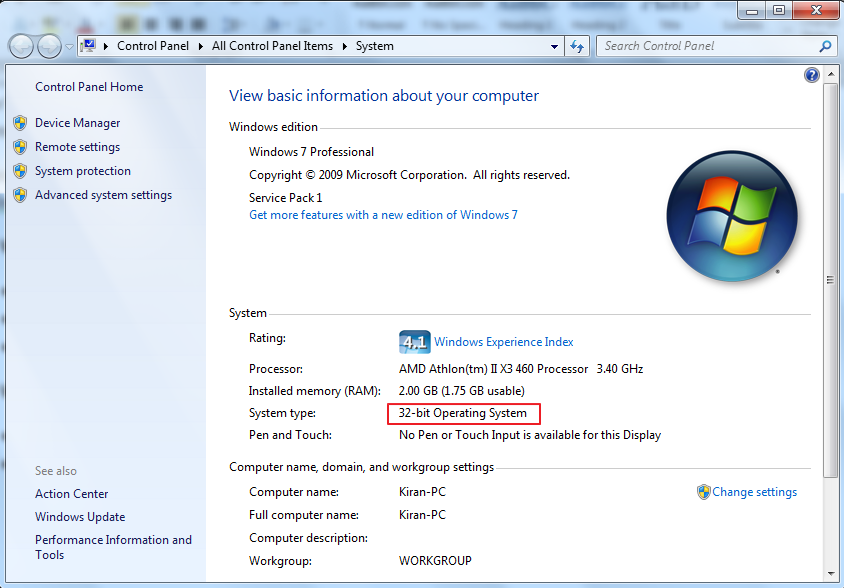
Since the Visual C++ Redistributable Packages are offered in two versions – 32-bit and 64-bit. You need to find out the system type before proceeding to troubleshooting steps given below
For Windows 7 users
- Click Start
- Right-click My Computer and select Properties
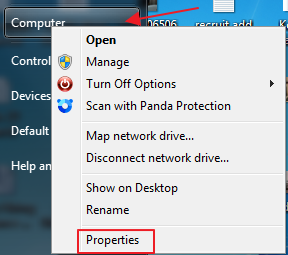
- In the System window, you can know about the system bit architecture- 32-bit or 64-bit
For Windows 10 users
- Open Windows Explorer
- Right-click This PC and select Properties
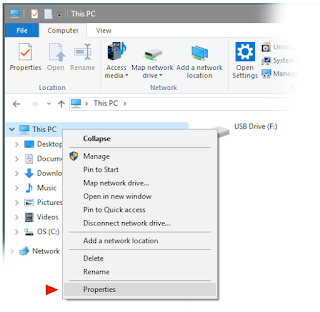
- In the System window, check the System type entry to find out whether the operating system is 32-bit(x86 based) or 64-bit(x64 based)
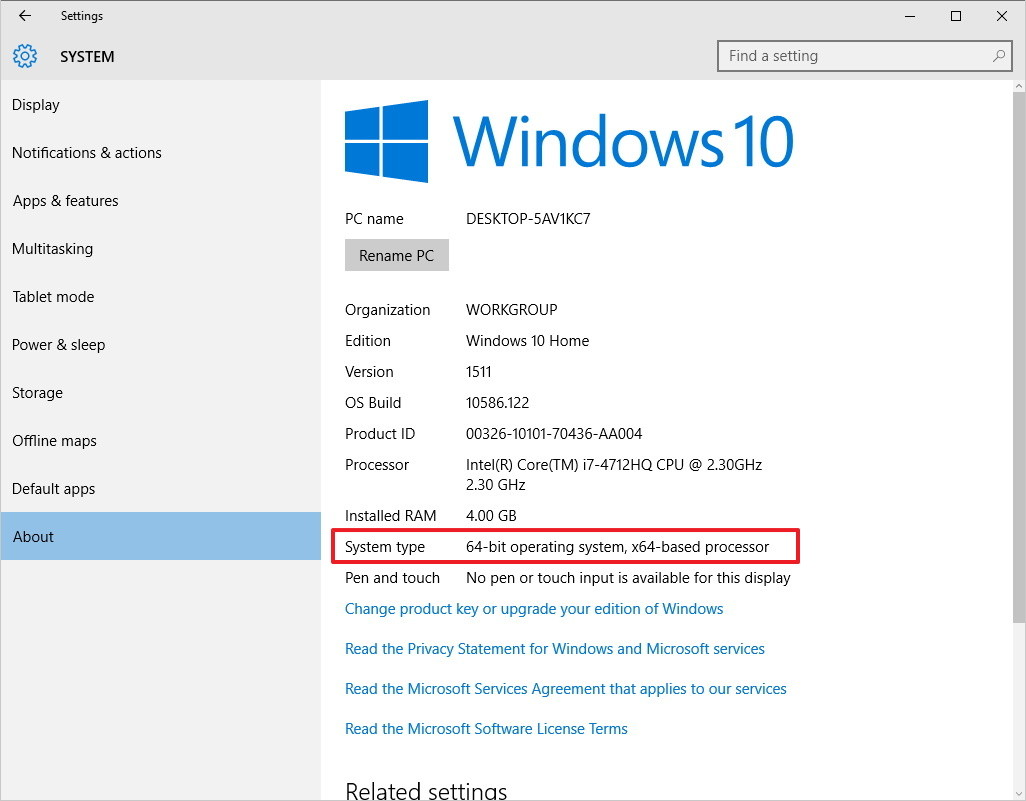
Once you have information about Windows operating system bit-architecture, you can proceed to trouble-shooting steps below.
- Click Microsoft Download website link
- Click Download

- Select the file as per your system type(x86 for 32-bit and x64 for 64-bit Windows)
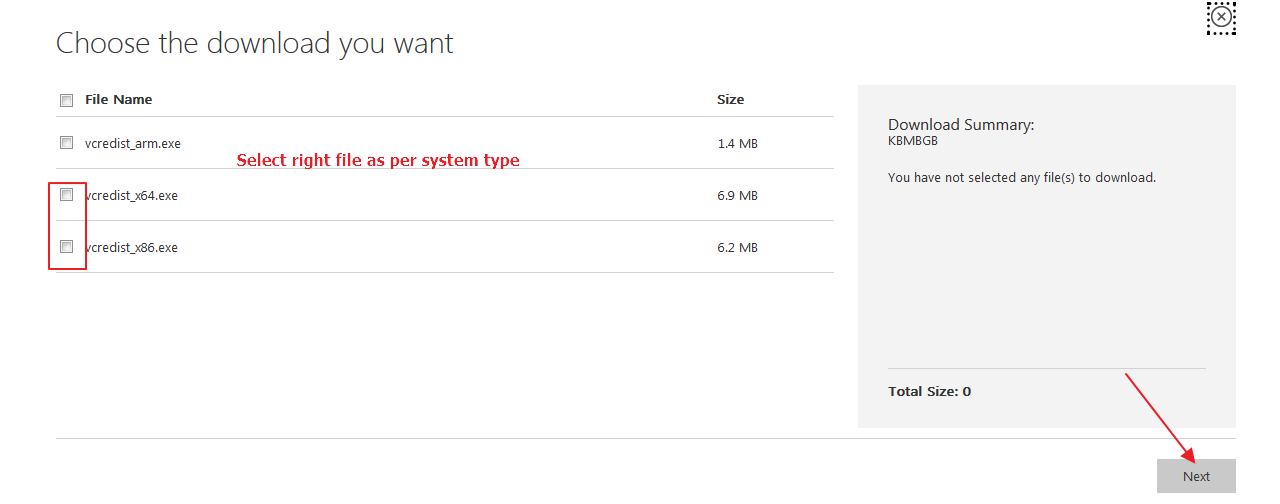
- After checking the box of right file type, click Next
- The file download is initiated and you can see a pop-up dialog on the screen, click Save File
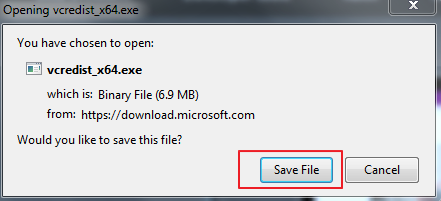
- Once the file is downloaded, double-click on the file to start the installation
- Follow on-screen instructions to install Visual C++ Redistributable Packages
- Restart computer
Try running the program and see if the “msvcr120.dll is missing” error is generated. If you still get the “msvcr120.dll is missing” error, try next solution
Solution Two – Perform a clean installation of the program
Since the problem is not resolved even after reinstalling Visual C++ Redistributable Packages, the program files might be corrupted that is causing the error. A simple solution to this problem is performing a clean installation of the program which includes completely uninstalling the program first and then reinstalling the program again. Here are the steps to follow.
- Press Windows logo key and R simultaneously on the keyboard to bring up the Run command console
- In the Run command box, type cpl and click OK
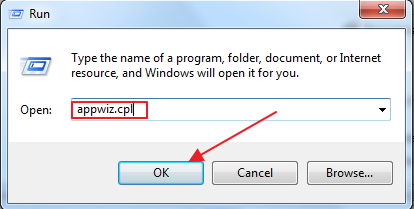
- Right-click the program that gives the error and click Uninstall/Change. In our case, it is Foxit Reader which is giving the error
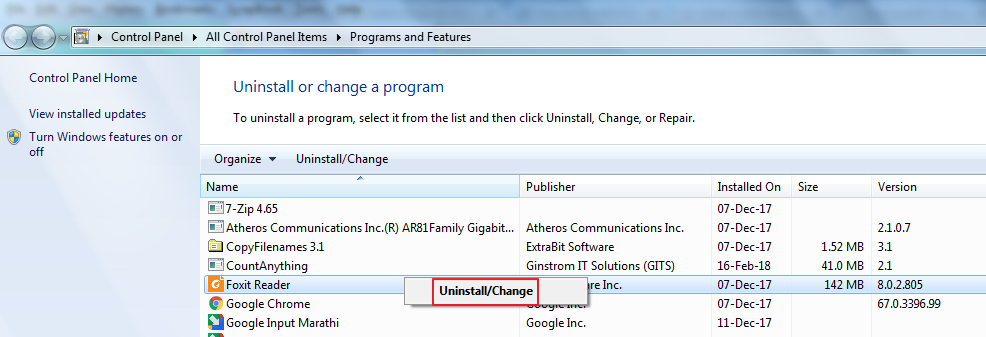
- Follow the instructions to uninstall the program
- Once the problematic program is installed, restart your computer
- Now, install the program and see if it works as intended
If you still encounter “Msvcr120.dll is missing” error while running the application, try next solution.
Solution Three – Update Drivers on your Windows computer
Outdated drivers can cause msvcr120.dll error. Therefore, update your drivers using a reliable and fast driver update tool software tool. Manual update is also possible but you might not want to go that way because it is not only time-consuming but also not hundred percent accurate.
Automatic driver update tools offer many benefits, the most important ones being:
- You can update device drivers automatically
- The software scans and updates all outdated or missing drivers at one go
- The tool picks the right drivers for your device and operating system, so you won’t have to worry about installing an incorrect driver by mistake
- Automatic driver updates are 100% safe
Driver Updater is one of the best driver update tools out there. Outbyte Driver Updater will give you access to a database of over 1 million drivers. It will regularly scan your PC, suggesting new driver versions to install. Driver Updater contains drivers for a variety of Windows devices. With just one click, you can update drivers in your system.
Step 1
Click here to Install and launch the app
Step 2
Scan all devices
Step 3
Install or update drivers automatically
Solution Four-Run a Virus scan on your computer
If your Windows operating system is infected by virus or malware, it can prevent some DLL files from running and that could be the cause of the error. Some “Dll is missing” errors also occur due to Trojan programs posing as DLL files and preventing normal operation of other programs.
To ensure your system is not infected with any virus, malware or Trojan programs, you need to run a full scan of your system with a good anti-virus. If you are using Windows Defender, it might not be enough. We suggest you to use a good anti-virus program to get rid of virus infections from your computer if any.
Once you have installed a good 3rd party anti-virus program, you need to run a full scan of your computer. The steps to run a full scan on your computer varies with each anti-virus program. Popular anti-virus programs offer different scan options such as Full Scan, Quick Scan, Custom Scan, or Critical Areas scan.
You need to select a Full Scan option which ensures every hard drive partition of your computer is scanned. If the anti-virus finds any virus or malware, it will offer you different options to get rid of the virus. Follow the instructions to get rid of the virus.
The steps given below are for reference purpose only. You need to refer your anti-virus documentation to know the exact steps to perform a full scan. Here we have Panda anti-virus installed on our computer.
- Right-click on anti-virus scan icon to open the anti-virus user interface
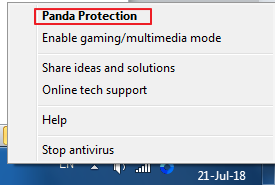
- Click Scan

- Click Full Scan
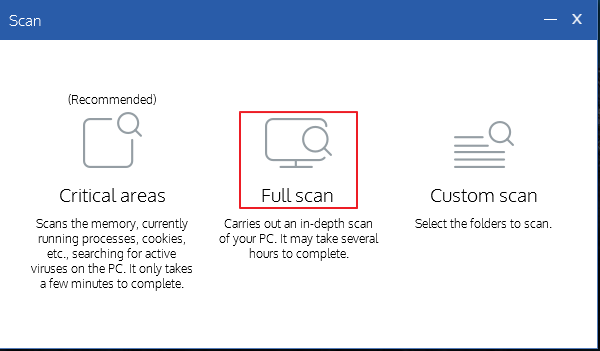
- Wait for the anti-virus scan to complete.
Once the anti-virus scan is completed, run the program that gave “msvcr120.dll is missing” error. If you still encounter the error while launching the program, move to the next solution.
Solution Five – Run SFC scan
One of the possibility is some system files are corrupt which is causing the “msvcr120.dll is missing” error. One simple solution to fix the problem with system files is running the SFC tool. SFC stands for System File Checker.
SFC is a command-line tool integrated into the Windows operating system. When you run the SFC tool, it scans system files for corruption and also detects any missing files. It then replaces missing and corrupt files with good cached file versions.
You can run SFC only through elevated command prompt that is a command prompt with admin rights. Here are the steps to run an SFC scan.
- Click Start
- Type cmd in the search box. Windows 10 users can type cmd in Cortana search box
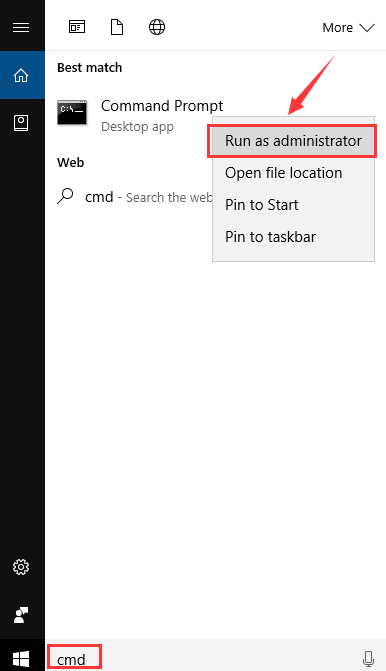
- Right-click cmd from the list of search results and click Run as administrator
- In the command prompt window, type sfc /scannow and press Enter on keyword
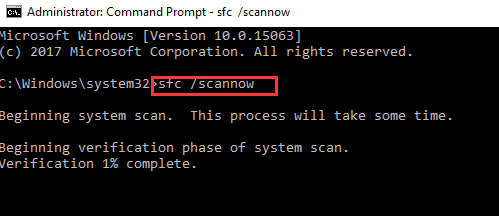
- The SFC scan process can take some time to complete. Wait for the command operation to complete and then close command prompt window
Now try to run the program that gave out “msvcr120.dll is missing” error. In most case, the “msvcr120.dll is missing” error should be resolved by now.

Leave a Reply