Unwanted programs are more than a nuisance. They pose a huge security risk and can hog your computer resources. Viruses, rootkits, and malware are just a few programs that can compromise system security by accessing and stealing data and transmitting it. While not all unwanted applications are a security risk, they can perform a number of undesirable actions to disrupt your computer’s performance. Some of the common undesirable actions unwanted applications can perform include:
- Automatically installing themselves
- Displaying unwanted and unneeded pop-ups on your screen
- Displaying messages requesting payments for programs which do not improve your computer’s security or performance or both in any meaningful way
Thankfully, Windows Defender—an antivirus software component of Microsoft Windows—helps you keep your computer free from unneeded applications and programs. In this post, we’ll show you how you can optimize Windows Defender and keep unwanted applications away.
Blocking Unwanted Programs Using Windows Defender
A signature-based anti-malware system, Windows Defender helps you defend your computer against unwanted applications and programs like viruses, malware, potentially unwanted applications (PUAs). Windows Defender includes a browser control, firewall, device driver protection, virus protection, and folder protection. It is important that you keep it turned on all the times.
How to Turn Virus and Threat Protection On
Computer viruses can infiltrate unprotected systems, installing unwanted programs for executing malicious code. To keep your system protected, ensure that Windows Defender Antivirus in not turned off. Verifying the status of virus protection offered by Windows Defender is very easy. Here’s what you need to do:
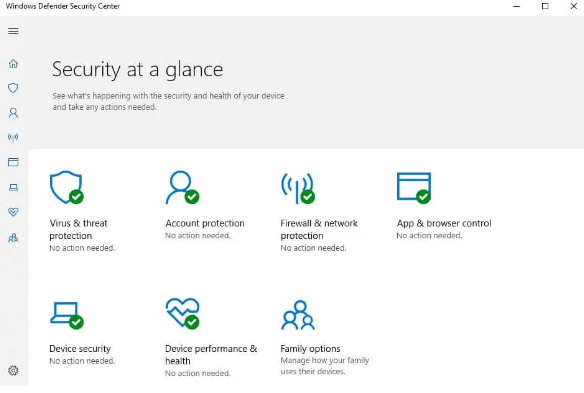
- Click Start, type Windows Defender, and then click Windows Defender or Windows Defender Security Center
- Click Virus and threat protection
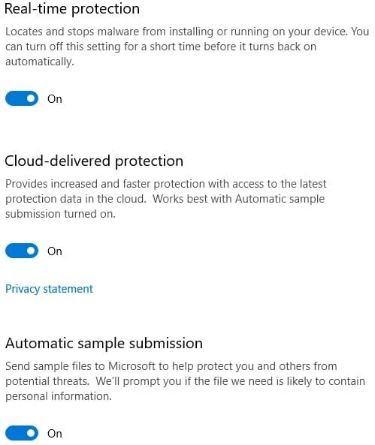
- In case the protection settings are turned off, turn on the following three settings: Real-time protection, Cloud-delivered protection, and Automatic sample submission
Turn on the Firewall Protection
Once you have checked whether Virus and threat protection settings are turned on or not, it’s time to look at the Firewall settings. When the Firewall is turned on, Windows Defender refuses connections with illegitimate sources, thereby protecting your system from unwanted programs.
Turning the Firewall on is easy, as the following steps show:
- Launch Windows Defender
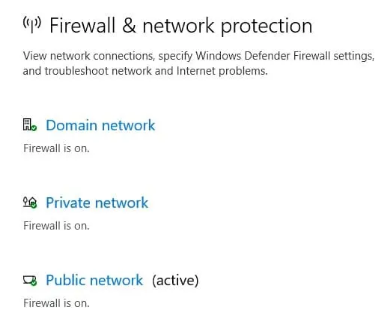
- Click Firewall and network protection
- Make sure the following features are turned on: Domain network, Public network, and Private network
Turn Browser Control On
The Browser Control feature of Windows Defender does two things. First, it warns you against unrecognized browser apps. Secondly, it blocks unwanted apps that try to install themselves automatically.
Here’s how you can check whether Browser Control is turned on or not:
- Open Windows Defender
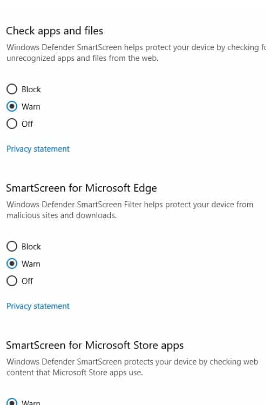
- Click App and Browser Control
- Make sure these features are either set to Warn or Block: SmartScreen for Microsoft Store apps, SmartScreen for Microsoft Edge, Check apps and files
Windows Defender Makes Protecting Folders Easy
Another great feature of Windows Defender is that it ensures that unwanted programs won’t be able to make changes to your files. If you want to protect your files, make sure the Controlled folder access is turned on. Here’s how to do so:
- Open Windows Defender
- Click Virus and threat protection
- Browse to Ransomware protection
- Turn Controlled folder access On

- Select Protected folders and then do as the on-screen instructions tell you to make a folder protected

Windows Defender Can Even Protect Your Device Drivers
Outdated device drivers can be a potential security risk. Hackers can exploit the vulnerabilities in outdated drivers and breach your system. Windows Defender has two features—Secure Boot and Core Isolation—that keep your devices safe. Nonetheless, it would be a good idea to ensure your device drivers are up-to-date all the time, as this will minimize the risk and improve the overall performance of your computer.
First, let’s look at how you can enable Core Isolation and Secure Boot, and then we’ll discuss the best way to keep device drivers updated.
Enabling Core Isolation
Core Isolation isolates malware-infected computer processes from the system and devices. You can enable it by following these steps:
- Open Windows Defender
- Navigate to Device security
- Click Core Isolation Details

- Turn the settings On to protect specific processes from malware
Enabling Secure Boot
Rootkits, which can hide keyloggers which capture your keystrokes without your permission, are perhaps the most dangerous of all viruses. By hiding keyloggers, rootkits make it easier for cyber-criminals to steal sensitive information, such as your credit card details. Because rootkits start before Windows boots, they are effectively able to bypass logins.
Secure Boot, a key feature included in Windows Defender, helps protect your computer against these malicious programs. However, it can help only if you keep it turned on. To check whether Secure Boot is turned on or not, perform the following steps:
- Open Windows Defender
- Click Device Security
- Make sure Secure Boot is turned on

In the event of Secure Boot being turned off, you must change computer bios settings at start-up. Here’s how you can do that:
- Go to Start and search for Recovery Options
- Under the Advanced Startup section, click the Restart now button
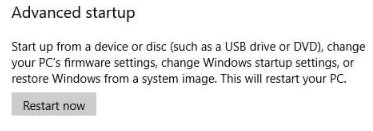
- Alternatively, you can access the BIOS menu by pressing F1, F12, or F2 (the exact key you need to press varies from manufacturer to manufacturer)
- Browse to Secure Boot and then enable it
How to run Windows Defender Scans
Once you turn on Windows Defender (and keep it on), it offers automatic, real-time protection. Moreover, it lets you scan and update whenever you want, thereby making is easy to keep the device up to date.
With Windows Defender, you can view the threat history and run quick scans from the same screen.
- Open Windows Defender
- Click Virus and threat protection
- Threat history will display various results, including unwanted programs presently running on your device, programs which were identified as threats but were granted permission to run, quarantined threats, and the time of last scan
- To run a quick scan, click scan now
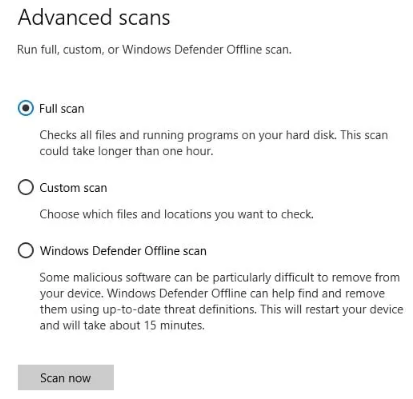
- If you want more options for running a scan, click Run a new advanced scan. You can choose from the following three options: Full (all the files will be scanned), Custom (lets you decide which files and folders you want to be scanned), and Windows Defender Offline (Windows Defender will run a scan without being connected to the net, but it will use the newest definitions)
It is Important to Update Windows Defender Definitions
Using the latest security updates is just as important as using the correct settings. While Windows Defender does its absolute best to ensure files and permissions are up to date, you can also manually check to see if they are current.
Here are the steps you need to perform:
- Open Windows Defender
- Click Virus and threat protection
- Click Virus and threat protection updates
- Click the Check for updates button to download new definitions
Windows Defender is Good, But Make Sure You Also Update Device Drivers!
Having a robust anti-malware system is vital to keep your computer and data safe. However, it’s no less important to regularly update device drivers since outdated device drivers can lead to various problems.
Which brings us to the all-important question: How to update device drivers?
There are two ways to do this. You can update device drivers either manually or automatically. Most people prefer the automatic method, since it’s quicker and requires little technical knowledge.
Always keep your Drivers up to date
Automatic driver update tools offer many benefits, the most important ones being:
- You can update device drivers automatically
- The software scans and updates all outdated or missing drivers at one go
- The tool picks the right drivers for your device and operating system, so you won’t have to worry about installing an incorrect driver by mistake
- Automatic driver updates are 100% safe
Driver Updater is one of the best driver update tools out there. Outbyte Driver Updater will give you access to a database of over 1 million drivers. It will regularly scan your PC, suggesting new driver versions to install. Driver Updater contains drivers for a variety of Windows devices. With just one click, you can update drivers in your system.
Step 1
Click here to Install and launch the app
Step 2
Scan all devices
Step 3
Install or update drivers automatically

Leave a Reply