Getting the Minecraft Launcher error 0x803f8001 when you try to open the launcher or install it?
Don’t worry. You’re not alone.
Many users have complained of receiving this error either when they try to open the Minecraft launcher or when they try to install it. This error can occur due to a number of reasons, but in most cases it is fairly easy to fix.
In this post, we’ll discuss 10 DIY fixes for Minecraft Launcher error. It would be best if you try theses fixes in the order they appear below.
Solution 1 – Ensure you’re logged into the appropriate Microsoft account
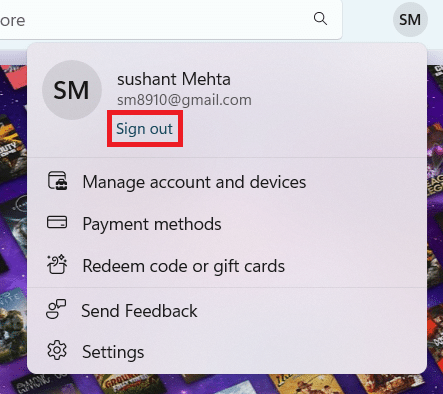
To begin, confirm that the Microsoft account you’re signed into is the same account used to purchase the Minecraft license. To check this, perform these steps:
- Type Microsoft Store in the Search bar in the taskbar
- Click the profile icon (next to the search bar) and check the account details

- In case you are logged into a different account, click Sign out and then sign in with the right Microsoft account
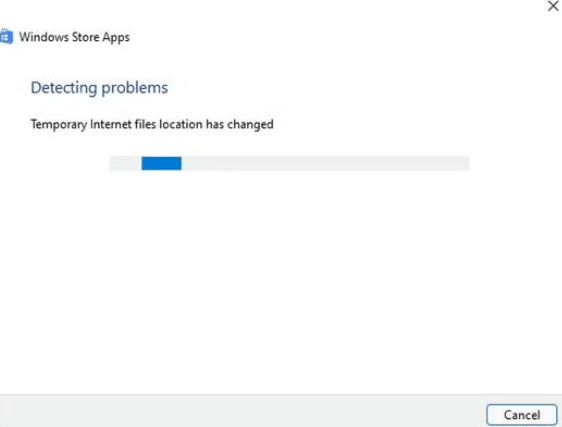
Solution 2 – Launch the Windows store apps troubleshooter
Some users said that the issue was resolved when they ran the Windows store apps troubleshooter, so it’s worth giving it a try. Here’s what you have to do:
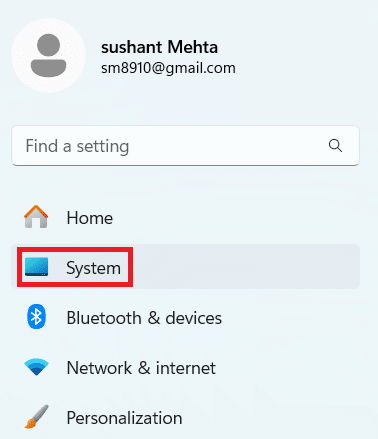
- Type settings in the search bar in the taskbar
- Click System (in the left pane)
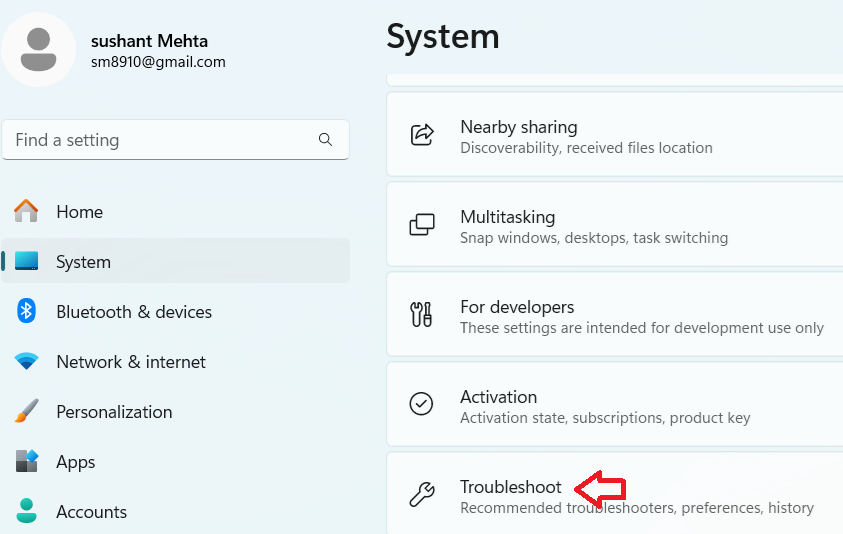
- Scroll down and click Troubleshoot
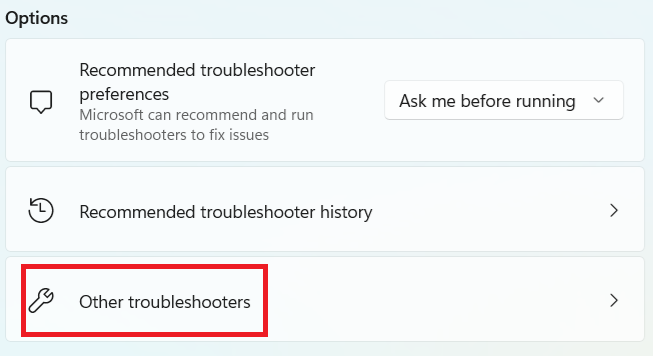
- In the next window, click Other troubleshooters in the Options field
- Scroll down until you see Windows Store Apps and click the Run button next to it
- The troubleshooter will run a scan and suggest resolutions if it finds any app issues. Apply those resolutions
Solution 3 – Reset Minecraft launcher and Microsoft store settings
There’s a Reset option in the Settings app. When you select this option for an app, that app’s data is erased. Since the Reset option can resolve issues with malfunctioning apps, resetting data for both the Minecraft launcher and Microsoft store is worth a try.
To reset the Microsoft app, perform these steps:
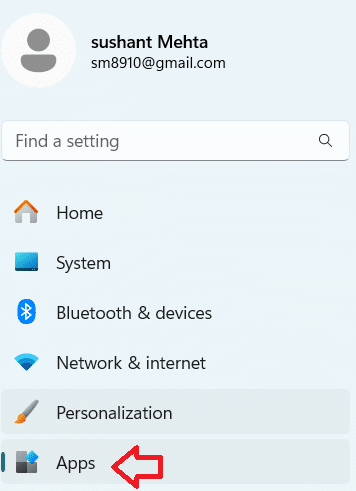
- Type settings in the Search bar in the taskbar
- In the Settings window, click Apps (in the left pane)
- Click Installed Apps
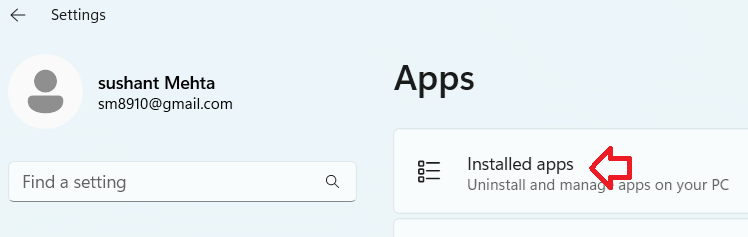
- Click the ellipsis icon (…) next to Microsoft Store and select Advanced options
- Click Reset. Click it again when Windows prompts you to confirm your action
| Pro Tip: You’ll also notice Repair option when you click the ellipsis icon next to Microsoft Store app. If resetting the app doesn’t work, try the Repair option. |
Now, repeat the steps given above for the Microsoft Launcher app as well and check if the error is fixed. If not, try the next solution.
Solution 4 – Make sure the Windows Date & Time is correct
Errors related to Microsoft Store often occurs when the Windows date and time settings are incorrect. This happens because once a game is launched, it remotely connects to the game servers. Incorrect date & time settings on your computer can cause miscommunication between the server and the host system, leading to the Error 0x803f8001.
The system date and time is usually displayed in the system tray in the taskbar.

If for some reason, system date and time are not displayed in the system tray, you can tweak the taskbar settings so that date and time are displayed. Here’s how you can do that:
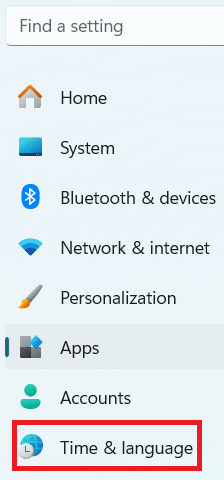
- Press Windows + I keys
- Click Time & language in the left pane
- Click Date & time in the right pane

- Toggle Show time and date in the System Tray on

Now that you know the system date and time, make sure it is correct. If it is not, correct it by performing these steps:
- Repeat the first three steps listed above
- Toggle Set time automatically off
- Adjust the system date and time
- Once you’ve done that, toggle Set time automatically on
- Restart your computer
Solution 5 – Reset Microsoft Store Cache
If the Microsoft Store cache is corrupt, you can encounter Error 0x8038f8001. The solution in this situation is pretty straightforward: reset the corrupted Microsoft Store cache. You can do that by performing these steps:
- Press Win + R keys
- Type wsreset.exe in the Run dialog box
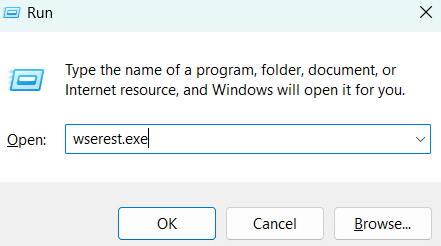
- Click the OK button
Solution 6 – Re-register Microsoft Store
Some users were able to resolve the Minecraft Launcher Error 0x8038f001 by re-registering Microsoft Store via an elevated Powershell. You can also do that by performing the steps listed below.
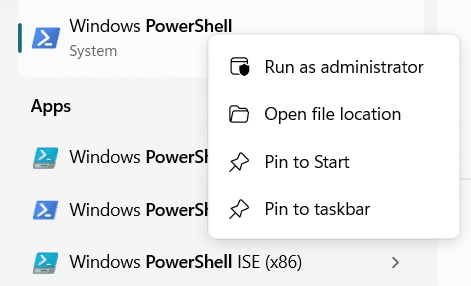
- Type powershell in the Search box in the taskbar
- Right-click Windows PowerShell in the search results and select Run as administrator
- Now, paste the following command into PowerShell and press Enter
Get-AppXPackage *WindowsStore* -AllUsers | Foreach {Add-AppxPackage -DisableDevelopmentMode -Register “$($_.InstallLocation)\AppXManifest.xml”} Get-AppXPackage -AllUsers -Name Microsoft.WindowsStore | Foreach {Add-AppxPackage -DisableDevelopmentMode -Register “$($_.InstallLocation)\AppXManifest.xml” -Verbose}
- Next, paste this command and press Enter
Get-AppXPackage -AllUsers -Name Microsoft.WindowsStore | Foreach {Add-AppxPackage -DisableDevelopmentMode -Register “$($_.InstallLocation)\AppXManifest.xml” -Verbose}
Wait for the command to run and then restart Windows. Now, check if the error is fixed. If not, try the next solution in the list.
Solution 8 – Reinstall Microsoft Store
If the Microsoft Store installation is corrupt, you can get the said error. To troubleshoot the issue, a reinstallation is required. Unlike most other apps, the Microsoft app cannot be uninstalled using the Settings menu.
In order to reinstall the app, run the following two commands into PowerShell. Here’s how to do that.
- Type powershell in the Search box in the taskbar
- Right-click Windows PowerShell in the search results and select Run as administrator
- Paste this command and press Enter
Get-AppxPackage -allusers *WindowsStore* | Remove-AppxPackage
- Restart Windows
- Open PowerShell and paste the following command into it and then hit Enter
Get-AppxPackage -allusers *WindowsStore* | Foreach {Add-AppxPackage -DisableDevelopmentMode -Register “$($_.InstallLocation)\AppXManifest.xml”}
- Restart Windows
Solution 9 – Reinstall Minecraft Launcher app
If the error still persists, try reinstalling the Minecraft Launcher app.
- Type settings in the Search bar in the taskbar and press Enter
- Click Apps in the left pane
- Click Installed Apps and locate Minecraft Launcher in the list of installed apps.
- Next, click the ellipsis icon (…) next to Minecraft Launcher and select Uninstall
- Wait for Windows to uninstall the app
- Restart Windows
- Open your web browser and go to this Microsoft Store webpage
- Click the Get button
- Next, click the Play option for this app in Microsoft Store
Solution 10 – Run SFC scan
The Minecraft Launcher Error 0x803f8001 can also arise due to corrupted system files. If nothing else has worked for you, we recommend you try running the System File Checker (SFC) scan, which scans system files for errors and repair them.
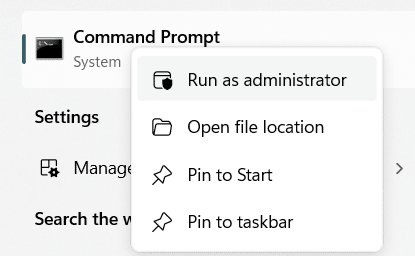
- Type command prompt in Search bar in the taskbar
- Right-click Command Prompt in the search results and select Run as administrator
- Type “sfc/scannow” in the Elevated Command Prompt and hit Enter
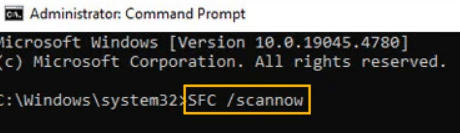
- Wait for the scan to complete and restart Windows
That’s it. Which of these methods worked for you?
Let us know if this guide has helped you by leaving a comment below and don’t forget to share it so others can benefit.
Before you wind up for the day, a final tip: Make sure your device drivers are up to date. That’s because outdated device drivers can not only slow down your computer but also cause frequent system crashes and errors.
If you’re wondering what’s the best way to update device drivers, our recommendation is to give Driver Updater a try. It is one of the most advanced driver update tool on the market.
Automatic driver update tools offer many benefits, the most important ones being:
- You can update device drivers automatically
- The software scans and updates all outdated or missing drivers at one go
- The tool picks the right drivers for your device and operating system, so you won’t have to worry about installing an incorrect driver by mistake
- Automatic driver updates are 100% safe
Driver Updater is one of the best driver update tools out there. Outbyte Driver Updater will give you access to a database of over 1 million drivers. It will regularly scan your PC, suggesting new driver versions to install. Driver Updater contains drivers for a variety of Windows devices. With just one click, you can update drivers in your system.
Step 1
Click here to Install and launch the app
Step 2
Scan all devices
Step 3
Install or update drivers automatically
Leave a Reply