Is your Windows 11 crawling along no faster than a snail? Tired of twiddling your thumbs as you wait for applications to load?
Don’t worry. We’ve got your back. This post shows how to speed up Windows 11 with just a few easy steps.
Step #1 – Turn off unnecessary startup programs
Startup programs launch automatically when your computer boots; hence the name. Some applications do need to start up when Windows loads, but if you check the list of startup programs on your PC, you’re very likely to find a few unnecessary ones. Disable them because too many startup programs can slow down a computer.
Here’s what to do:
- Press Windows + I keys to launch the Settings app
- Click Apps in the left-hand pane
- Click Startup in the right-hand pane
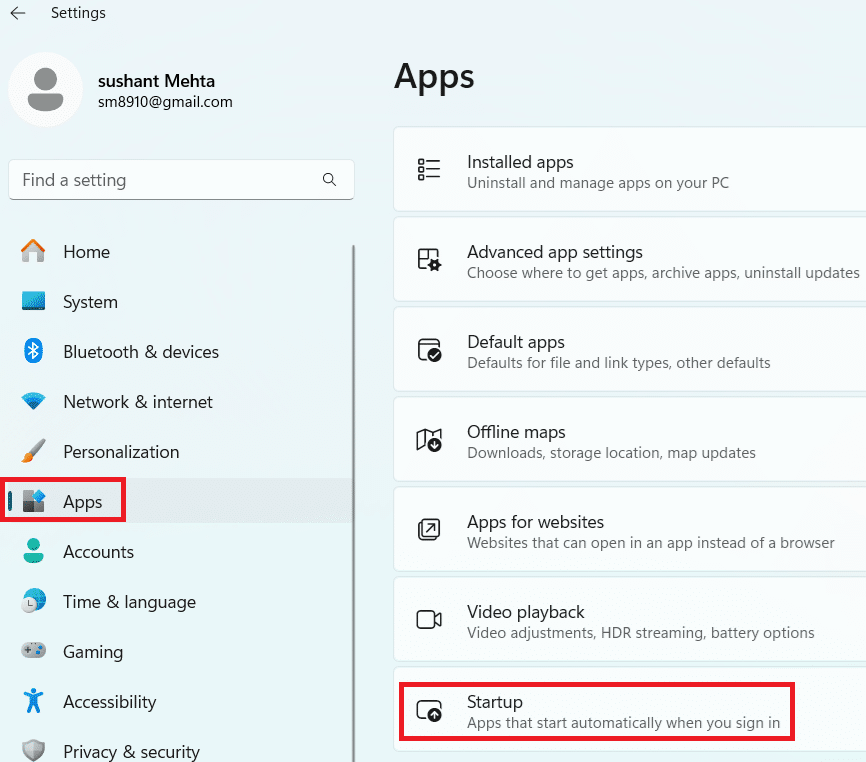
- In the right-hand pane, you’ll see the names of all programs that are configured to load automatically when Windows starts
- Go through the list and toggle off applications (to disable them) that don’t need to run in the background
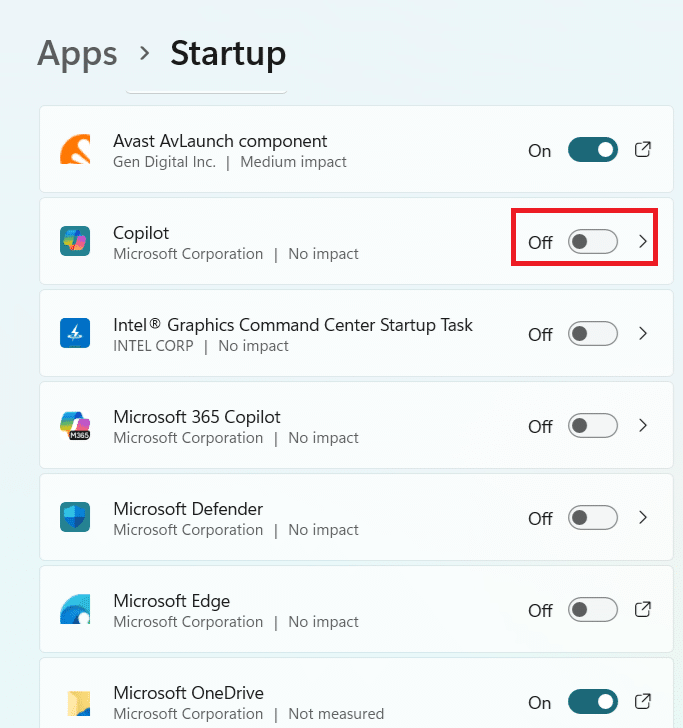
- Once you’re done, restart Windows and check whether everything is working smoothly (After restart, If you’re facing issues with a disabled app or program, you can enable it by toggling it on in the Startup window.)
| Note: Many apps such as Xbox, Microsoft Edge, Mobile devices, Skype, etc. can be safely disabled from starting automatically. |
Step#2 – Turn off unnecessary background services
Background services run in the background, providing important support for essential system features. They consume system resources such as memory, disk space, and CPU. While your system and software need some background services for smooth functioning, several Windows 11 services are unnecessary and therefore can be safely disabled. Example includes Certification Propagation, Platform Service, and Connected User Experiences.
To disable background services, follow these steps:
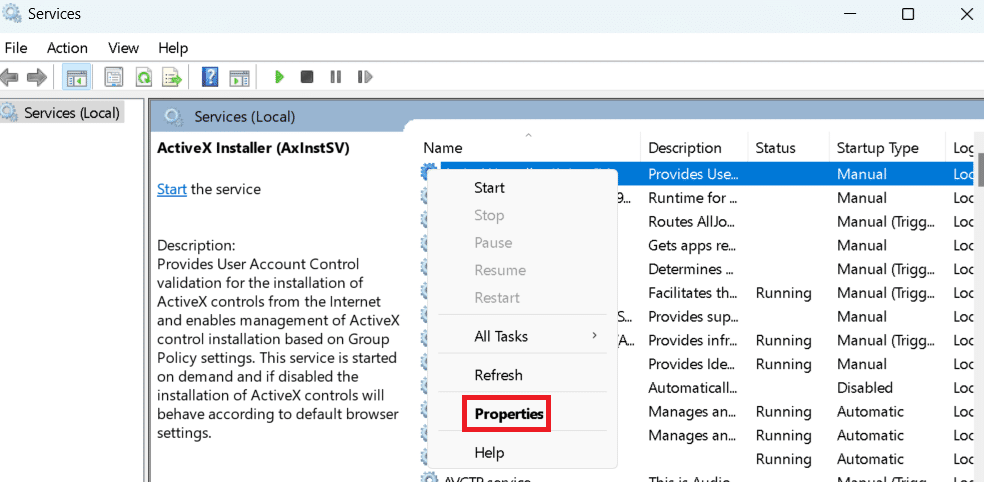
- Press Win + R keys to launch the Run command box
- Type services.msc and then hit Enter

- In the right-hand pane of the Services window, right-click each of the services mentioned above one-by-one, select Properties, and the select Disabled in the Startup type drop-down menu
- Click the Apply button and then OK to save the changes
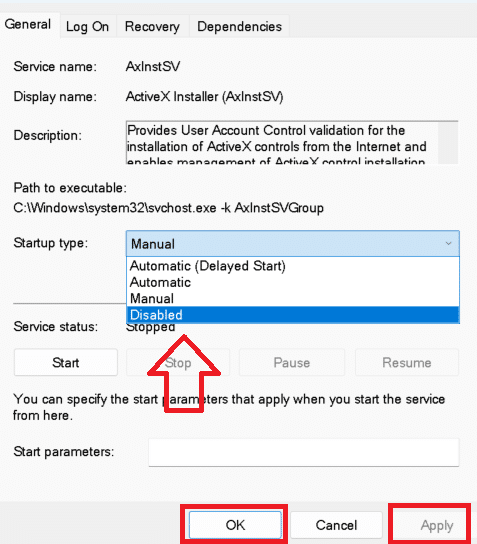
- Restart Windows
Step #3 – Remove Temporary Files
Removing temporary files can help speed up your computer. Here’s what to do:
- Press Win + R keys
- Type %temp% in the Run command box and hit Enter
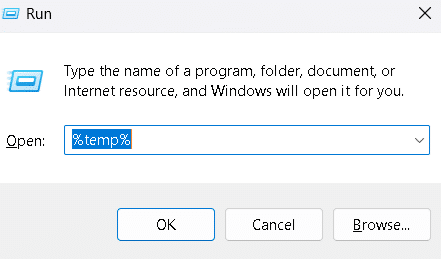
- You’ll see all temporary files on your system in the right-hand pane. Select them and click the delete button in the toolbar

- If the File-in-Use pop-up window comes up, just select Do this for all current items and then click the Skip button
Step #4 – Disable visual effects
Windows 11 includes several visual effects, like shadow effects and animation. While these visual effects look great, they consume a good amount of system resources and may slow down your computer. Consider disabling them to improve computer speed.
Here’s what to do:
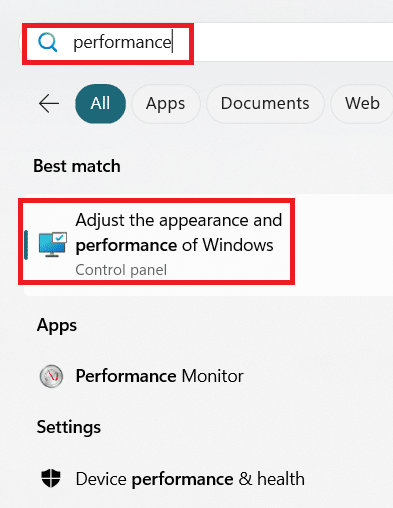
- Click the Windows icon in the taskbar, type performance in the search bar, and select Adjust the appearance and performance of Windows in the search results
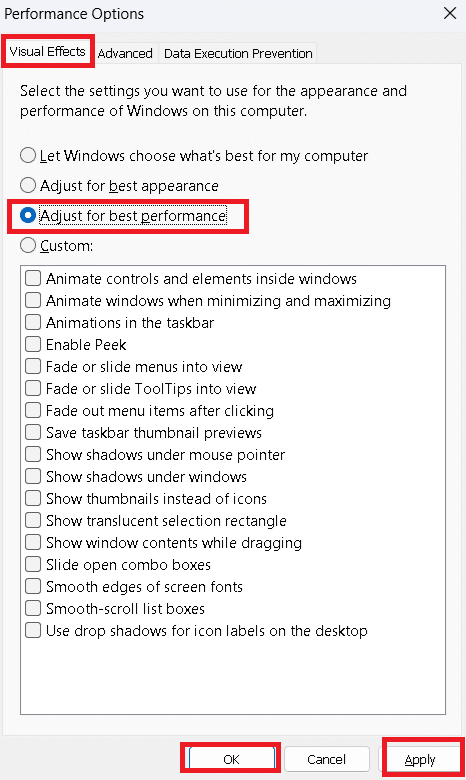
- Click the Visual Effects tab (if it’s not selected by default)
- Select Adjust for best performance
- Click Apply to save the changes and then click OK to close the Performance window
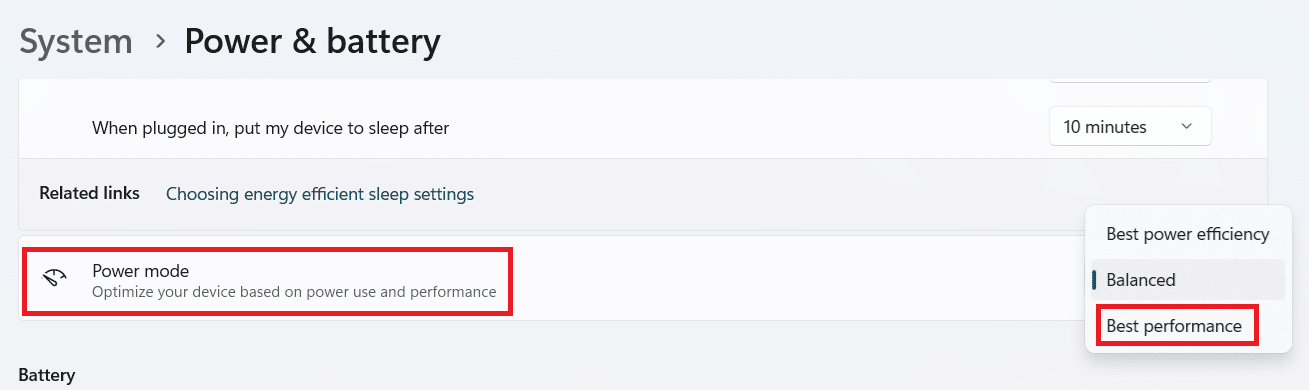
Step #5 – Select Best performance power plan
Changing the power plan to “Best performance” or “Balanced” can improve PC performance. But the trade-off is you will get much less time out of a battery charge.
To switch to Best performance power plan, perform these steps:
- Type settings in the Search box in the taskbar and hit Enter
- Click System in the left pane
- Click Power & battery in the right pane
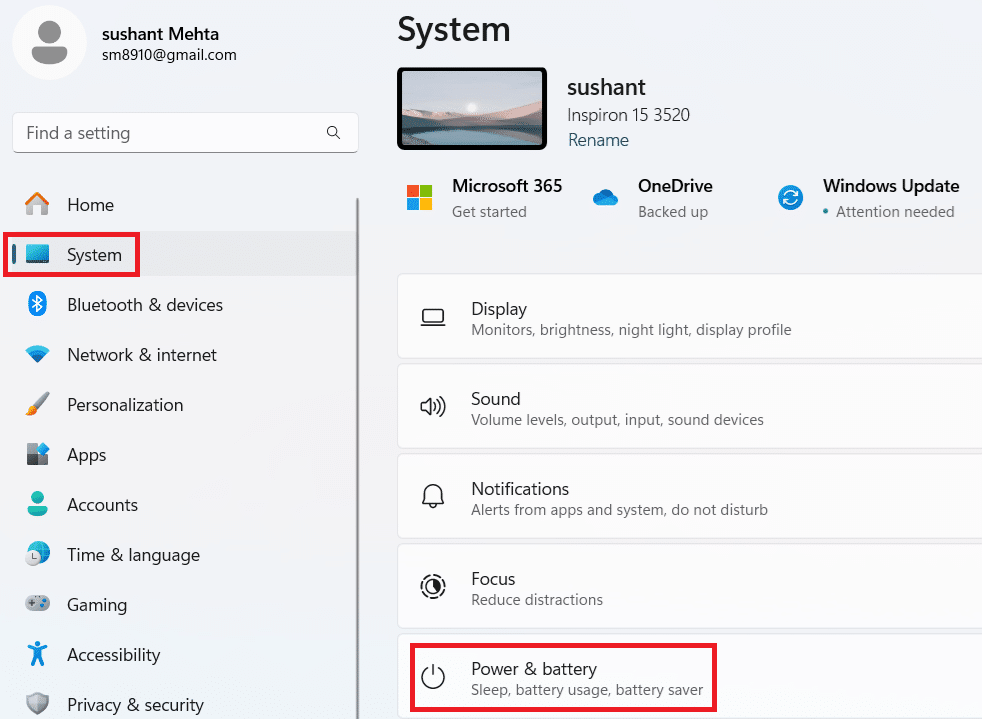
- Scroll down just a little and use the drop-down menu next to Power mode to change its setting to Best performance
Step #6 – Uninstall unused apps
Unused or infrequently used applications can consume valuable system resources. Removing them is a smart idea if your computer’s performance is less than optimal.
Here’s how you can remove unwanted programs:
- Type settings in the Search bar and hit Enter
- Click Apps in the left pane
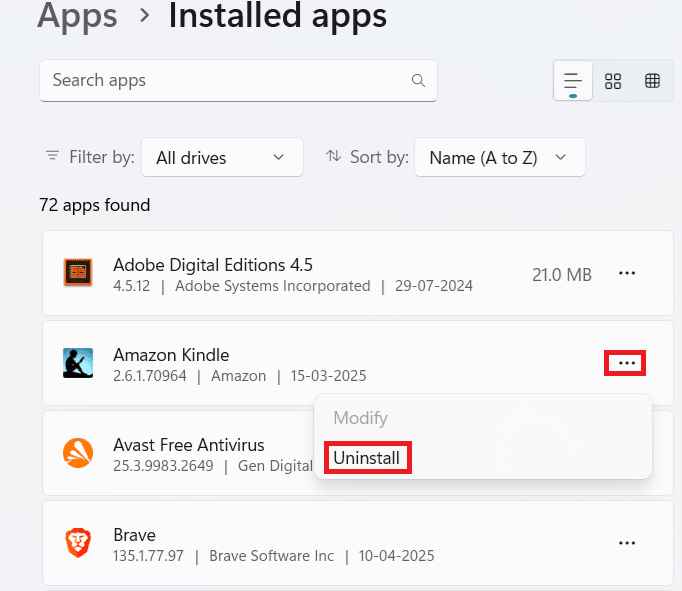
- Click Installed apps
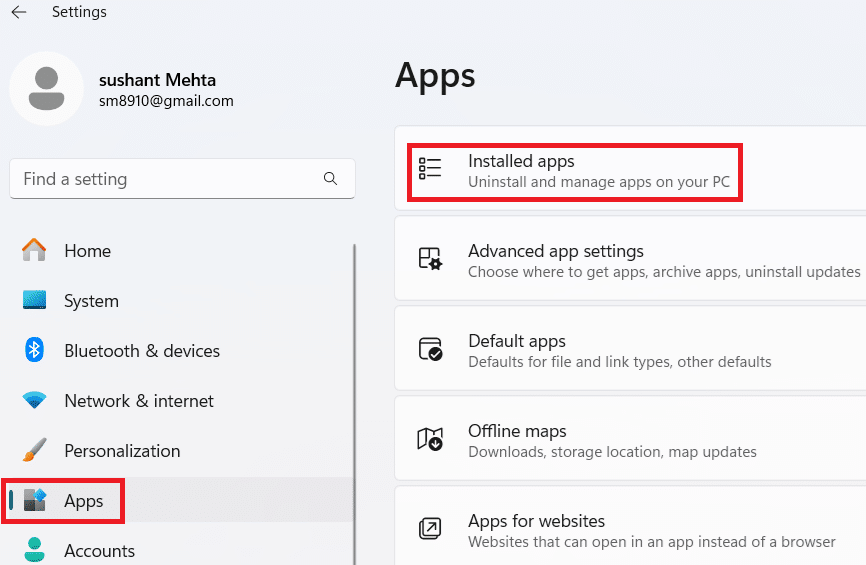
- Go through the list of installed apps and remove those you rarely use one-by-one by clicking the three-dot menu (…) next to them and selecting Uninstall
Step #7 – Turn off Automatic Defrag (For SSD disks only)
The default setting in Windows 11 is to defrag drives for optimizing performance. However, when it comes to SSD drives, defragmentation does little to improve performance. It may also shorten the disk’s lifespan. For this reason, we recommend to turn off disk’s defrag if you have as SSD drive.
Here’s what to do:
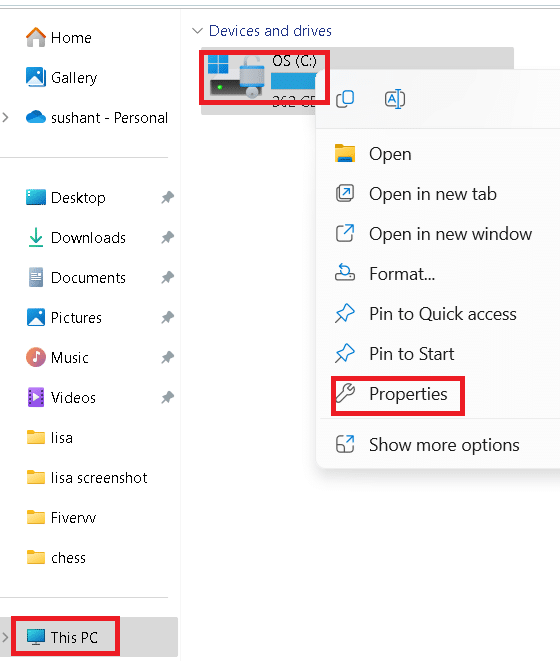
- Type file explorer in the Search box in the taskbar and hit Enter
- Click This PC in left pane
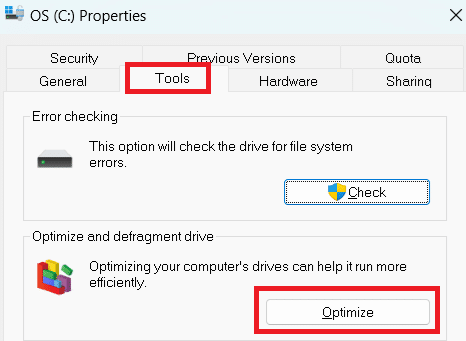
- Right-click Local Disk (C:) on the right and choose Properties
- Click the Tools tab and then click the Optimize button
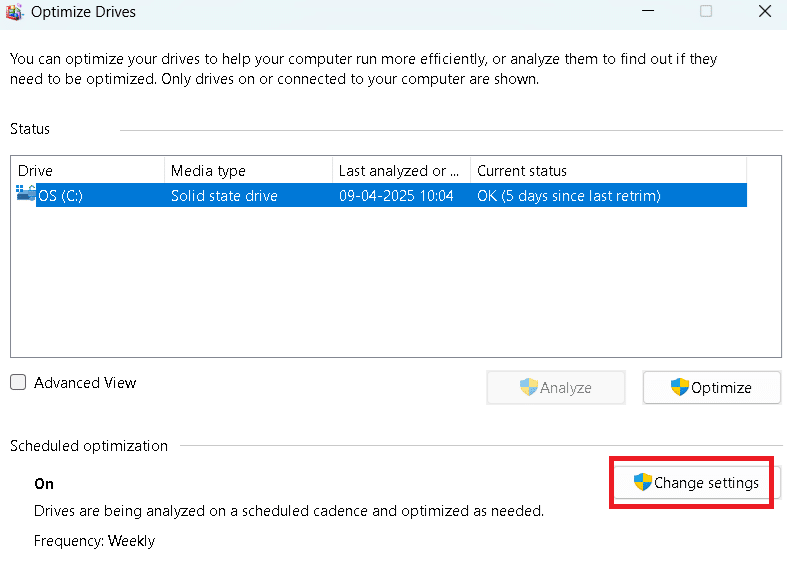
- Click Change settings in the next window
- Uncheck “Run on a schedule” option and then click the OK button
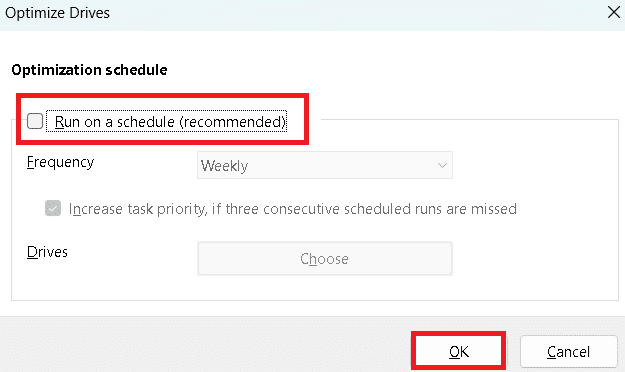
- Click Close
Step #8 – Run a virus scan
Malware can impact your PC’s performance, among other things. Run a deep virus scan on your computer to ensure there are no viruses, malware, or rootkits.
Step #9 – Update device drivers
Outdated device drivers can slow down you computer and trigger software-related errors. They also pose a security risk as they may contain unpatched vulnerabilities that can be used by hackers to access your computer. However, manually updating drivers is tedious, not to mention the risk of accidentally installing an incompatible driver that can complicate matters further. Therefore, we recommend using an advanced third-party tool such as Driver Updater.
Automatic driver update tools offer many benefits, the most important ones being:
- You can update device drivers automatically
- The software scans and updates all outdated or missing drivers at one go
- The tool picks the right drivers for your device and operating system, so you won’t have to worry about installing an incorrect driver by mistake
- Automatic driver updates are 100% safe
Driver Updater is one of the best driver update tools out there. Outbyte Driver Updater will give you access to a database of over 1 million drivers. It will regularly scan your PC, suggesting new driver versions to install. Driver Updater contains drivers for a variety of Windows devices. With just one click, you can update drivers in your system.
Step 1
Click here to Install and launch the app
Step 2
Scan all devices
Step 3
Install or update drivers automatically
Leave a Reply