We all have been there. One moment, your computer is running smoothly, and the next moment it comes to a screeching halt, with a blue screen staring at your face. This is what most Windows users call the dreaded blue screen of death. Many different errors (and issues) can trigger it, and one such error is the Amdkmdag.sys error.
“Amdkmdag.sys” error is usually related to faulty AMD graphics drivers, though it can also occur due to other reasons such as corrupt system files, faulty hardware, or software conflict.
In this post, we’ll show you different ways in which you can fix the issue. You don’t have to try out all the solutions listed here. We recommend you start with the first solution and then work your way down, until the issue is resolved.
What is Amdkmdag.sys Error?
As said before, the error is related to AMD graphics drivers. More often than not, faulty graphics drivers trigger it, but other causes cannot be ruled out. Missing or damaged system files, buggy applications, or faulty hardware can all trigger the amdkmdag.sys error, which belongs to the category of Windows errors that are unofficially known as “blue screen of death (BSOD)” errors.
When the amdkmdag.sys error occurs, your computer may experience issues such as:
- screen flickering
- system freezing
- frequent crashes
- bootloop
Some common error messages that may flash on your screen are:
- Code 31
- Bad object Header
- Video_TDR_Failure
- 0xc000021a
- Code 0XC00000E5
- Exception on invalid Stack
When does an Amdkmdag.sys error occur?
You’re most likely to face the error while playing video games, launching a third-party application, watching YouTube videos, or Windows loads at the startup.
How to troubleshoot Amdkmdag.sys error?
Solution 1 – Run SFC scan
SFC, or system file checker, is a built-in Windows utility that allows you to scan for missing, corrupt, or damaged system files and repair them. Because Amdkmdag.sys error is often related to a driver-related system file, starting with an SFC scan makes sense.
Here’s what you need to do:
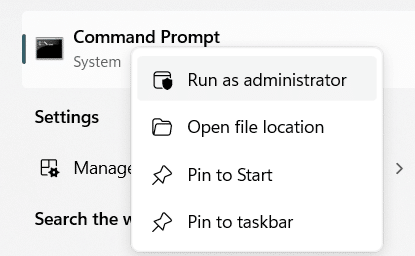
- Type command prompt in the search bar and then right-click Command Prompt in the search results and select Run as administrator
![]()
- Type the following command and press Enter: DISM /Online /Cleanup-Image /CheckHealth
- Now type this command and press Enter: DISM /Online /Cleanup-Image /RestoreHealth
- Wait for the command to run
- Now type the following command and press Enter: sfc/scannow

- The scan may take anywhere between a few minutes to an hour, depending on the health of your hard drive
- Check the scan results and then close the Command Prompt window
- Restart Windows and check if the error is fixed
Solution 2 – Rollback Driver
According to technical internet forums, some versions of AMD Radeon Adrenalin driver versions are guilty of triggering BSOD. These include 23.4.1, 23.2.2, and 23.2.1.
If you’re using any of these driver versions, rolling back the driver to a previous version, like 20.4.2, 22.5.1, 22.11.2, 20.5.1, or a similar version is worth trying.
To find out the AMD driver version, perform these steps:
- Type device manager in the search bar in the taskbar and hit Enter
- In the Device Manager window, locate and expand Display adapters
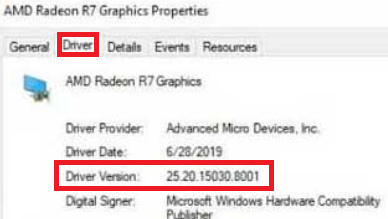
- Right-click AMD Radeon device and select Properties

- Click the Driver tab
- Check the driver version
To roll back your AMD driver to a previous version, perform these steps:
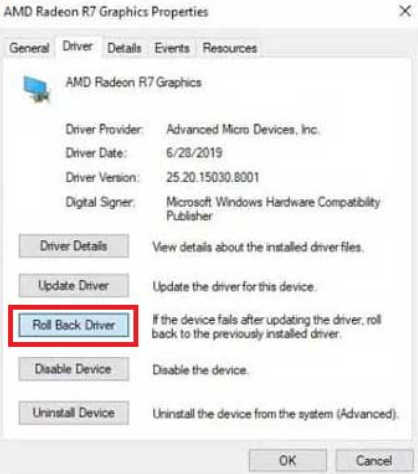
- Open Device Manager and expand Display adapters
- Right-click the AMD graphic card and select Properties
- Click Roll Back driver
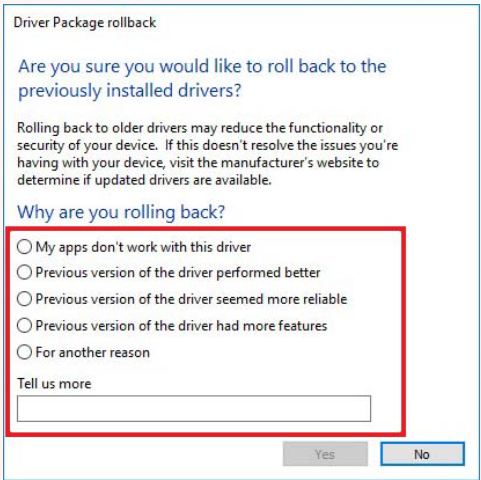
- Select the appropriate reason for rolling back to an earlier version and click the Yes button
- Once the roll back is complete, restart Windows, and check if the error is fixed
Solution 3 – Update your AMD graphics driver
Some users said updating the graphics driver worked for them. Since updating a driver is fairly easy, especially when you use a third-party tool, there’s no harm in trying this solution.
The easiest way to update AMD graphics driver (or any other device driver for that matter) is by using a reliable driver update tool. We recommend you use Driver Updater. It is fast, accurate, and 100% reliable. With just a few mouse clicks, it will update the AMD graphics and other device drivers. More information about the software and a download link is shared at the end of the post.
If you don’t want to take the automatic route, you can update the graphics driver on your own. There are two ways to do this. One, you can update the driver via Device Manager. Two, you can directly download the latest driver from the manufacturer website and install it.
To update AMD graphics driver via Device Manager, perform these steps:
- Type device manager in the search bar and hit Enter
- Expand Display adapters section
- Right-click your AMD graphics card and select Update driver

- Select the first option in the list: Search automatically for drivers

- Windows will search the system for the best available driver version and install it (if it is not already installed)
Solution 4 – Perform a clean boot
When you do a clean boot, Windows loads only with core system components. All non-essential startup applications and programs are disabled. This “minimalistic” startup mode helps you:
- Check if an error persists when Windows boots with the bare minimum applications and programs
- Pinpoint if a specific background service or program is causing the issue by isolating potential conflicts
To perform a clean boot, complete these steps:
- Type msconfig in the search bar in the taskbar and hit Enter
- In the System Configuration dialog box, click the Services tab
- Select Hide all Microsoft services (on the bottom left-side corner)
- Now click Disable all (on the bottom right-side corner) and then click the Apply button

- Next, click the Startup tab
- Click Open Task Manager

- Right-click all Enabled services and apps one by one and then select Disable

- Close the Task Manager window
- Click the OK button in the System Configuration window
- Restart Windows
If the error didn’t appear after restart, enable the services you had disabled one by one and restart the computer after enabling each service. The will allow you to locate the app or program that is causing the issue. Once you’ve identified the culprit, uninstall it to fix Amdkmdag.sys error once and for all.
Solution 5 – Remove problematic program or application
If Amdkmdag.sys error started appearing after a recent installation, uninstall that app or program and see if that fixes the issue.
To uninstall an app or program, follow these steps:
- Type settings in the search bar in the taskbar and hit Enter
- Click Apps > Installed apps
- Click the ellipsis icon (…) next to the problematic app and select Uninstall
- If Windows prompt you to confirm your action, click Yes and continue with the uninstallation process
Solution 6 – Check for faulty hardware
Windows come with built-in utilities that allow you to test your RAM and hard drive. For testing the RAM, Windows Memory Diagnostic tool can prove handy. Whereas, CHKDSK suffices for identifying and repairing hard drive issues.
Perform these steps to test the RAM with Windows Memory Diagnostic:
- Type windows memory diagnostic in the search bar in the taskbar and hit Enter
- Click the first option: Restart now and check for problems (recommended)

- Windows will start the diagnostic process upon restart

- Let the scan process complete. This could take upwards of 20-30 minutes, depending on your RAM configuration
- Once the test is complete, Windows will continue to start and a pop-up window may appear with the test results
- If the pop-up window doesn’t appear, then you can view the scan results in the Event Viewer
- Type event viewer in the search bar and press Enter
- Expand Windows Logs and then click System in the left-side pane
- Now select the latest log with MemoryDiagnostics-Results as the source
If no errors are listed, this means there’s no issue with the RAM. If an error is listed, cleaning the memory and its slots (compressed air is the best option) may do the trick. If it doesn’t, consider replacing the RAM.
To run CHKDSK command, perform these steps:
Note: We recommend you to back up your data before running CHKDSK.
- Type command prompt in the search bar in the taskbar and hit Enter
- Right-click Command Prompt in the search results and select Run as administrator
- Type the following command and hit Enter: chkdsk /f /r D:
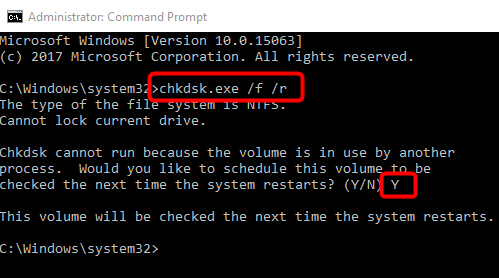
- Wait for the scan to complete. Windows will automatically repair any hard drive issues it finds
- Exit Command Prompt after the scan is complete and restart Windows
- Check if the error is fixed
Solution 7 – Perform system restore
If none of the above-mentioned solutions worked for you, perform System Restore in Windows Recovery Environment.
Here’s what you need to do:
- Press the power button to turn off the system
- Reboot Windows. When the Windows logo or your device’s brand logo appears, turn the system off
- Repeat the first two steps three times to access Windows Recovery Environment (RE)
- Once you’re in the Recovery Environment, click Advanced options > Troubleshoot

- Click System Restore

- Click Next and then select a restore point
- Click Scan for affected programs. Windows will list all the programs that will be affected during the system restore process

- Once you’ve reviewed this information, click Close and then click Next
- Click the Finish button
- When the system restore process completes, restart Windows and check if the error is fixed
We hope one of these solutions work for you. Leave us a comment below if you need additional help and share the post so that others can benefit from it.
Before we sign off for the day, a gentle reminder: Keeping your device drivers up-to-date is crucial. This is because outdated drivers can cause various errors and issues, including Amdkmdag.sys.
Driver Updater updates your AMD graphics and other device drivers with just a few mouse clicks, thereby improving system performance and minimizing potential errors.
Automatic driver update tools offer many benefits, the most important ones being:
- You can update device drivers automatically
- The software scans and updates all outdated or missing drivers at one go
- The tool picks the right drivers for your device and operating system, so you won’t have to worry about installing an incorrect driver by mistake
- Automatic driver updates are 100% safe
Driver Updater is one of the best driver update tools out there. Outbyte Driver Updater will give you access to a database of over 1 million drivers. It will regularly scan your PC, suggesting new driver versions to install. Driver Updater contains drivers for a variety of Windows devices. With just one click, you can update drivers in your system.
Step 1
Click here to Install and launch the app
Step 2
Scan all devices
Step 3
Install or update drivers automatically
Leave a Reply