If you’re like most people, you might be using your computer for multiple activities, such as:
- Doing office work or school work
- Online shopping
- Entertainment and video streaming
- Banking
- Email and social media
- Gaming
According to a research, an average person spends close to 3 hours working on a computer or browsing the internet on a computer. Given that we use computers so often, shouldn’t we clean it more frequently?
If you find yourself wondering how often you should clean your computer, this post is just for you. We have put together this guide to help you find out about everything you need to know about cleaning your computer.
How Frequently Should We Clean our Computer?

There’s more to cleaning your PC than wiping the dust off your keyboard. Your keyboard is not the only hardware device that can collect dust. Many other peripheral devices and internal devices are prone to collecting dust, and if they are not cleaned on a regular basis, they can stop working properly or even become a fire hazard.
Here’s the list of parts of your computer that can collect dust and as such should be cleaned regularly:
- Motherboard
- Hard drives
- Fans and filters
- Graphics/video card
- Heat sinks
How to Clean Your Computer Efficiently and Quickly
When it comes to cleaning a computer, nothing works better than a can of compressed air. With it, you can get rid of dirt and dust out of crevices that are hard to reach.
How to clean a keyboard

It may be no great surprise that your keyboard can get dirty really quickly. There are a number of things that can get under the keys. Over time, this build up under your keyboard can damage the keys.
Here are some things that can collect under the keys:
- Body oils
- Dust
- Germs
- Crumbs
- Spills
It is now possible to buy keyboards that are dishwasher safe. In case you have such a keyboard, simply toss it to give it a thorough clean (of course, you must follow the manufacturer instructions).
But what if your keyboard is not dishwasher safe?
If so, you must clean it manually, which is not that difficult, but spills of tea, coffee, or other liquids might prove to be an exception.
Things you need:
- Microfiber cloth
- Compressed air
- Cotton swabs
- Isopropyl alcohol
If you are dealing with spills, it would be a good idea to keep a thin blade or a slotted screwdriver (small) handy. You may need them for removing key caps.
Tips for cleaning the keyboard
First things first, unplug your keyboard. If you have a wireless keyboard or are using a laptop, turn the device off.
Now, turning your keyboard upside down, give it a few shakes. Laptop users should shake gently. A few shakes will remove any crumbs or larger particles under the keys.
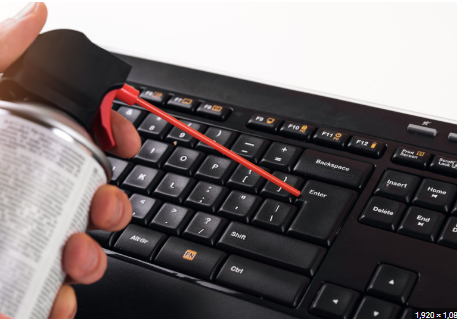
For stubborn debris, using the compressed air can blow the air between the keys. Don’t forget to spray from multiple angles and make sure the nozzle is at least half an inch from the keys.
After thoroughly spraying the keys, shake the keyboard a few times once again.
In case you still see contaminants like dust, use a small brush to clean the keyboard.
Handling considerable build-ups of dirt on the keyboard
In case the keys have a substantial build-up which needs a much forceful cleaning, consider using cotton swabs that have been dampened with isopropyl alcohol for cleaning around and beneath the each key.
Cleaning a mechanical keyboard
In case you have a mechanical keyboard, you can deep clean it by following the steps shared below:
- Remove the key caps gently. You can do so by prying each cap gently using a thin blade or a tiny screwdriver. (Note: Don’t forget to take your keyboard’s picture first. You can refer it to make sure you insert each key in the right place)
- Soak the keys in a mixture made of water and dish soap or any other mild detergent.
- Next, wipe the keys using a clean cloth and let them dry out.
- Once the keys have dried out completely, push them gently back into their place.
How to handle liquid spills on your keyboard
If unfortunately you have spilled something on your laptop’s keyboard, immediately turn the system off. This will help avoid or minimize electronic damage.
Next, remove the laptop’s battery (if possible) and turn the device upside-down. This will help drain out the spilled liquid. You can use a hair dryer to dry the keyboard thoroughly. Alternately, you can let the laptop sit idle until it dries out on its own. Using a cotton bud dab the keys to remove any liquid that may still be there and then restart the laptop.
How to clean LCD screen of your computer
When it comes to cleaning LCD screens, there are a few special considerations that you should keep in mind. Compared to glass monitors, LCD screens offer much better resolutions, but they require special care while cleaning.
Do not ever use an abrasive cloth or a paper towel to clean an LCD screen. Ammonia-based solutions and alcohol are also a big no-no.
Now that you know what you shouldn’t do, let’s see the right way to clean an LCD screen:
- Turn off the laptop or desktop
- Unplug the monitor from the desktop (if you are using a desktop)
- Take a soft cloth, make sure it perfectly clean, and then gently wipe the screen from top to bottom and side to side (Avoid swirling or circular motions)
If your LCD screen has fingerprints or smudges, we recommend using only a microfiber cloth.
If you are dealing with more stubborn grime, mix liquid soap with a light detergent and then dampen the microfiber cloth lightly and gently wipe the screen with it. Once the screen has thoroughly dried, restart the laptop or monitor.
Tips for keeping your computer healthy
Your computer is no different from other electronic devices in the sense that it generates heat when running. In order to cool the various components and boost their longevity, most systems have an in-built fan. However, as the fan pulls the air into the system to cool things down, dust, animal hair, human hair, and other particles enter the system. Over time these elements build up and can prevent your computer from running efficiently. That’s why you must regularly clean your computer to keep it in good condition.
How to deep clean your computer
Deep cleaning your computer is not especially difficult. Here’s what you need to do:
- Turn off your computer and unplug it
- Disconnect various peripherals such as keyboards and monitors
- Open your computer’s case
- Using a can of compressed air, remove the dust collected on the internal components, including the fans
- Make sure you clean the internal components in an area that’s pretty well-ventilated. You might stir up a considerable amount of dust, so you don’t want to do deep cleaning in an enclosed space
- Once you have cleaned the internal components using a can of compressed air, take a soft brush or some cotton balls and remove dust from the surfaces of the fans, graphic cards, CPU, and the computer case. These parts usually get contaminated the most and it is a good idea to give them a thorough cleaning
- When cleaning the fan blades, keep them stationary by inserting a small screw driver or pencil while you brush off the dust
- Using the can of compressed air, also clean the RAM slots, the area around the CPU, the space around the heat sinks, and other parts. Refrain from using a standard vacuum cleaner to clean the inside of a computer. That’s because the plastic nozzle on a standard vacuum cleaner can build up static, which can severely damage your computer.
- After you have cleaned the internal components, close the computer’s case, plug it in, connect the various peripherals, and power on the system.
How often Should I Clean my PC?
Cleaning the computer regularly helps prolong its life. Most experts recommend giving your PC a deep clean once every 3 to 6 months.
Driver Maintenance is Crucial As Well
It’s not just the internal components and peripheral devices that require regular maintenance. Your device drivers also require some maintenance.
Keeping your device drivers up-to-date helps your computer function at its optimal level and boosts security. Latest drivers also allow you to fully leverage your hardware devices.
While it is possible to update drivers manually, there’s a much simpler and faster way. We recommend using a driver update tool.
Automatic driver update tools offer many benefits, the most important ones being:
- You can update device drivers automatically
- The software scans and updates all outdated or missing drivers at one go
- The tool picks the right drivers for your device and operating system, so you won’t have to worry about installing an incorrect driver by mistake
- Automatic driver updates are 100% safe
Driver Updater is one of the best driver update tools out there. Outbyte Driver Updater will give you access to a database of over 1 million drivers. It will regularly scan your PC, suggesting new driver versions to install. Driver Updater contains drivers for a variety of Windows devices. With just one click, you can update drivers in your system.
Step 1
Click here to Install and launch the app
Step 2
Scan all devices
Step 3
Install or update drivers automatically

Leave a Reply