“Headphone not working” is a common issue faced by Windows 10 users. So what happens here is that you might find that after upgrading to Windows 10, your computer refuses to detect the headphones or it might detect the headphones but no sound comes from it.
While an irritating problem, it is nothing to lose sleep over. You can fix it yourself without breaking a sweat—and we’ll show you how.
In this post, we have provided four solutions that could get your headphones working again. You don’t have to try all solutions to fix the issue. For some users, the Solution One worked while some benefited from other solutions.
The best approach is to start with the first solution and if it does not work, try the next solution and so on, till your headphone starts working.
Solution One – Set headphone as the default device
Your computer has several sound/audio output devices installed and your headphone is one of them. In many cases, the speakers are set as the default device for sound/audio output. When you plug in the headphone, the Windows operating system should automatically switch to headphone and make it a default device.
Due to some problem, the switching does not happen. As a result, you cannot hear sound from the headphone.
The solution to this problem is to manually adjust the headphone as default device. Here are the steps to do this.
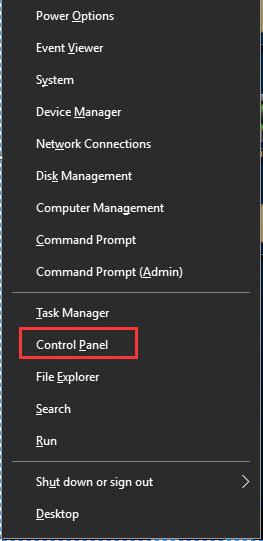
- Press Windows logo key and X simultaneously on the keyboard
- From the menu, click Control Panel
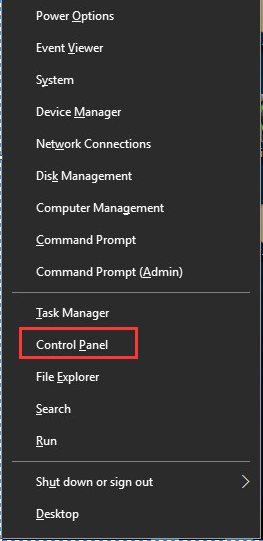
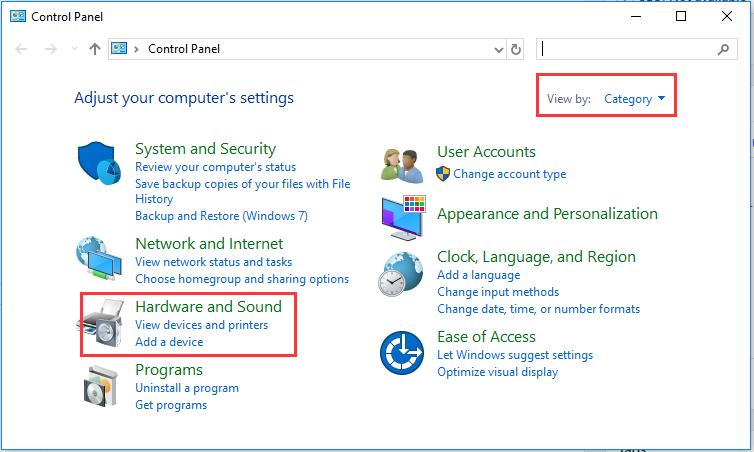
- In the Control Panel window, set the view by Category and click Hardware and Sound
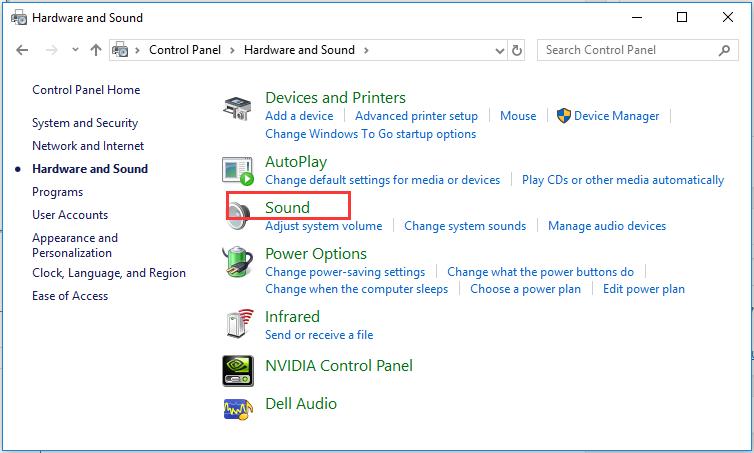
- In the Hardware and Sound window, click Sound
- In the Sound properties window, click Headphones and then click Set Default
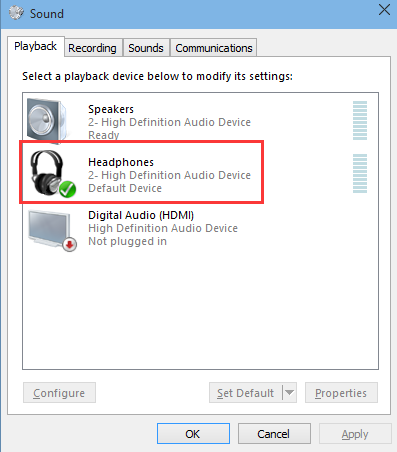
- Note: you may also get the combined option- Speakers/Headphones. In that case, you need to click Speakers/Headphones and then click Set Default
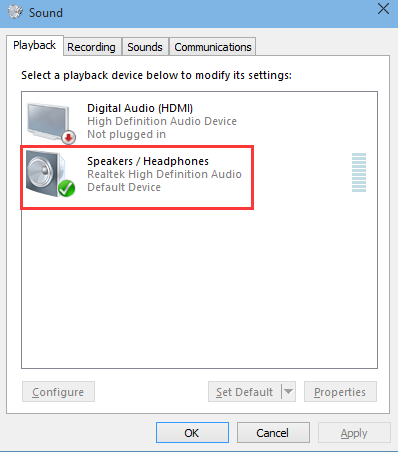
- Click OK
- Play a song on your Windows 10 PC and check whether you are able to hear sound from headphones. If you find headphones are not working, try the next
Solution Two – Update Audio Drivers
Outdated audio drivers can prevent your system from detecting your headphone. Many users were able to resolve the issue by updating their audio drivers.
You can update drivers manually, but the best way to go about doing this is by using a driver update tool.
Automatic driver update tools offer many benefits, the most important ones being:
- You can update device drivers automatically
- The software scans and updates all outdated or missing drivers at one go
- The tool picks the right drivers for your device and operating system, so you won’t have to worry about installing an incorrect driver by mistake
- Automatic driver updates are 100% safe
Driver Updater is one of the best driver update tools out there. Outbyte Driver Updater will give you access to a database of over 1 million drivers. It will regularly scan your PC, suggesting new driver versions to install. Driver Updater contains drivers for a variety of Windows devices. With just one click, you can update drivers in your system.
Step 1
Click here to Install and launch the app
Step 2
Scan all devices
Step 3
Install or update drivers automatically
Solution Three – Modify some settings in Realtek HD Audio Manager
There is a possibility the headphones are not properly configured in Realtek HD Audio Manager and hence your headphones are not working. To resolve this issue, you need to modify some settings in Realtek HD Audio Manager. Here are the steps to follow.
- Go to System tray and look for Realtek icon(Red speaker) and click on it to open the Realtek HD Audio Manager interface
- In the Realtek HD Audio Manager window, click the small folder icon(yellow colored) in the upper-right corner
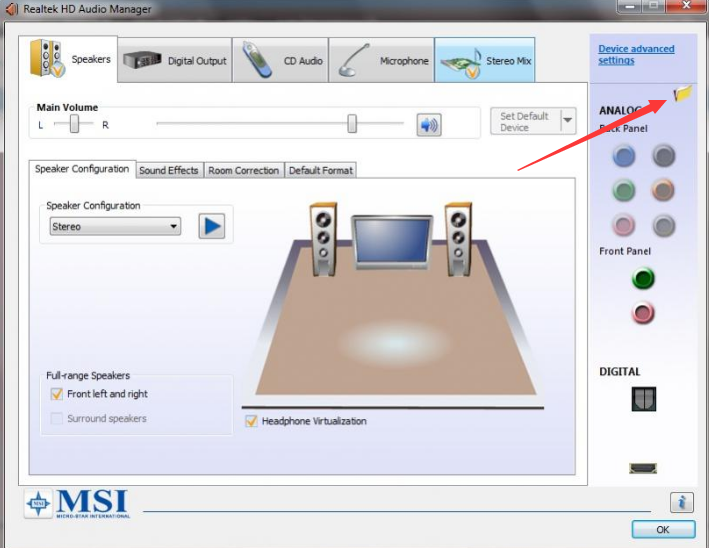
- Check the box next to Disable front panel jack detection

- Click OK
Check whether headphones are working now. If your headphones are still not working, move to the next solution.
Solution Four – Uninstall the IDT audio device
Note- You should perform these troubleshooting steps only if your computer has IDT device installed.
- Press Windows logo key and X simultaneously on the keyboard to bring up Win X menu
- Click Control Panel from the list
- In the Control Panel window, set the view by Large icons
- click Programs and Features
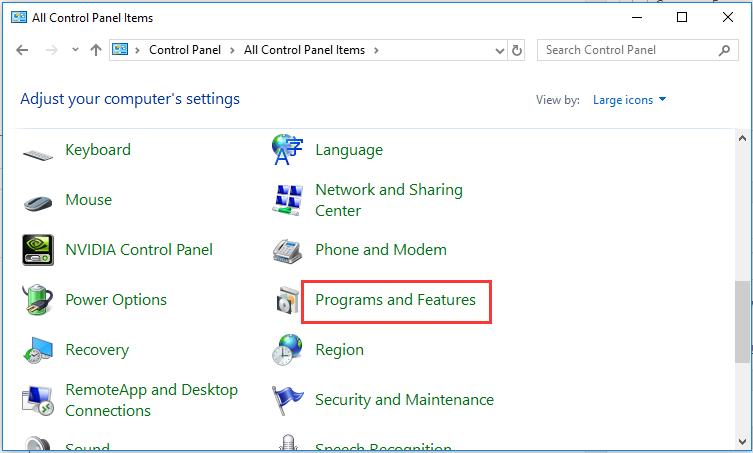
- select IDT Software and Driver from the list and click Uninstall
- Restart your computer and see if the headphones are working.
In most cases, the headphones not working problem should be resolved by now.

Leave a Reply