Do you get “no signal” issue when you try to connect a monitor or TV to your desktop PC through HDMI ports?

If so, stop worrying. This is a common issue encountered by many users at least once, and thankfully it is also relatively easy to solve.
When you get the “no signal” message, it means your monitor or TV is unable to receive any input from the source.
In this article, we’ve discussed several solutions for this problem. You can try them one-by-one until the problem is resolved.
Switch Input Source
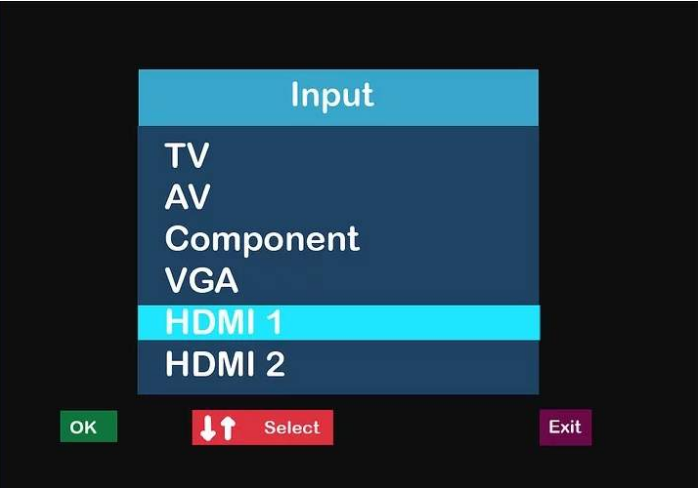
The first thing you should do upon receiving the error is switch input source. Press the Source or Input button on the remote to switch input source to HDMI port. In case of multiple HDMI ports, make sure you pick the right one.

Update Graphic and Chipset Drivers
If the graphics drivers and chipset drivers are faulty, this error can arise. Update your device drivers and check if the issue resolves.
You can update your device drivers in two ways—manually and automatically.
Updating drivers manually is a bit tedious. Also you require a certain degree of technical knowledge for this purpose. In case you lack time or technical knowledge, we suggest you go for the second option, that is, updating drivers automatically.
Here we’ve discussed both options. Have a look.
Updating Drivers Manually
Here are the steps you need to update your graphics drivers
- Click the Windows icon in the taskbar and then type ‘run’ in the start search box and press Enter
- Type “devmgmt.msc” in the run dialog box and press Enter to open the Device Manager window
- Double-click Display adapters, right-click the necessary device, and click Update Driver Software
- Now you’ll have two options in front of you: Search automatically for updated driver software and Browse my computer for driver software. Click the second option.
- Now click Let me pick…
- Select the suitable device driver from the options that display on your screen and click Next
- Windows will now update the driver. Once it does that, a confirmation message will pop-up on your screen. All that’s left to do is click the Close
- You’ll be prompted to restart Windows. Do so.
Update Drivers Automatically
A far easier way to update drivers is using an advanced driver update software tool.
Automatic driver update tools offer many benefits, the most important ones being:
- You can update device drivers automatically
- The software scans and updates all outdated or missing drivers at one go
- The tool picks the right drivers for your device and operating system, so you won’t have to worry about installing an incorrect driver by mistake
- Automatic driver updates are 100% safe
Driver Updater is one of the best driver update tools out there. Outbyte Driver Updater will give you access to a database of over 1 million drivers. It will regularly scan your PC, suggesting new driver versions to install. Driver Updater contains drivers for a variety of Windows devices. With just one click, you can update drivers in your system.
Step 1
Click here to Install and launch the app
Step 2
Scan all devices
Step 3
Install or update drivers automatically
Unplug Power Cable and Then Re-plug It
Unplug power cable of your monitor or TV for a couple of seconds and then re-plug it. This simple step has worked for many people, so it’s certainly worth a try.
Disconnect HDMI Sources One-by-one and then Reconnect them
So in this step all you need to do is disconnect every HDMI source in case you have multiple HDMI sources and then reconnect them. However, in case you only have a single HDMI source, ignore this solution and move on to the next one.
Here are the steps to follow.
- Unplug the monitor or TV from HDMI ports
- Next unplug power cable for approximately 10 minutes
- Now plug in power cable in your monitor or TV
- Next plug in one device to your PC’s HDMI port
- Turn the device on
- You need to repeat the last steps for every device and HDMI port
Factory Reset
This is the last resort. If nothing has worked, simply reset the monitor or TV to its factory settings.

Leave a Reply