Wi-Fi problems can be frustrating especially when the cause of the error is not clear. “Wi-Fi doesn’t have a valid configuration” is one of the most common errors faced by Windows users.
There can be several reasons behind this error, such as corrupt network drivers, the problem with Wi-Fi adapter, hardware problem related to Wi-Fi connection, virus, disabled windows services or any other factors.
If you are getting such an error, here are some quick troubleshooting solutions that can get rid of the “Wi-Fi doesn’t have a valid configuration” error and restore Wi-Fi connection to normalcy on your Windows 10 computer.
Note: You can also check this article on our blog. It deals with the same wi-fi problem but has different solutions.
Solution 1 –Set the IP address manually
If your home network is used by several computers and devices like smartphones, the DHCP server will assign a unique IP address to every connected device. You need to assign the IP address manually and see if it fixes the problem. Here are the troubleshooting steps you need to follow.
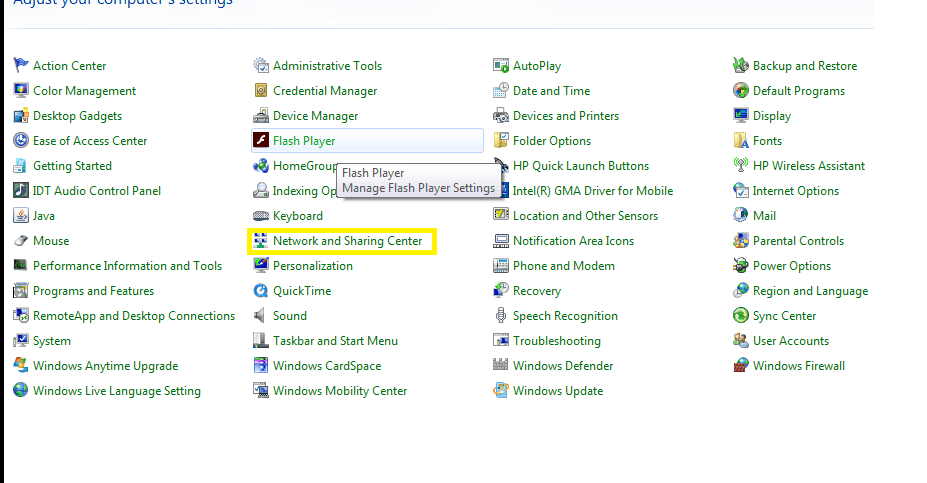
- Go to Desktop and type control panel in the search bar
- Select control panel from the results
- Change the Control Panel view to Small icons by clicking on drop-down list “view by”
- Select Network and Sharing Center
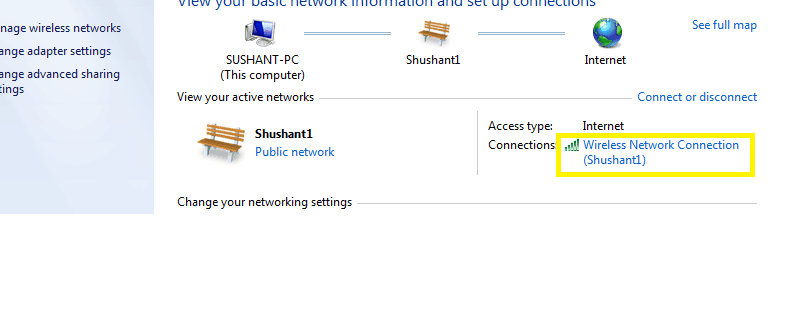
- Right-click on Wi-Fi connection( in my case TP-LINK_7388) and select Properties
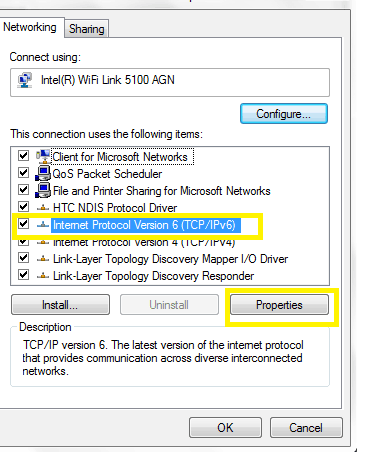
- In Wi-Fi properties window, select Internet Protocol Version 4 (TCP/IPv4) and then click Properties
- Select option – Use the following IP address
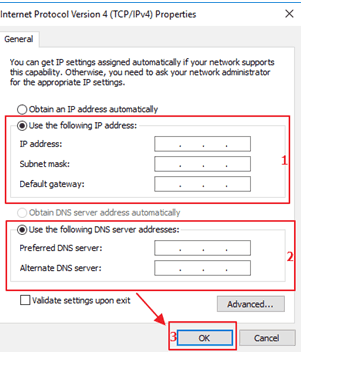
- In the IP address field – type 168.1.x (where x is any number between 2 and 254. If you are confused about the number, use 192.168.1.250)
- In the Subnet Mask field – type 255.255.0
- In the Gateway field – type 168.1.1
- In the same Wi-Fi properties window, select option – Use the following DNS server addresses
- In Preferred DNS server field – type 8.8.8
- In Alternate DNS server field – type 8.4.4
- Click OK
Note- the above given DNS Server IP addresses are Google Public DNS IP addresses. Generally, the DNS server IP addresses are automatically provided by your ISP. If you do not want to use Google Public DNS IP addresses, contact your ISP for DNS IP addresses.
Solution 2 – Remove Wi-Fi adapter driver
As mentioned at the start, one of the reasons behind “Wi-Fi doesn’t have a valid configuration” error can be corrupt Wi-Fi adapter drivers.
Uninstalling Wi-Fi adapter drivers and allowing Windows to install new drivers could resolve the issue. Here are the troubleshooting steps you need to follow.
- Go to Desktop and type device manager in the search bar
- Select device manager from the results
- Go to Network Adapters and expand the category
- Right-click on the wireless device and select Uninstall Device
- Look at the bottom corner for option – Delete the driver software for this device. Check the box beside the option
- Click Uninstall
- Reboot your computer
After the reboot, Windows will identify missing Wi-Fi drivers and install drivers from its driver’s database. If the problem is not resolved, you need to search for latest Wi-Fi drivers for your computer and install them manually.
Solution 3- Change Wireless SSID
Changing wireless SSID is one of the solutions to resolve the “Wi-Fi doesn’t have a valid configuration” error. However, to change your Wireless SSID, you need to connect your PC to the modem/router through Ethernet cable.
Once the Ethernet cable connection is established, access the router interface. We have given general steps to change Wireless SSID and password, but we suggest you to first check your router/modem manual to know exact steps to change the Wireless SSISD and password if you have the manual.
- Login to the router interface
- Go to Wireless Settings and look for Wireless Network Name or SSID field
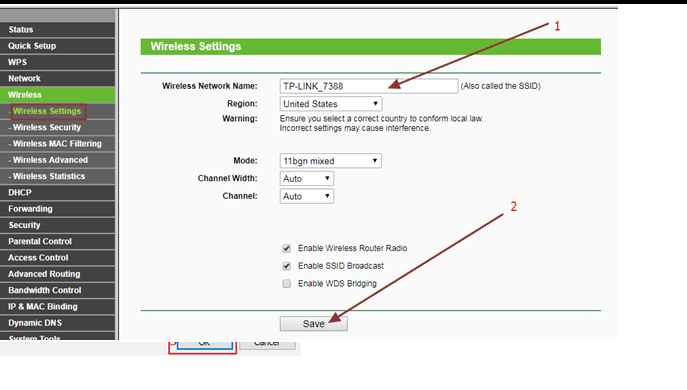
- Type desired name as SSID
- Click Save
- Go to Wireless Security and look for the Wireless password field
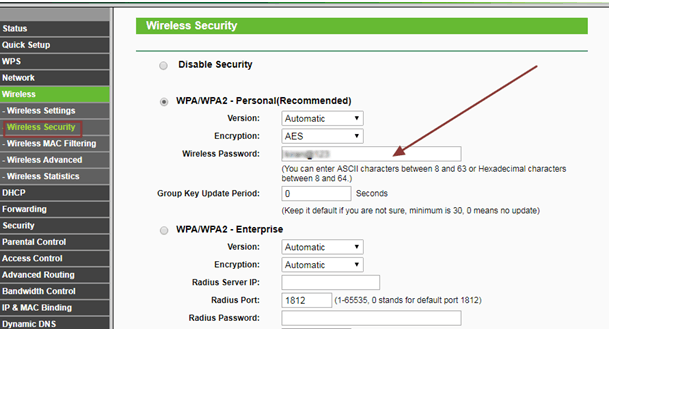
- Type desired password
- Click Save
Solution 4- Set the Channel width to Auto
The Channel width refers to how much radio bandwidth your router is using in the available spectrum. Routers generally use 2.4 GHz or 5GHz channel that use 20MHz wide channels and 40Mhz wide channels respectively.
Generally, the channel width is not a problem but if there other wireless devices in the area, it can cause interference that might cause problems. The 802.11n specification requires high throughput to very high throughput that are only available in wide channels above 20MHz.
Experts suggest Windows users to set the 802.11n Channel Width of 2.4GHz to auto that could resolve the issue. Here are the steps you need to follow.
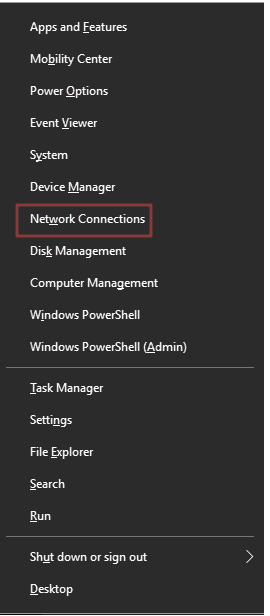
- Press Windows + X buttons simultaneously on your keyboard
- Select Network connections
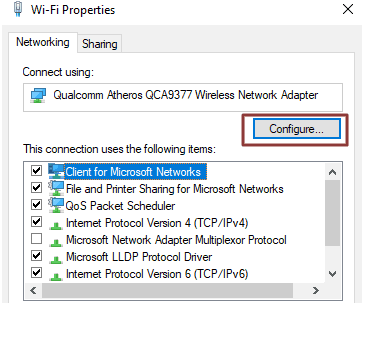
- In Network and Sharing Center window, right-click your wireless connection and select Properties
- Click Configure button
- Go to Advanced tab
- Under Property look for 802.11n Channel Width for 2.4 and select it
- Under the Value field, select Auto from the drop-down list
- Click OK
Solution 5 – Update WIFi drivers
Updating WiFi drivers manually can be difficult as details about hardware manufacturers are not readily available. You need to be an expert to dig into Device Manager to get that information. If you have not updated drivers manually, try using Driver Download software that can update all drivers automatically.
With Driver Downloader, there is no risk of downloading wrong drivers, nor are you required to spend hours to search for drivers. The software scans your system for outdated drivers and finds the latest driver versions and installs them on your computer. Here are the steps you need to follow.
Updating Drivers Automatically
Automatic driver update tools offer many benefits, the most important ones being:
- You can update device drivers automatically
- The software scans and updates all outdated or missing drivers at one go
- The tool picks the right drivers for your device and operating system, so you won’t have to worry about installing an incorrect driver by mistake
- Automatic driver updates are 100% safe
Driver Updater is one of the best driver update tools out there. Outbyte Driver Updater will give you access to a database of over 1 million drivers. It will regularly scan your PC, suggesting new driver versions to install. Driver Updater contains drivers for a variety of Windows devices. With just one click, you can update drivers in your system.
Step 1
Click here to Install and launch the app
Step 2
Scan all devices
Step 3
Install or update drivers automatically
Leave a Reply