One of the more common problems faced by Windows 10 users is old software not working with the new operating system. Many Epson printer users have reported that their old printer doesn’t work after upgrading to Windows 10. In this post, we will look at some common Epson printer problems in Windows 10 and the solutions to these problems
Epson Stylus Photo R200 doesn’t work after Windows 10 upgrade
One of the reasons the old Epson printer doesn’t work with Windows 10 is that the operating system tries to use old drivers and associated Epson packages from your previous installation.

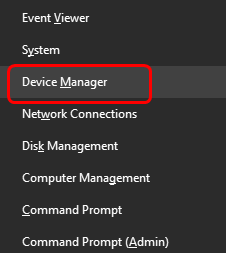
You need to uninstall the printer using the Add/Remove programs option. Also, remove any Epson related software package from your Windows 10 system. To be on safe side, check the Device Manager for any reference to Epson software by following the steps below:
- Go to Desktop
- Click on the Start Menu
- Type device manager in the Search Box
- Click Device Manager from the list of search results
- In the Device Manager window, click View > Show Hidden Devices
- Check for any Epson related entry and if found, delete it
- Disconnect the Epson Printer
- Reboot your PC
The basic objective behind these troubleshooting steps is to remove all obsolete Epson software from your Windows 10 system. According to Epson, they have not released any Windows 10 compatible driver for the Epson Stylus Photo R200. However, the printer works well with the native drivers in Windows 10. All you need to do is force Windows 10 to install the native driver instead of using the old driver. Follow the steps given below to install native drivers for Epson Stylus Photo R200.
- Restart the PC
- Connect the Epson Stylus Photo R200 to your PC through USB
- Switch on the printer
- Windows 10 will detect the new printer and install native drivers from its database
Windows 10 doesn’t install printer driver when I connect printer
If Windows 10 does not install the printer driver after connecting your printer, you have to manually add the printer by following the steps given below:
- Turn your printer on and ensure it is connected to Windows 10 system
- Go to Desktop and click Start Menu
- Click All apps and scroll down to the Windows system folder
- Click on the Windows System folder that reveals Control Panel
- Click Control Panel
- Select Hardware and Sound > Devices and Printers > Add a Printer
- If your printer model does not appear, select The printer that I want isn’t listed
- Click Add a local printer or network with manual settings > Next
- Follow the on-screen instructions to install the printer

Nate says
2021 update: still the same problem. Uninstalling all software gets to the point of the printer working – a different model, but still a multifunction. All options showing (unlike before) but the scanner still not working. The software launched hangs, so does trying to test communications. It’s ridiculous.