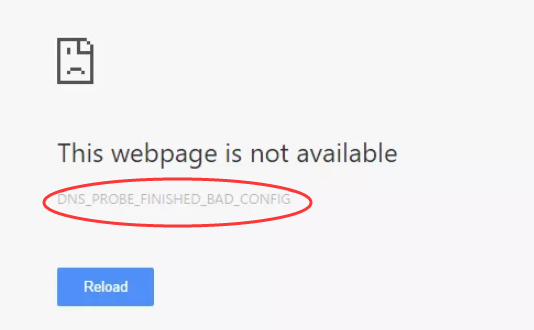
The DNS Probe finished bad config error is a common Internet-related error in Google Chrome. The error occurs when there is a problem with the default DNS server that is being used by your computer.
As you might know, the DNS server plays the important role of converting human-readable hostnames into machine-readable IP addresses. If the DNS server is not functioning properly, you cannot surf the Internet.
If you are getting DNS Probe finished bad config error, there is nothing to worry about as it can be easily fixed. We have provided some simple solutions which have helped many users resolve the DNS related error successfully. Let’s get started.
Solution One – Release & Renew IP Address
Windows stores the IP addresses of web servers that contain pages you recently viewed. If the IP address of the web server changes before Windows updates its DNS cache, you can no longer view the webpage or may not be able to access website too.
This can be one of the reasons behind DNS Probe finished bad config error. The simple solution to this problem is flush the DNS cache that will force the Windows operating system to rebuild its DNS cache. Here are the steps to follow.
- Press Windows logo key and R simultaneously on the keyboard to invoke run command console
- Type cmd in the run command box and click OK
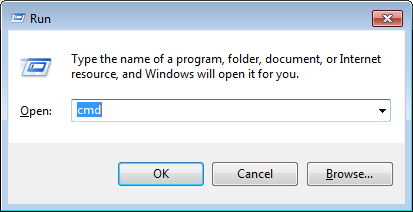
- In the command prompt window, type ipconfig /release and hit Enter on the keyboard
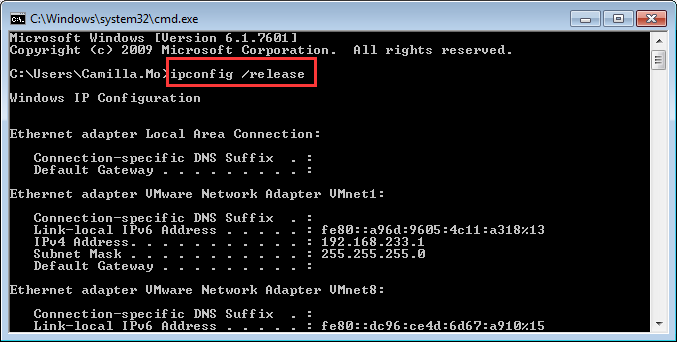
- Next type ipconfig /flushdns and press Enter on the keyboard
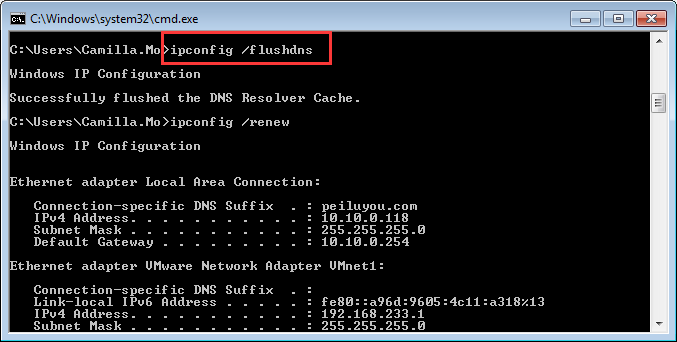
- Then type ipconfig /renew and press Enter on the keyboard
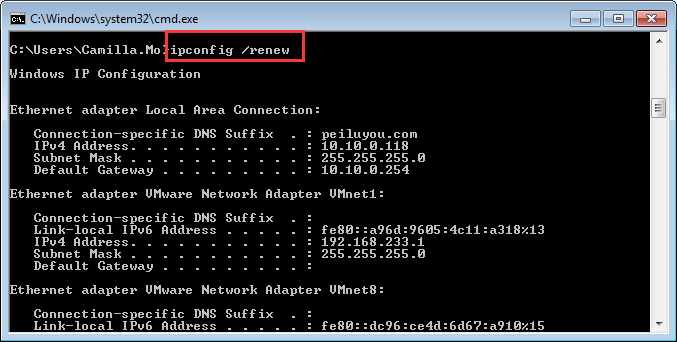
- After you have completed the above actions, close the command prompt window. Open Chrome browser and try accessing any website.
If you are still getting DNS Probe finished bad config error, try next solution
Solution Two – Change DNS Server Settings
When you connect to the Internet, your ISP provider assigns a DNS server to your computer. There is a possibility the DNS server of the ISP is experiencing some problems which is resulting in DNS Probe finished bad config error on your end. The simple solution to this problem is changing DNS server settings. Here are the steps to follow.
- Press Windows logo key and R simultaneously on the keyboard to bring up the Run command console
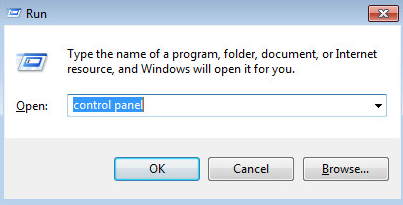
- Type control panel in the run command box and click OK
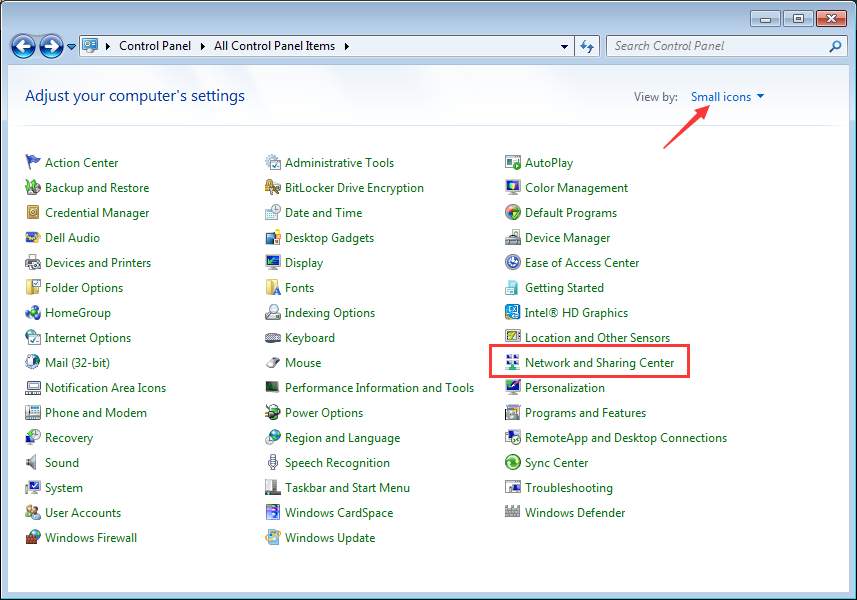
- In the Control Panel window, set the view – By small icons and click Network and Sharing Center
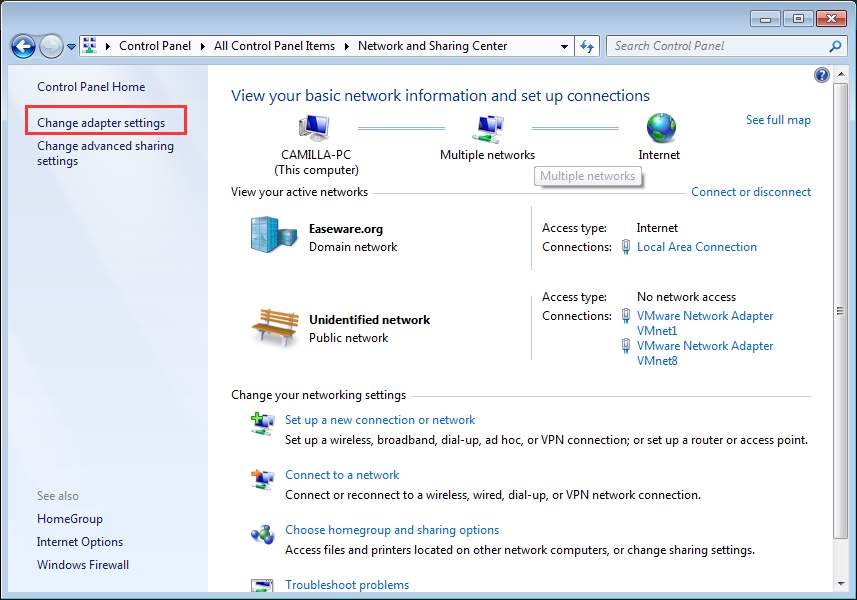
- In the next window, click Change adapter settings in the left pane
- Right-click on problem network( with Red X mark or yellow ! mark) and click Properties
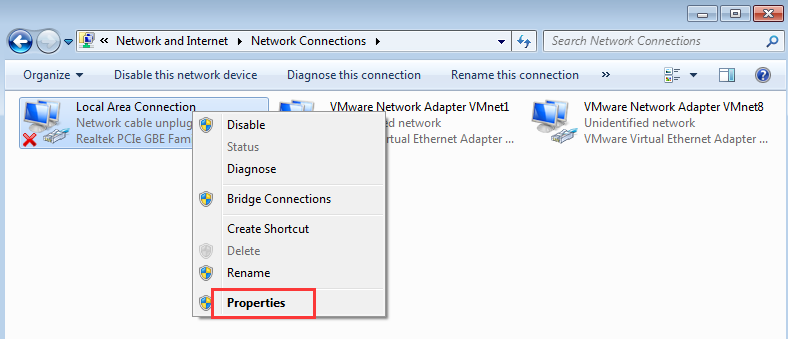
- In the Local Area connection properties window, go to Networking tab
- Highlight the Internet Protocol Version 4 (TCP/IPv4) and then click Properties
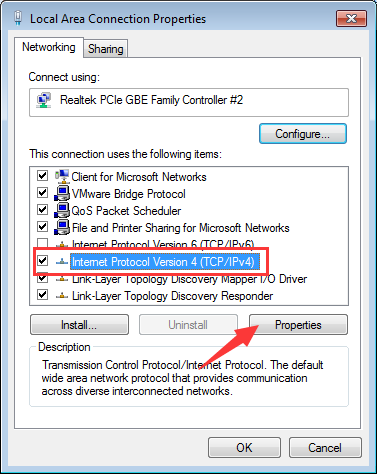
- In the next window, click Use the following DNS server addresses option and enter following DNS server addresses.
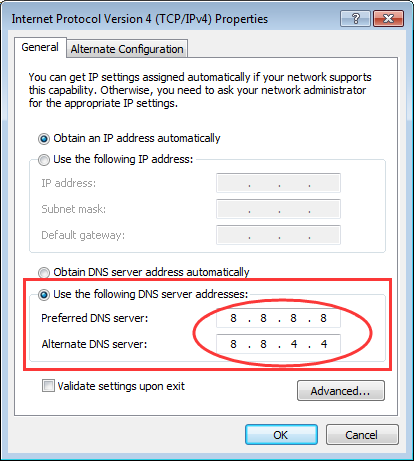
- Preferred DNS server: 8.8.8
- Alternate DNS Server: 8.4.4
(Note- these are Google public DNS server addresses)
- After you have entered the DNS server addresses, click OK
- Open chrome browser and try accessing any website. If you are still not able to access the Internet, you need to change the DNS server addresses again by following steps given above
- This time try the DNS server addresses given below
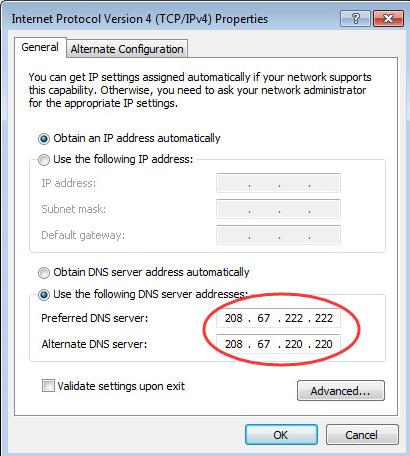
- Preferred DNS. server: 67.222.222
- Alternate DNS Server: 67.220.220
In most cases, the DNS Probe finished bad config error should be resolved. Don’t forget to mention which solution worked for you in the comments.

Leave a Reply